How to online migrate an instance from on-premise to Azure Managed Instance in the Cloud (Azure Database Migration Service)
- How can we connect Oracle Database to SQL Server using Oracle Gateway on Linux - 1 July 2024
- How do we automate the process of checking the integrity of databases in SQL Server without using a maintenance plan - 10 May 2024
- How can we connect Oracle Database to SQL Server using Oracle Gateway on Windows - 5 April 2024
In this article we will analyze the way we can do it online migration of a SQL Server Instance from on-premise in Azure Managed Instance. To be able to do it online, with near zero downtime we will use it Azure Database Migration Service in hybrid mode.

The process is done using an installed client worker service in Windows Server 2012 and later versions in collaboration with the Database Migration Service in Azure.
The example
It is a complex process so we should follow the steps very strictly.
First the process requires that we have created the Azure SQL Managed Instance. We can see how this is done in detail in this article.
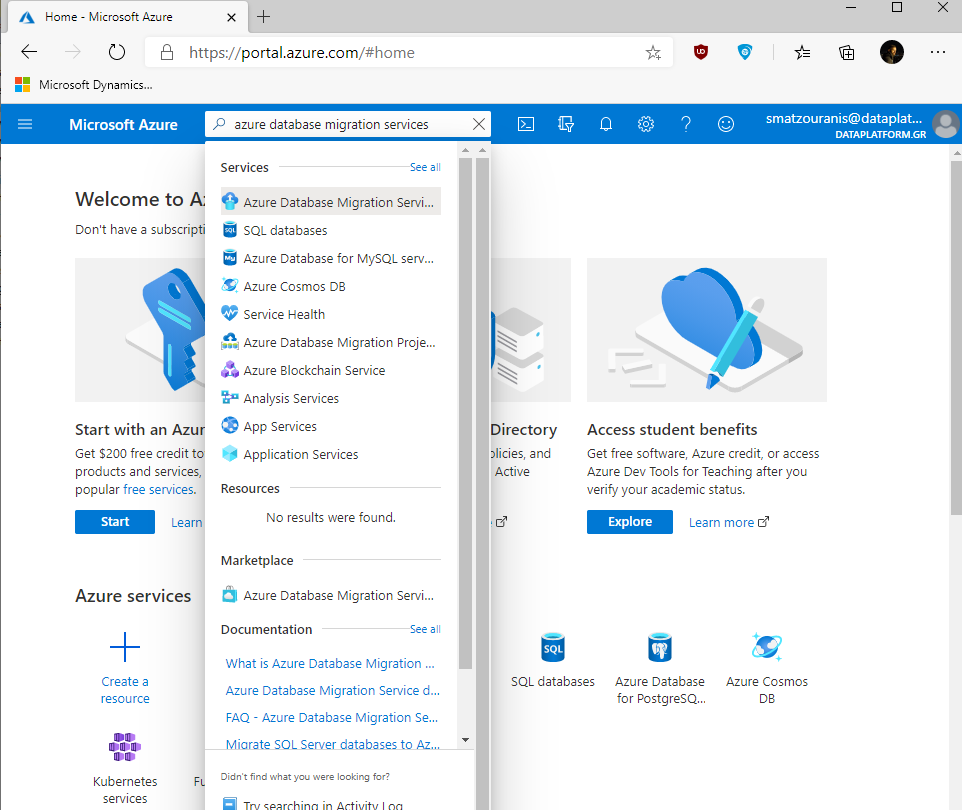
To start setting up the migration process, we will search for it Azure Database Migration Services.
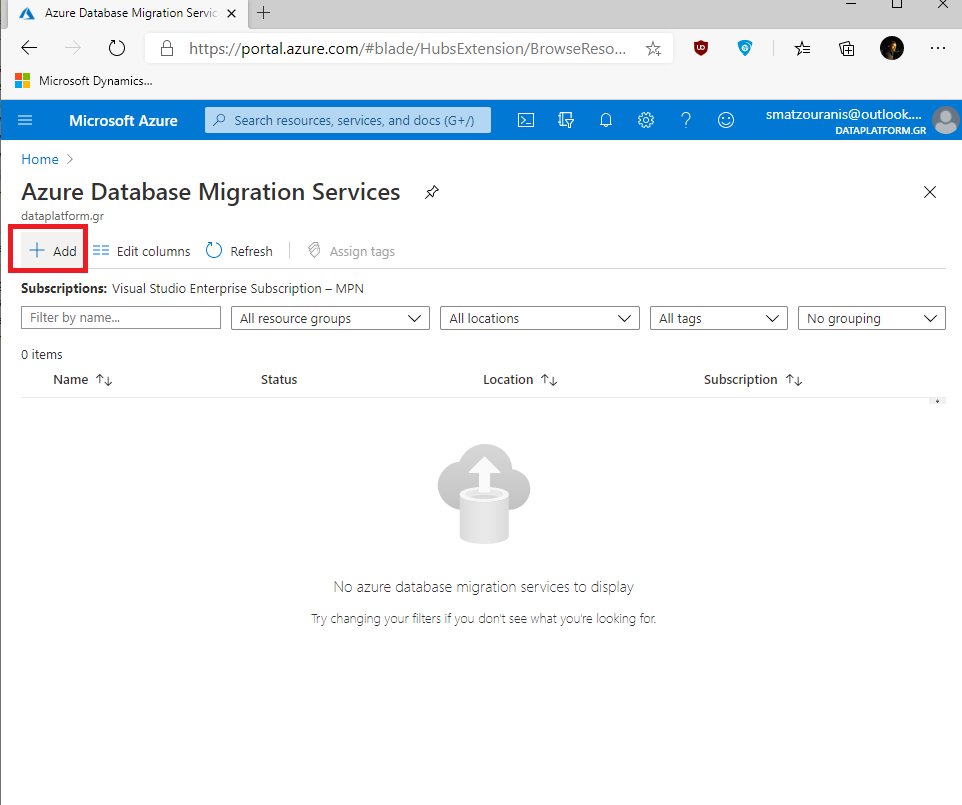
We choose Add.
We put Resource Group which is the Managed Instance we will migrate, a name in the service and we choose Hybrid Service mode.
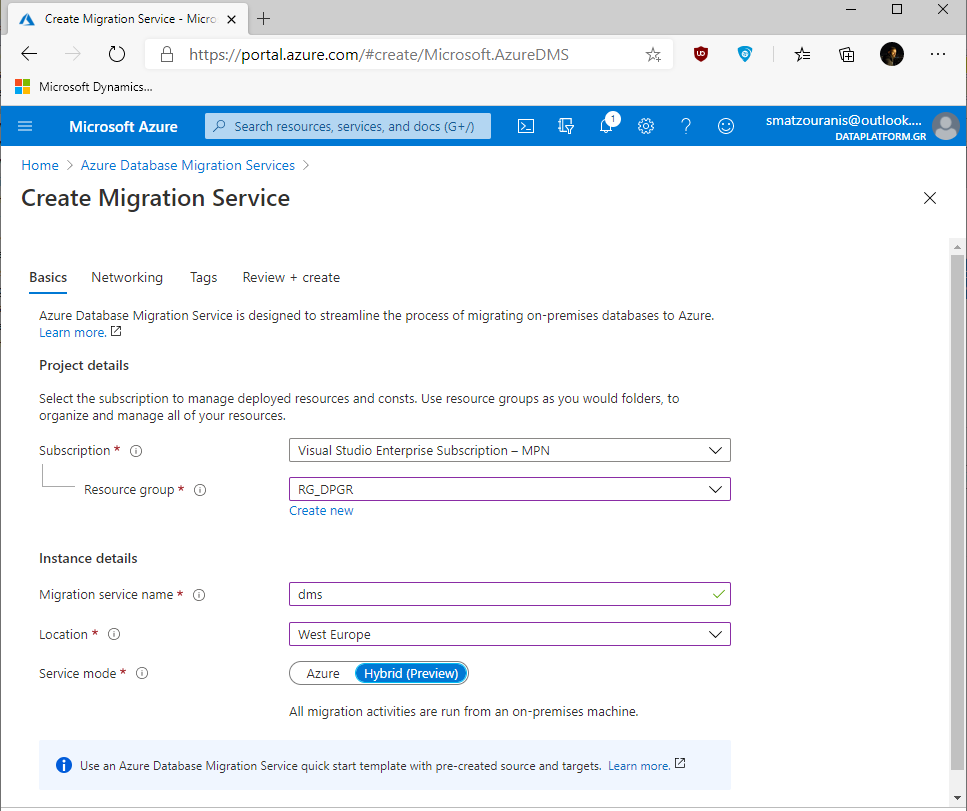
At this point we should make one Azure App which will be responsible for communicating with each other client worker and his Database Migration Service.
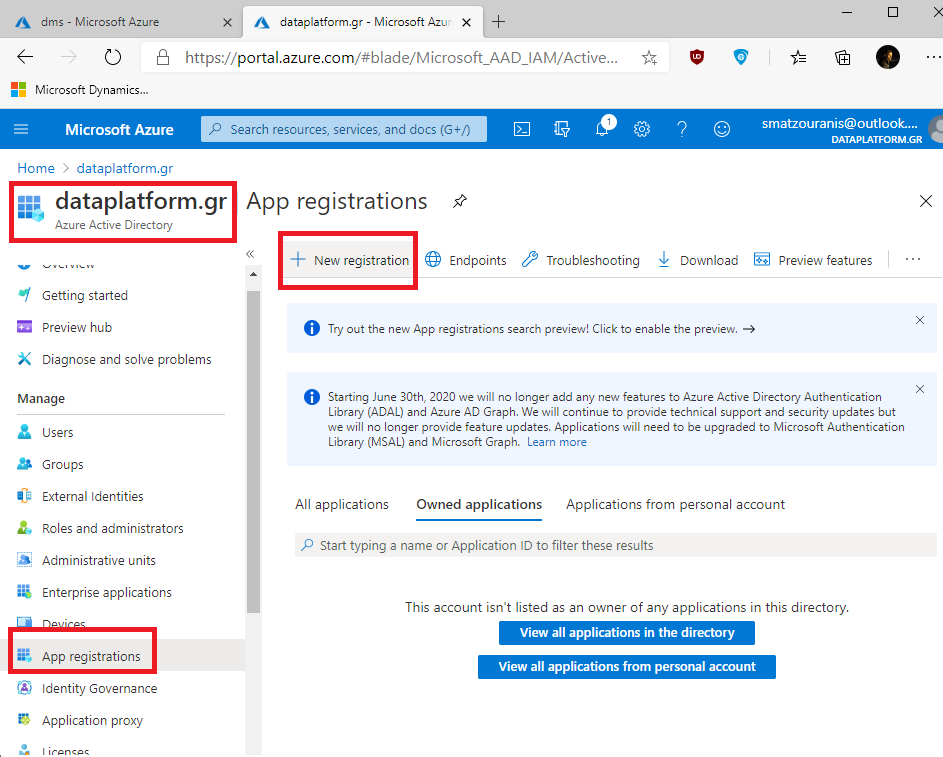
So let's go to Tenant of Azure Active Directory that we have, App registrations and New registration.
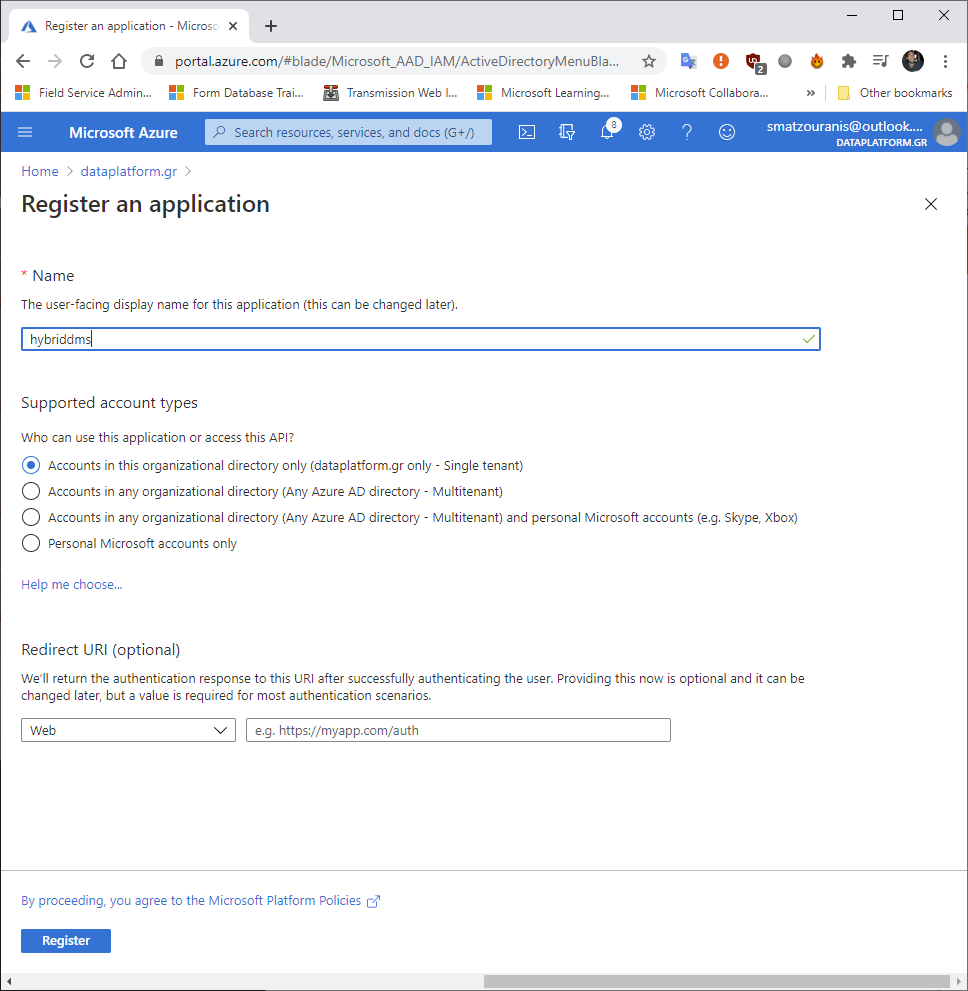
We set a name and leave the rest as it is.
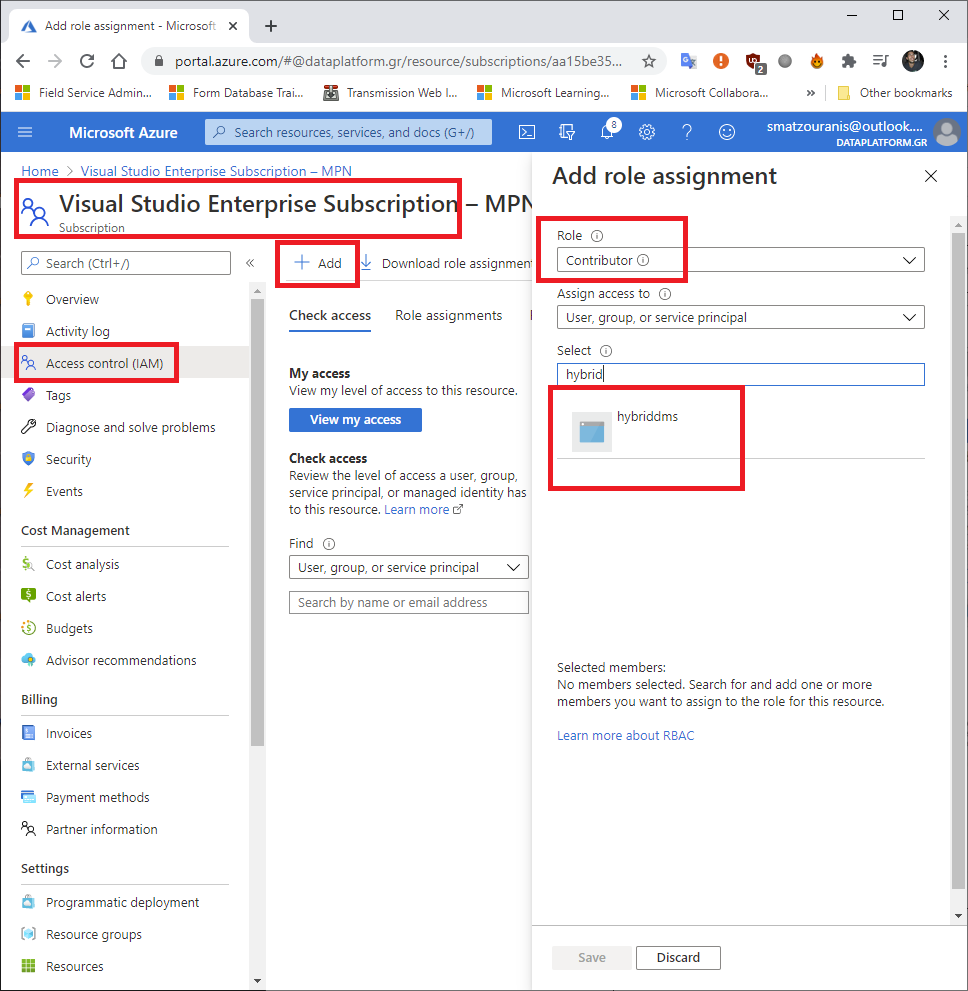
Now we should turn to Azure Database Migration Service that we built in the beginning and give the Contributor role to have the access you require. So we choose Access Control, Add role assignment, we define the role and look for the name of the application we defined.
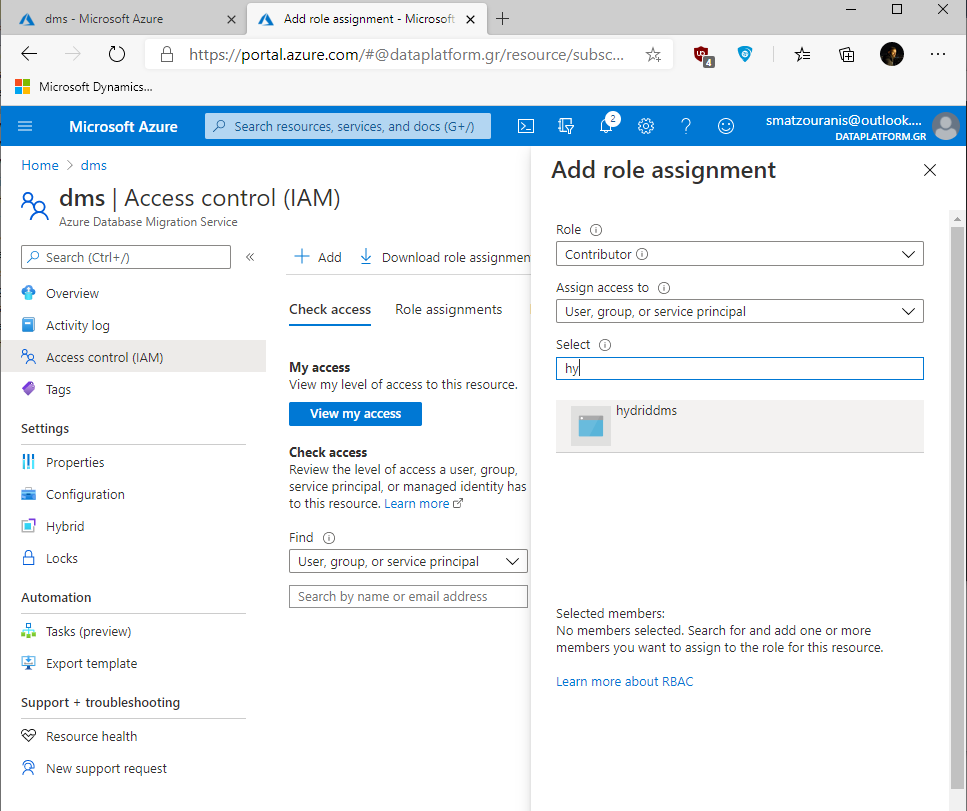
We should do the same procedure for the application below Subscription that we have.
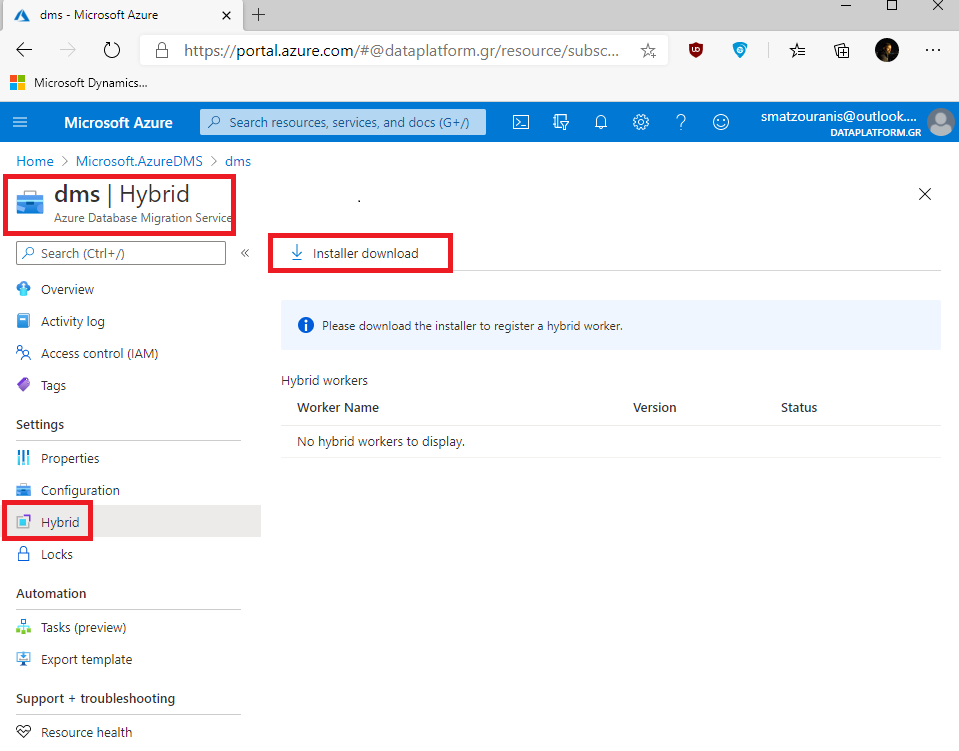
We go back to the Azure Database Migration Service and select the tab Hybrid and Installer download. From there we will download the client worker that we will install.
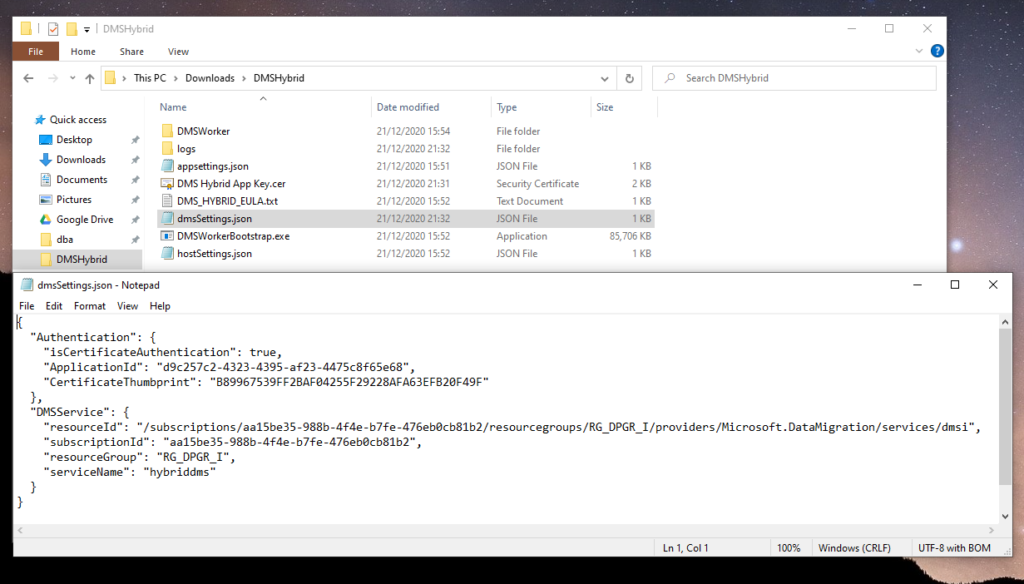
After it is downloaded and we unzip it, we should put the parameters it asks for in the dmsSettings.json.
- The ApplicationId we find it from Azure Active Directory, App registrations in Application (client) ID.
- The CertificateThumbprint we leave it for now with the default value as we will make it in the next step, then we will go back and fill it in.
- Ta resourceId, subscriptionId, resourcegroup and serviceName we will find it by going to Azure Database Migration Service, Properties.
Then we should create the Certificate, open a command prompt, cd to the DMSHybrid folder and run the following command:
DMSWorkerBootstrap.exe -a GenerateCert
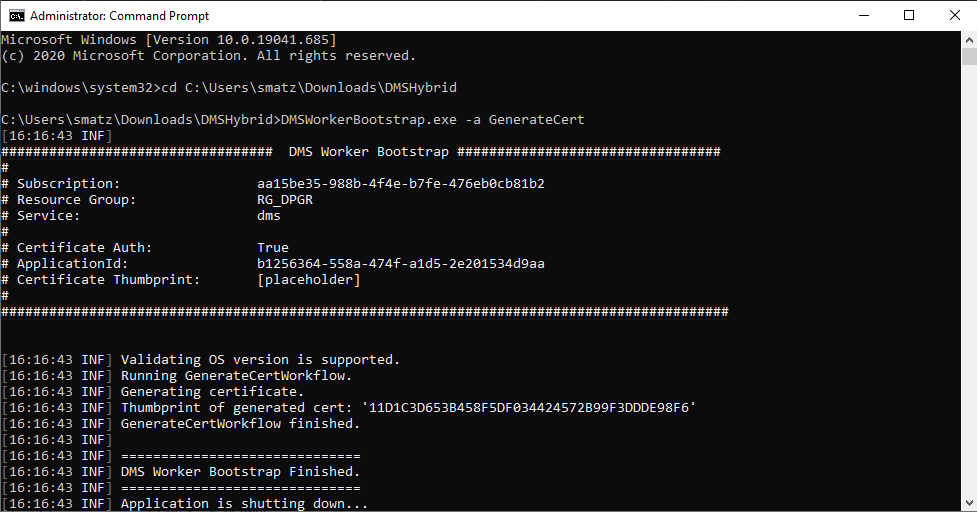
When we run it successfully, a file with the name will be created in the folder DMS Hybrid App Key.cer. This certificate should be uploaded to the application. To do this we go to Azure Active Directory again, App registrations, we select our application, Certificates & Secrets and Upload certificate.
We'll keep it from there Thumbprint.
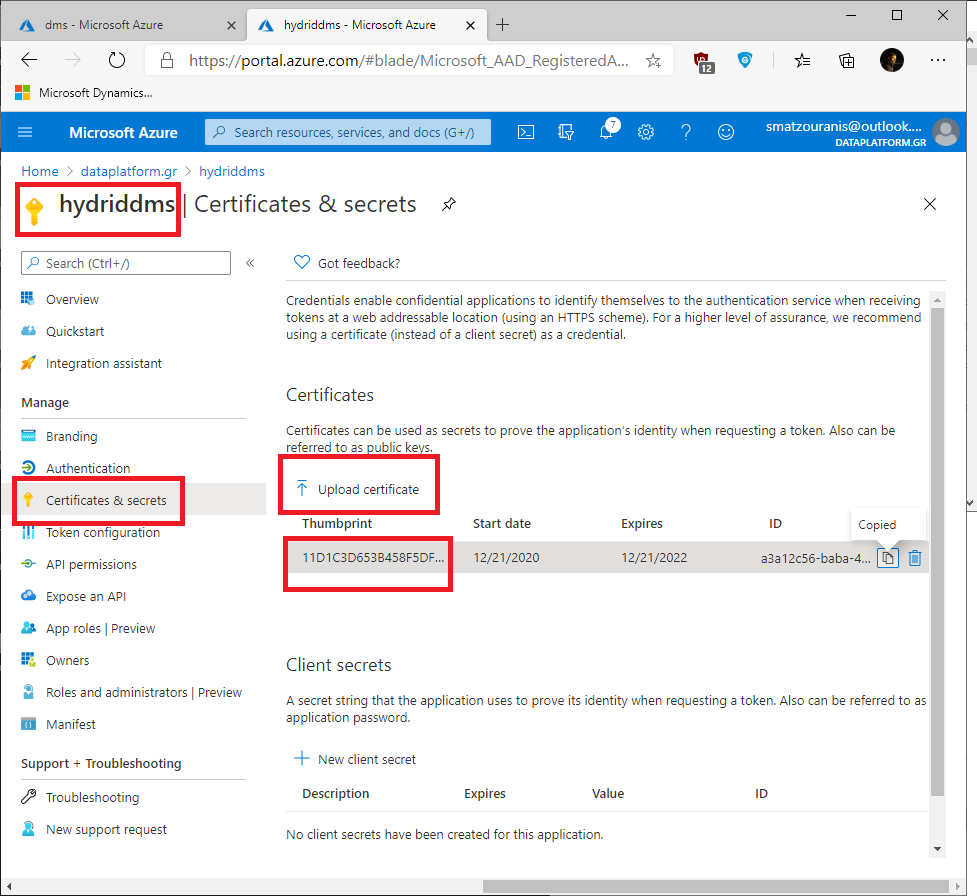
We add it Thumbprint in the field CertificateThumbprint of dmsSettings.json
{
  "Authentication": {
    "isCertificateAuthentication": true,
    "ApplicationId": "d9c257c2-4323-4395-af23-4475c8f65e68",
    "CertificateThumbprint": "B89967539FF2BAF04255F29228AFA63EFB20F49F"
  },
  "DMSService": {
    "resourceId": "/subscriptions/aa15be35-988b-4f4e-b7fe-476eb0cb81b2/resourcegroups/RG_DPGR_I/providers/Microsoft.DataMigration/services/dms",
    "subscriptionId": "aa15be35-988b-4f4e-b7fe-476eb0cb81b2",
    "resourceGroup": "RG_DPGR_I",
    "serviceName": "hybriddms"
  }
}
Later we will also need a secret, so let's make it from now by choosing New client secret. We keep the value it has in Value as it hides after a while.
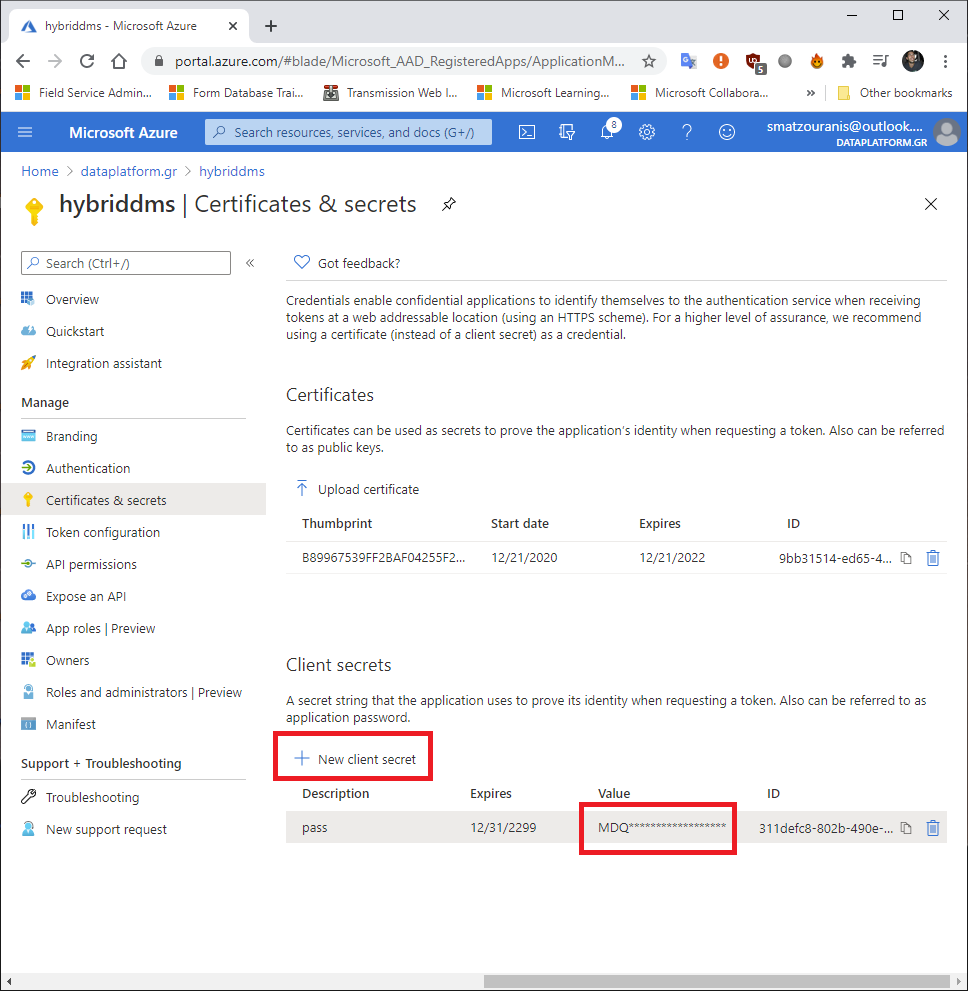
Now we are ready to proceed with its installation client worker.
To do this we cd into the folder DMSHybrid and execute the following:
DMSWorkerBootstrap.exe -a Install -IAcceptDMSLicenseTerms -d
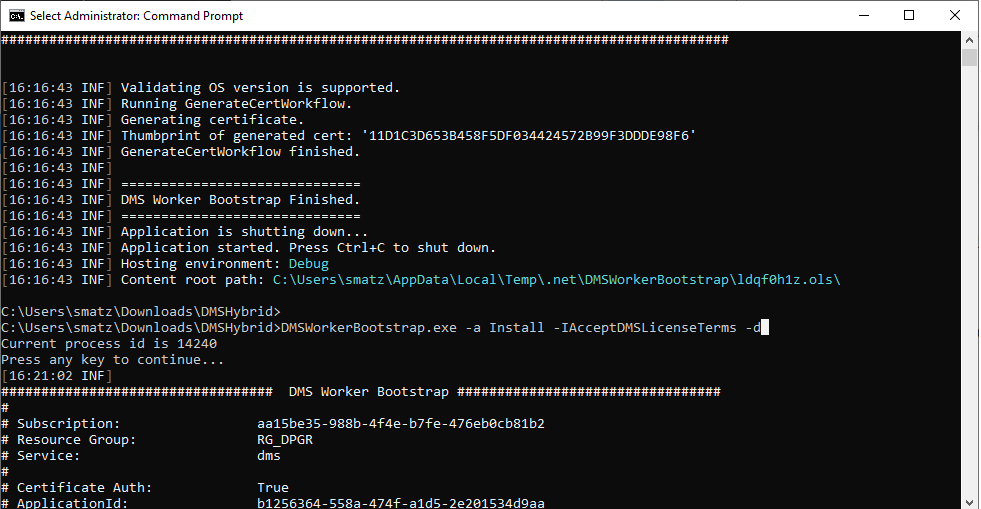
If an error like the one below appears, it may mean that another application is using the door.
In this case we see in the log is this reason.
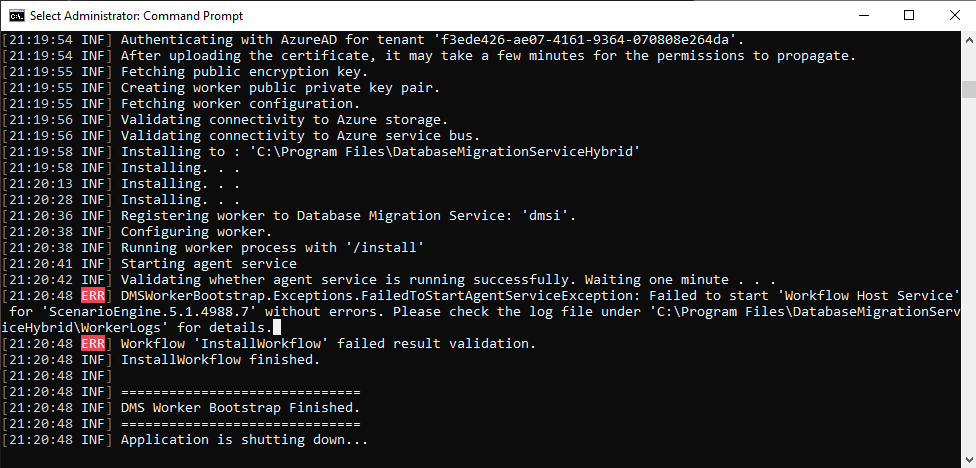
If it is true, we open one command prompt with run as administrator and run the following command to see which application is using the port and close it (in my case it was OneDrive):
netstat -a -bIf we have made this correction, we will have to uninstall and re-install with the command we executed before.
DMSWorkerBootstrap.exe -a uninstall -ReuseCert
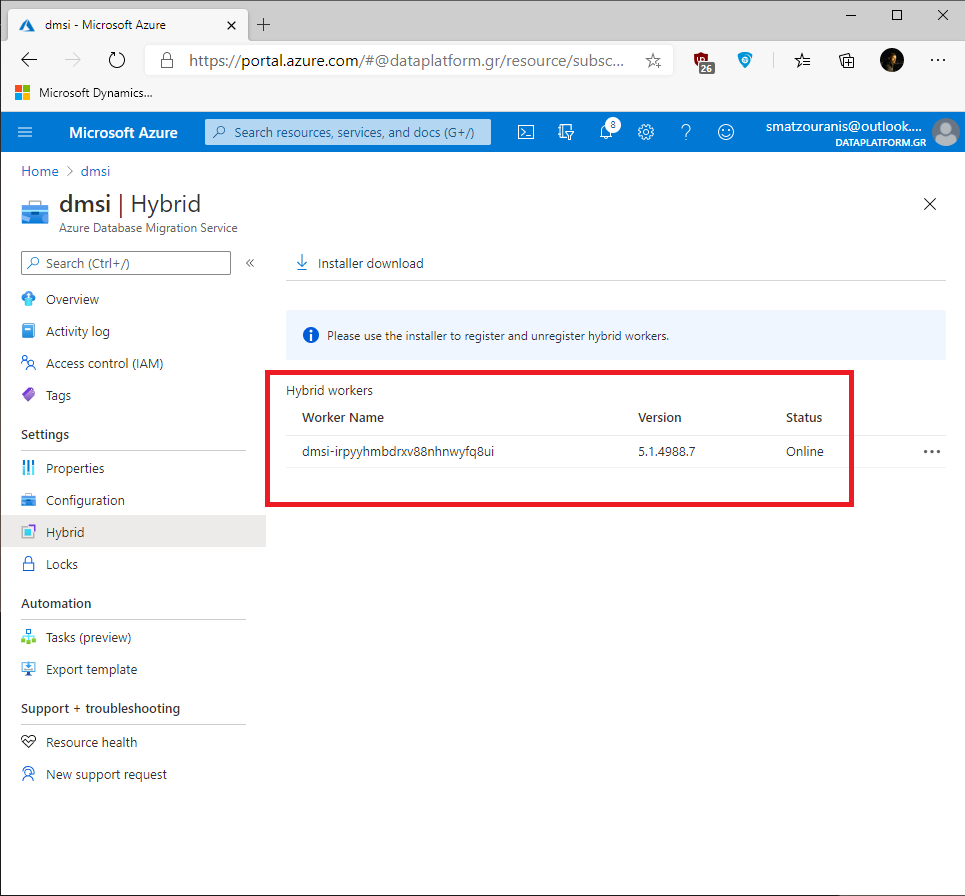
After the installation of the hybrid client worker has been completed we will see at Azure Database Migration Service of, in the tab Hybrid the Worker Name.
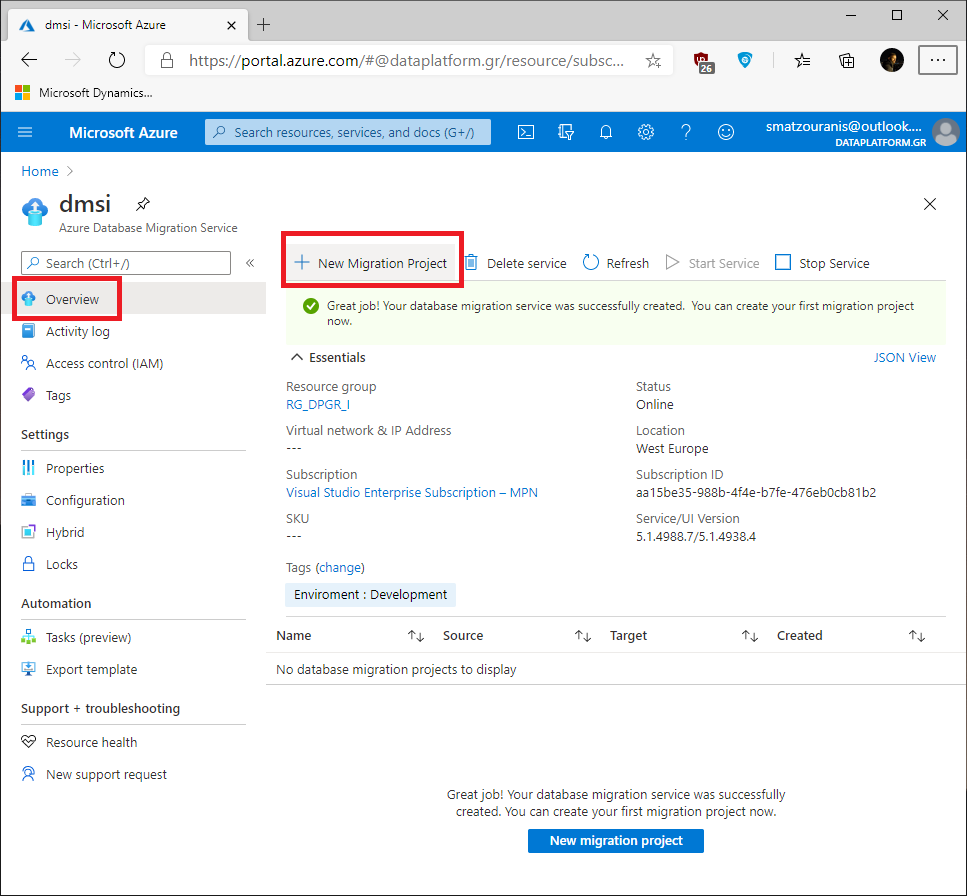
I keep choosing Overview and New Migration Project.
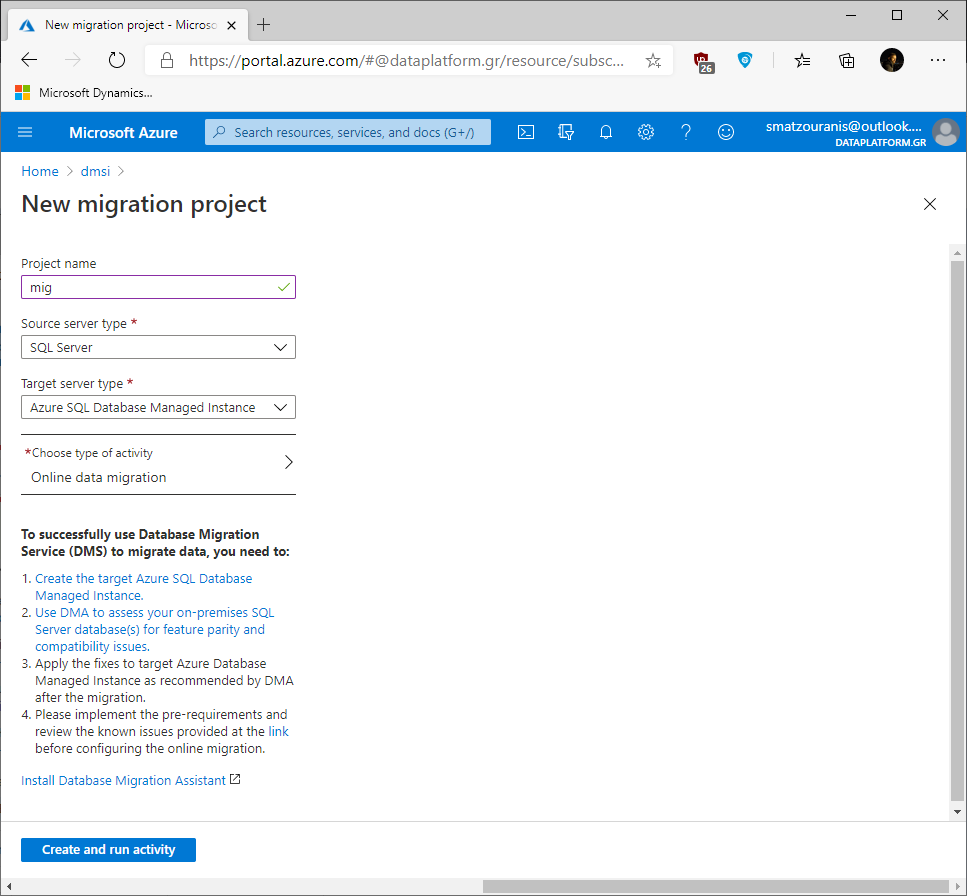
There we define a name for the Project, that it is about SQL Server, that the target is Azure Managed Instance and that we will make use of it Online data migration.
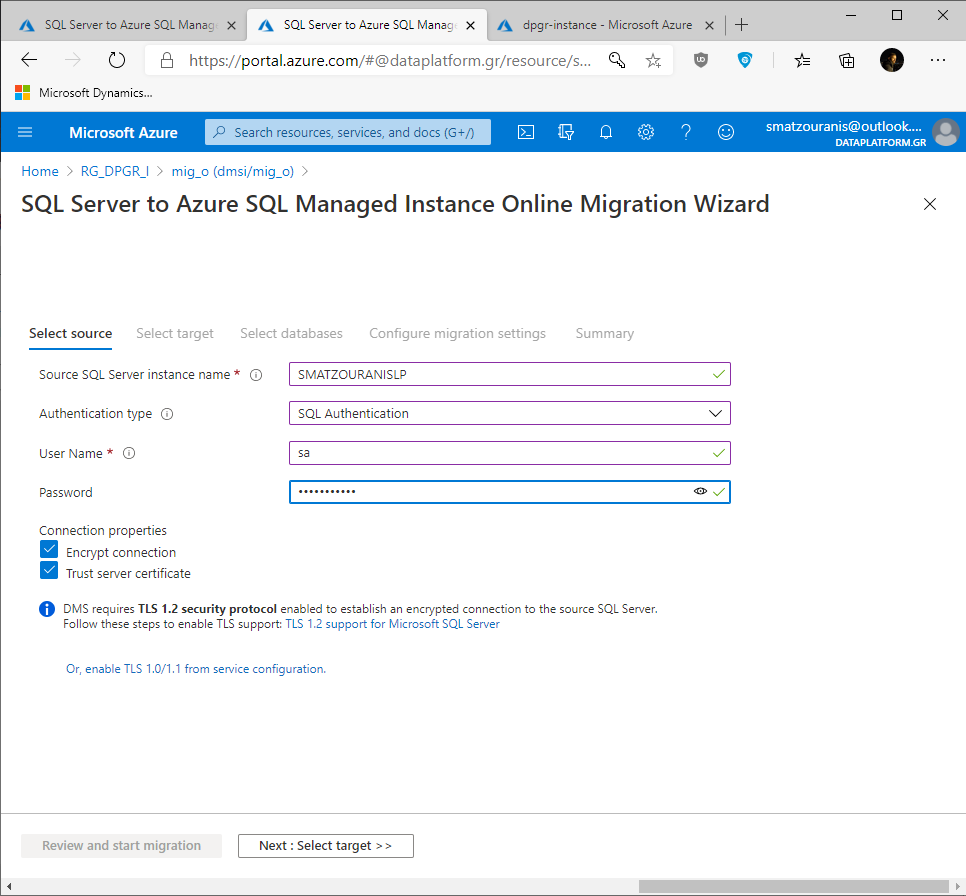
Then we will have to fill in the details for the connection to the on-premise source. Hostname, Authentication and one sysadmin user. We also choose Encrypt connection, Trust server certificate.
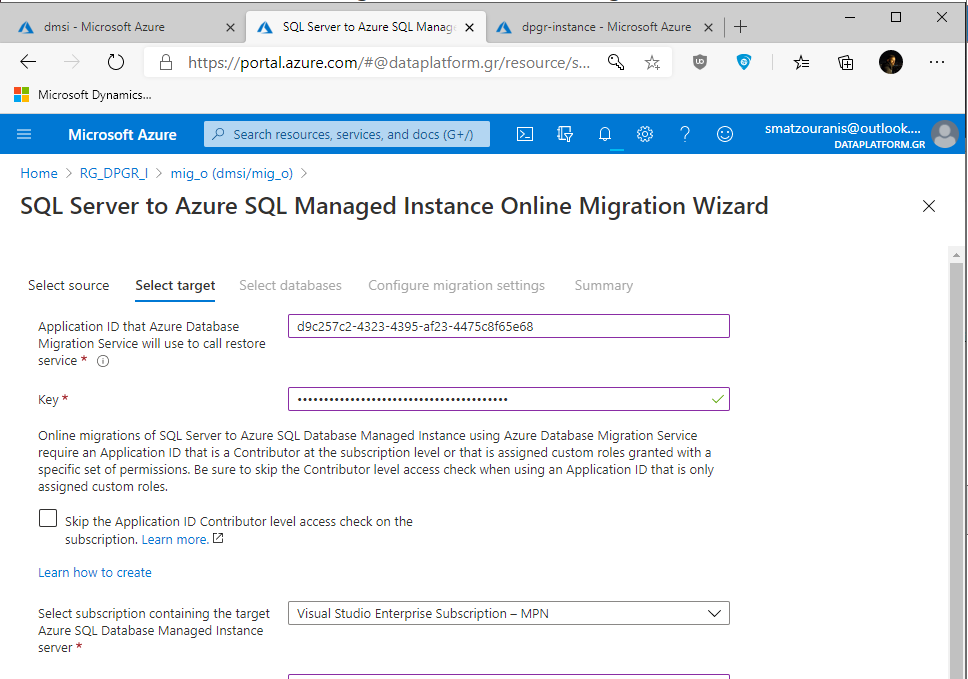
In the next step we should fill in the information about the target in the Azure Managed Instance.
- The ApplicationID (if we don't remember it we find it in Azure Database Migration Service, Properties)
- As Key the Value of the secret we created in the Application and kept in image 12.
- The Azure Managed Instance which we will have as a target.
- The sql username / password from sysadmin user on the target, we can use the admin user we created when creating the Managed Instance.
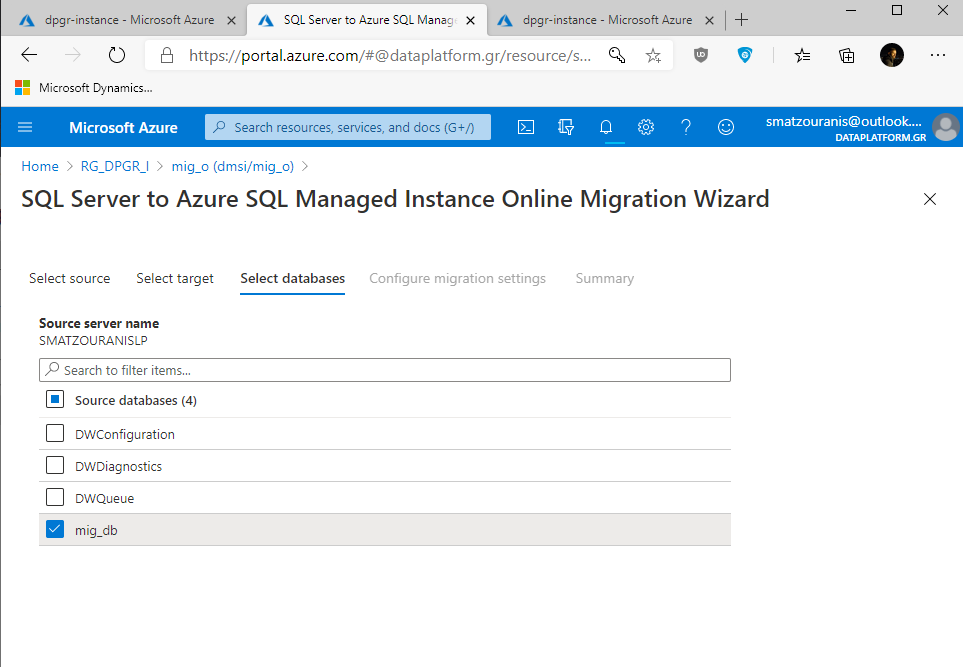
We choose the databases that we will migrate.
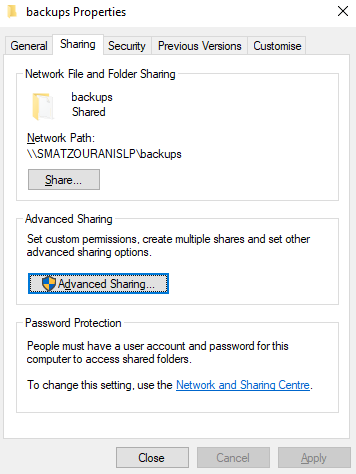
At this point we will need a folder in the on-premise source which we will do Share as a network path so that the Hybrid client worker has access.
In this path we will store them backups which will be needed for the migration.
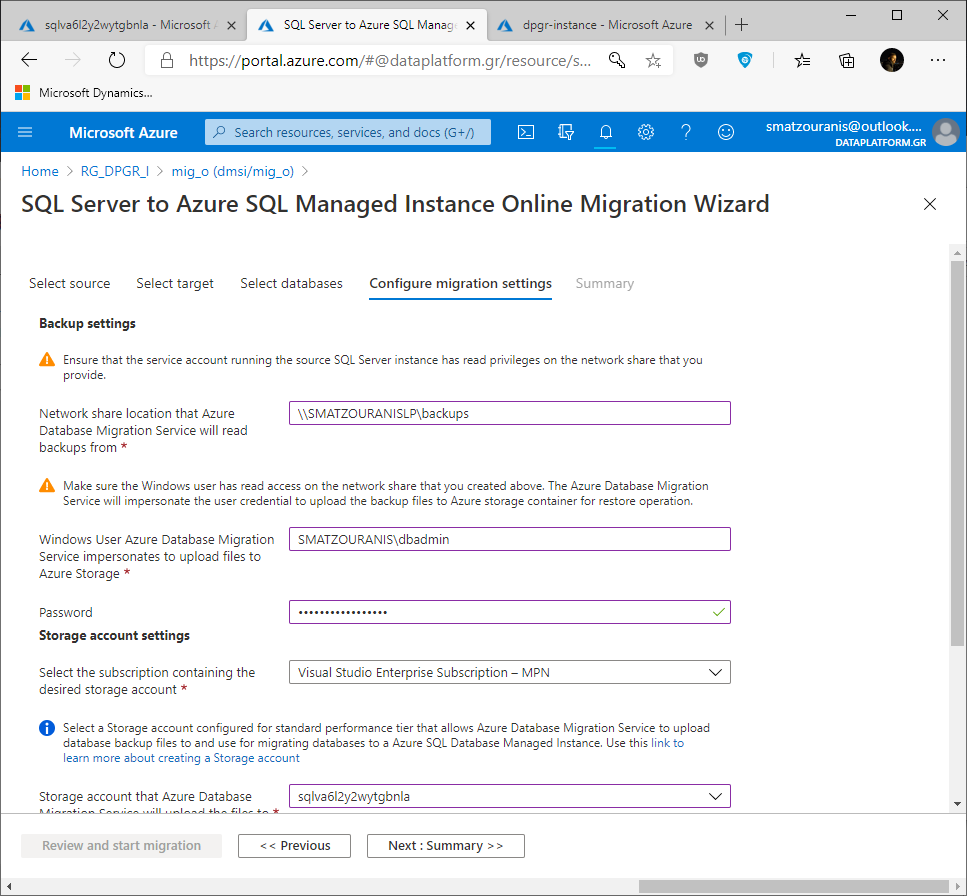
In the next step we fill in the network path for backups from the previous step, in the next field we fill in the credentials a user who has access to this network path or a local admin.
At the end it will ask us to choose it Storage Account where we want the backups to be stored, we can use one we already have or create a new one.
At the end, before we start the migration, we should have taken the backups of the databases on the network path.
The backups should be with the option with checksum.
backup database mig_db to disk='C:\backups\full_mig.bak' with checksum
backup log  mig_db to disk='C:\backups\log.trn' with checksum
After making sure that the backups are OK, we proceed to Start Migration.
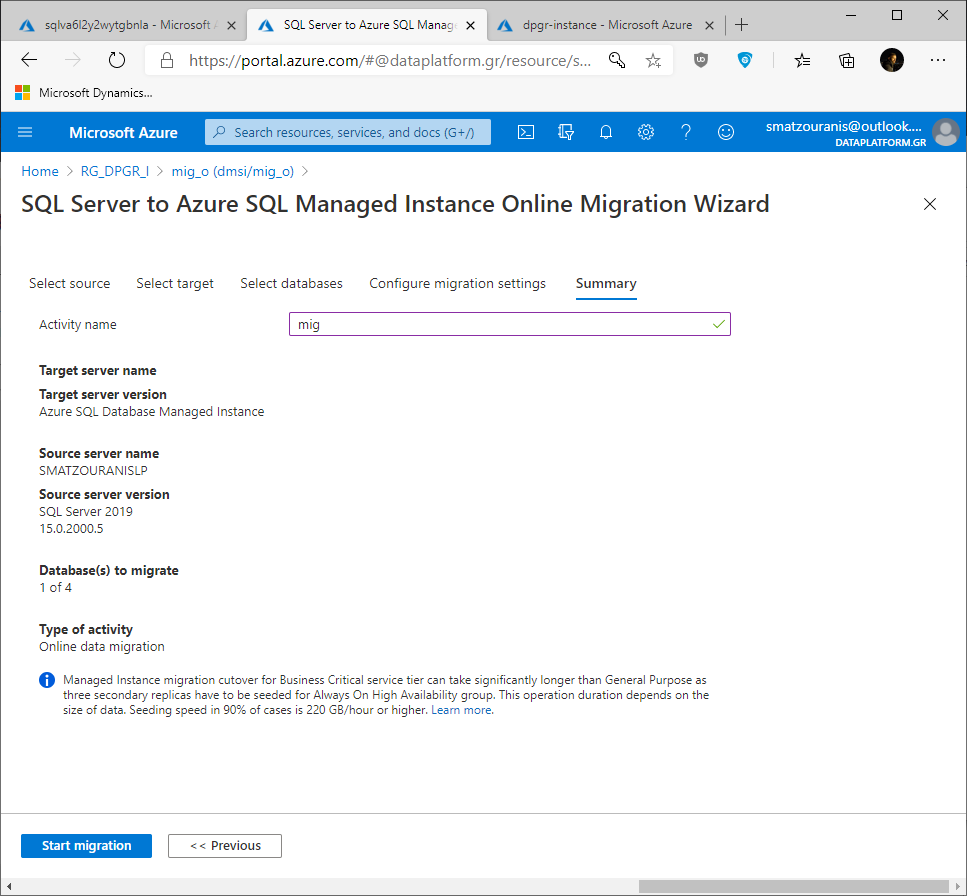
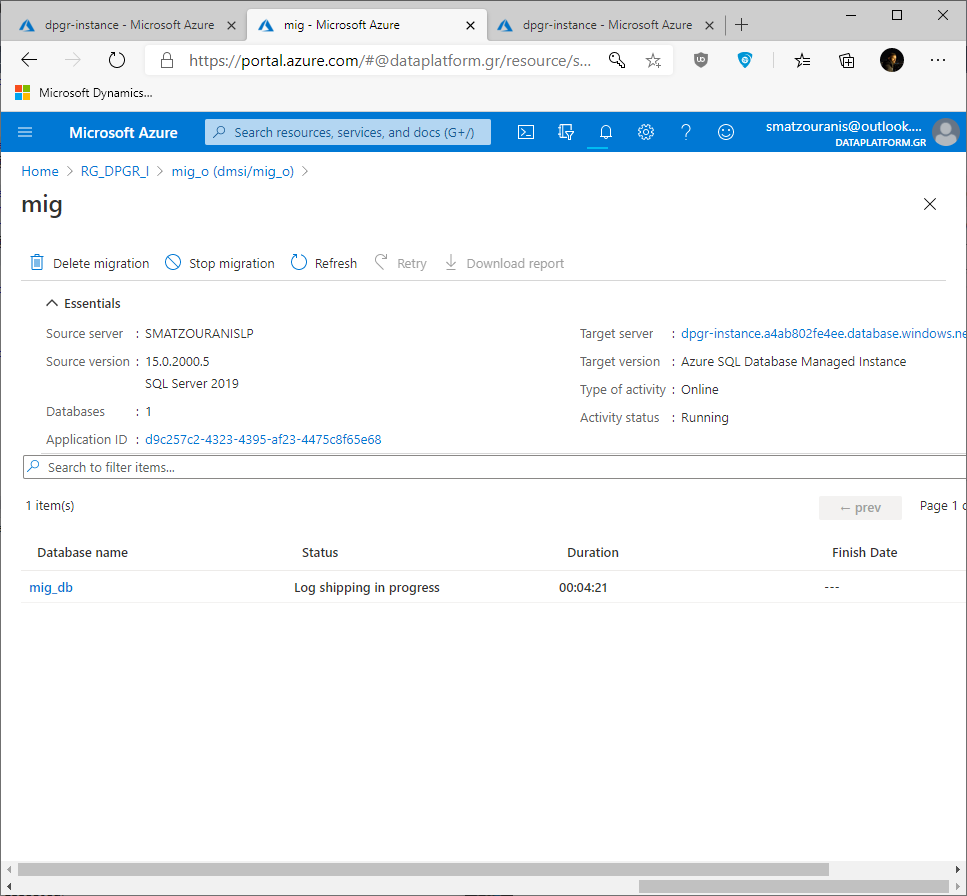
We will see that the process has started. If we select each base we will see in detail which step it is on.
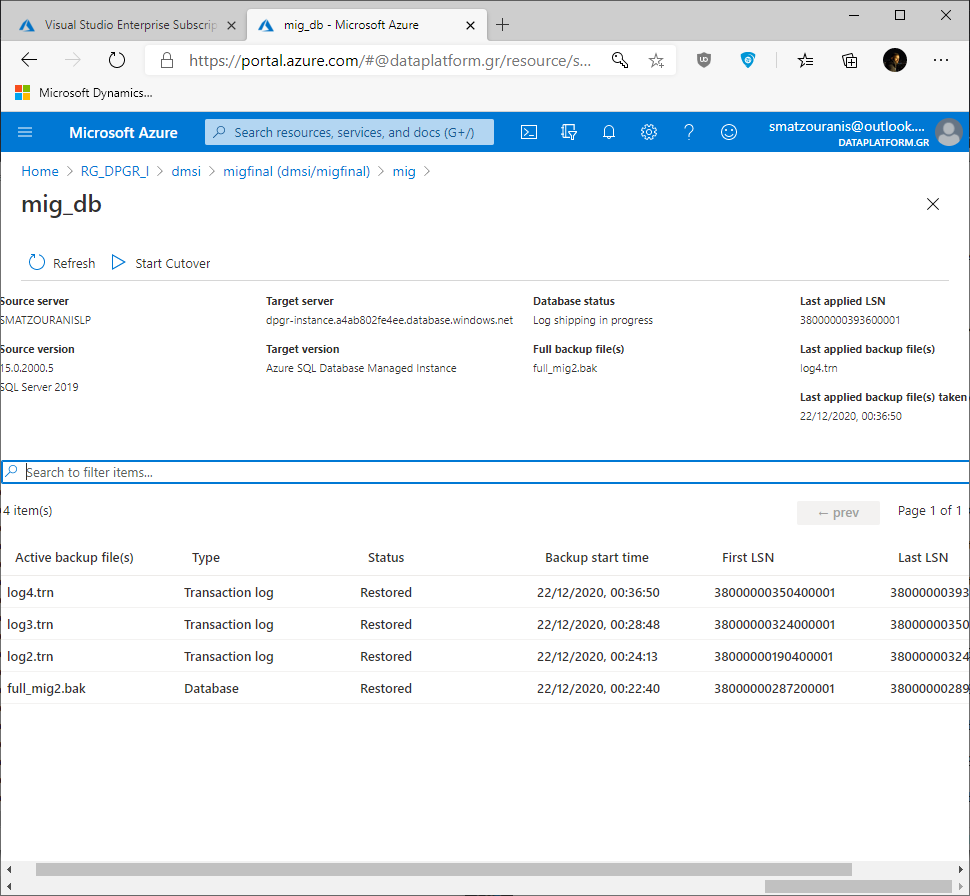
After seeing what has been done Restored all backup files we can start the process at any time we want Start Cutover so that we can also transfer the information from the last seconds from the on-premise server to our database in Azure Managed Instance.
With Start Cutover selected, this will be the only point where the application connecting to our database should be offline.
After the application is downloaded we get the last one tail log backup which is one transaction log backup which does not allow access to the base. We do this so that we can be sure that we have backed up all the data.
backup log mig_db to disk='C:\backups\log_final.trn' with checksum,norecovery
When this backup is completed and we make sure that this has been done as well Restored. We can press it Apply.
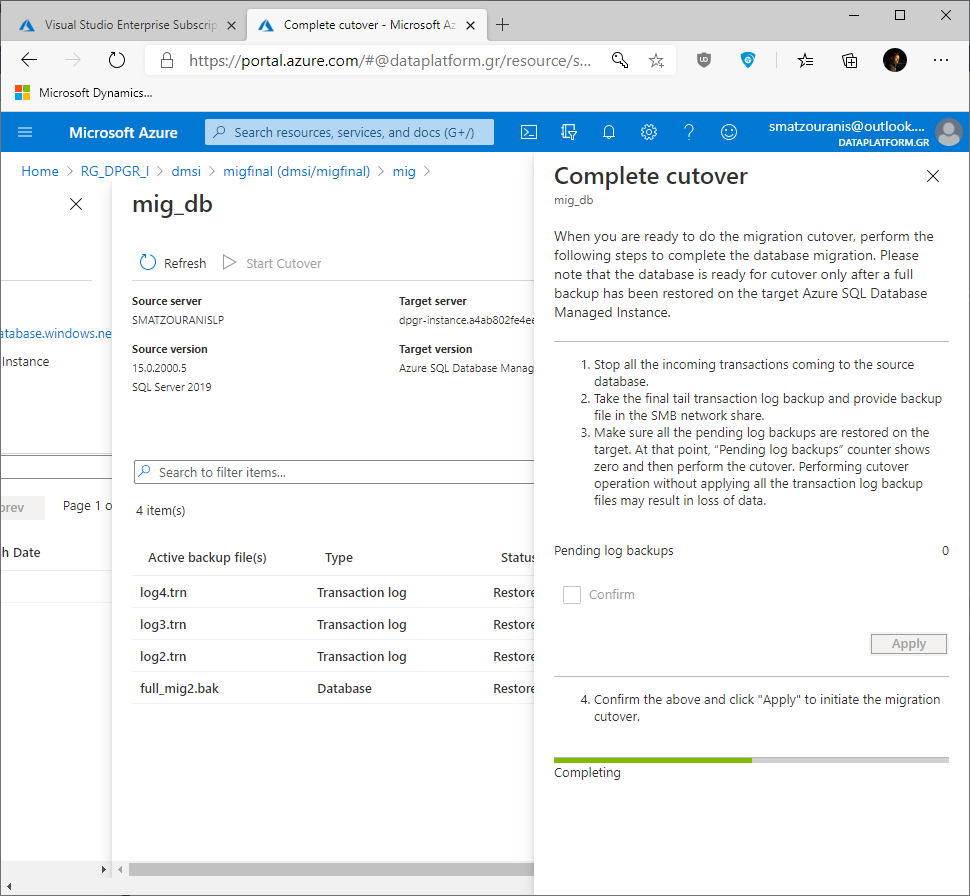
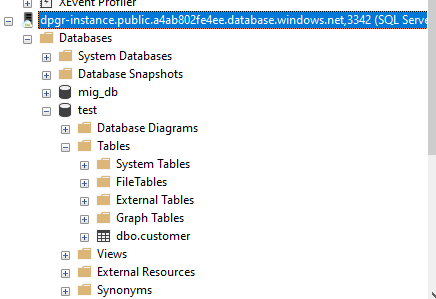
Somewhere here the process ends and if we connect to the Managed Instance we will see that the database we chose to migrate has been transferred.
Sources:
- Quickstart: Create a hybrid mode instance with Azure portal & Azure Database Migration Service
- Tutorial: Migrate SQL Server to an Azure SQL Managed Instance online using DMS


