

How do we apply a patch in an Oracle Data Guard environment (even online)

Certifications:

In previous article we saw how to patch an Oracle database. In this article we will see the same process in an environment Oracle Data Guard on a UNIX operating system. The steps we will follow allow us to do the process even online if we make use of it Oracle TAF.
How to download the patch set update
Through the Oracle support portal, we connect to the following link:
https://support.oracle.com/portal/We select Patches & Updates and search for the patch id we want. In this case we are looking for patch 33192793 to upgrade from version 19.03 to 19.13:
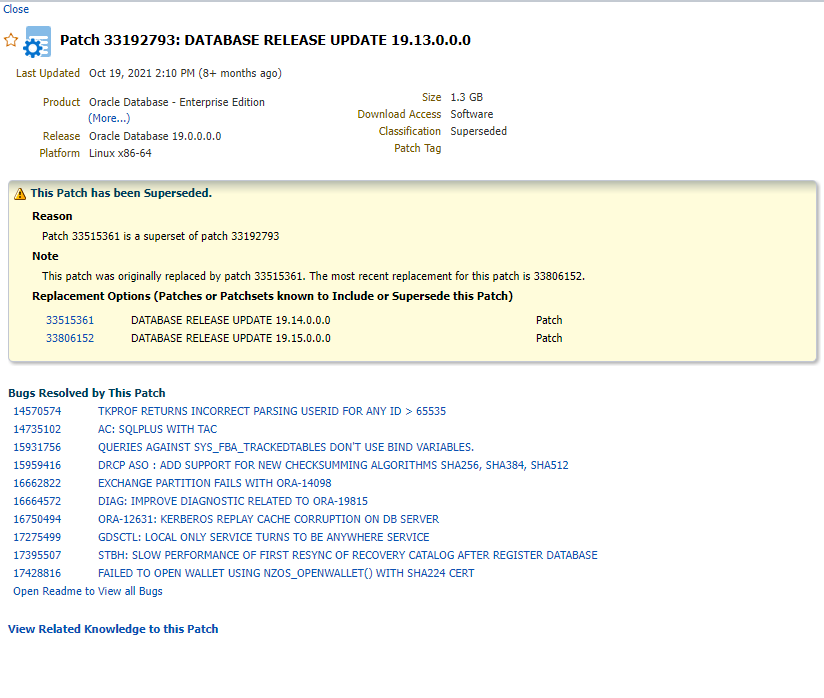
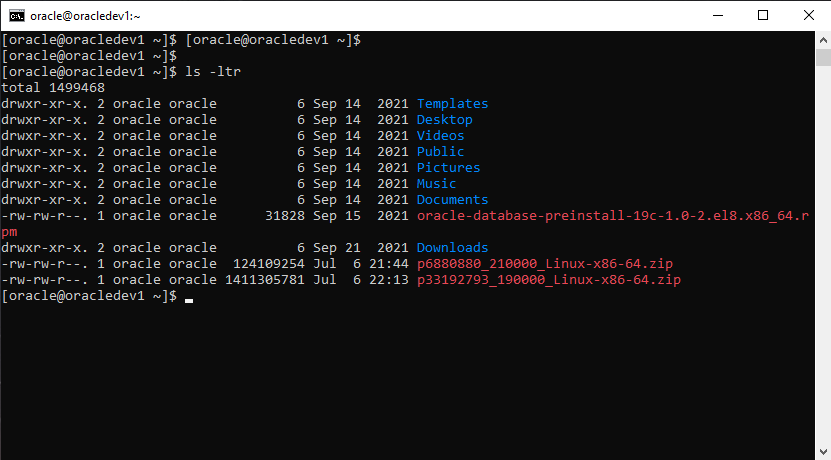
When it is downloaded, copy it to /oracle/home and unzip it on both Data Guard servers:
cd $HOME
unzip p33192793_190000_Linux-x86-64.zip
How to install the latest OPatch
However, in order to apply a latest patch, we must also have updated the Oracle tool that performs this process, which is called OPatch.
To download the latest version we connect to the link below:
https://updates.oracle.com/download/6880880.htmlWe choose the correct release and operating system (careful with 32 and 64bit):
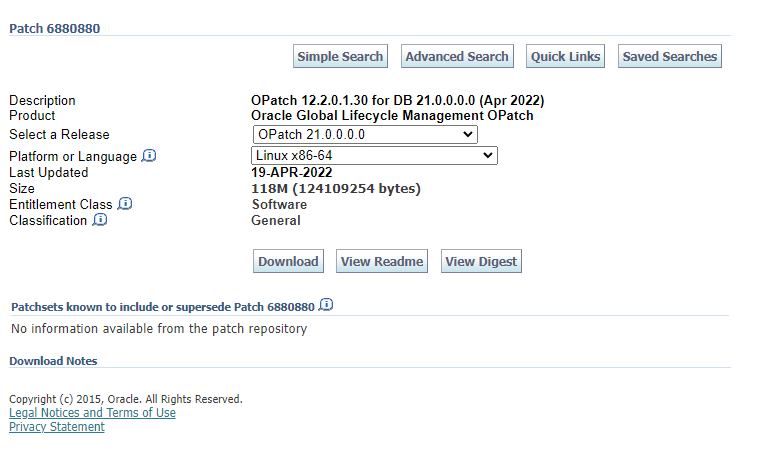
After we download it, we transfer it to both servers, e.g. in the /oracle/home, from there we transfer it to $ORACLE_HOME of each and unzip it in place of the old OPatch folder:
cp p688* $ORACLE_HOME/
cd $ORACLE_HOME
unzip p6880880_121010_LINUX.zip
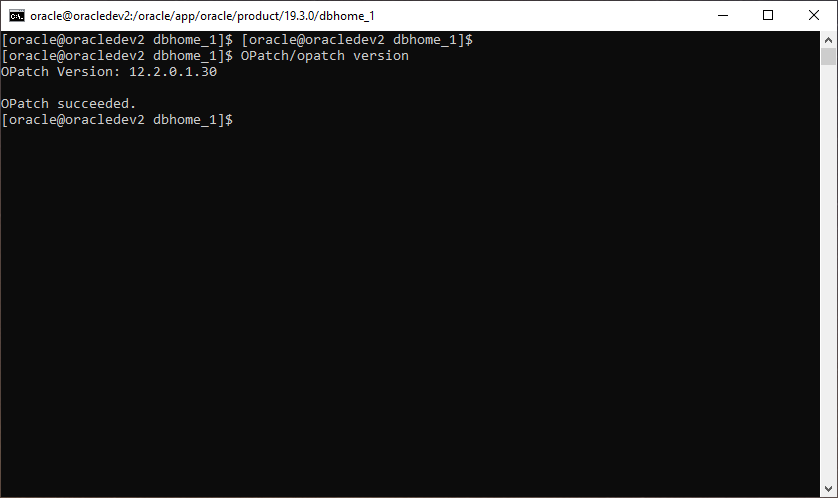
When the process is complete, we run the following on both servers to see that the version has passed successfully:
$ORACLE_HOME/OPatch/opatch version
The process
For a start in the case that we have activated the Fast-Start Failover in Data Guard we disable it:
dgmgrl "sys/Kwdikos1!"@ORADEV

show configuration;

disable fast_start failover
Then we connect to Standby and we stop the base which is now mount state and the listener:
lsnrctl stop

sqlplus / as sysdba
shutdown immediate;
exit;
Go to the folder where the patch is located:
cd $HOME

ls -ltr

cd 33192793
Now we can start the update process:
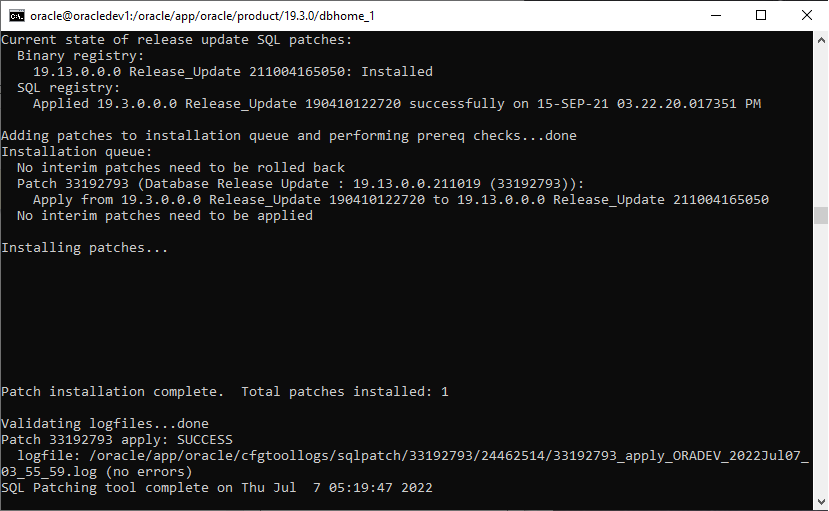
$ORACLE_HOME/OPatch/opatch apply
Patching component oracle.jdk, 1.8.0.201.0...
Patch 33192793 successfully applied.
Sub-set patch [29517242] has become inactive due to the application of a super-set patch [33192793].
Please refer to Doc ID 2161861.1 for any possible further required actions.
Log file location: /oracle/app/oracle/product/19.3.0/dbhome_1/cfgtoollogs/opatch/opatch2022-07-06_22-26-07PM_1.log

OPatch succeeded.
With that completed we connect to the database, raise it to mount state and raise the listener:
sqlplus / as sysdba
startup mount
exit;

lsnrctl start
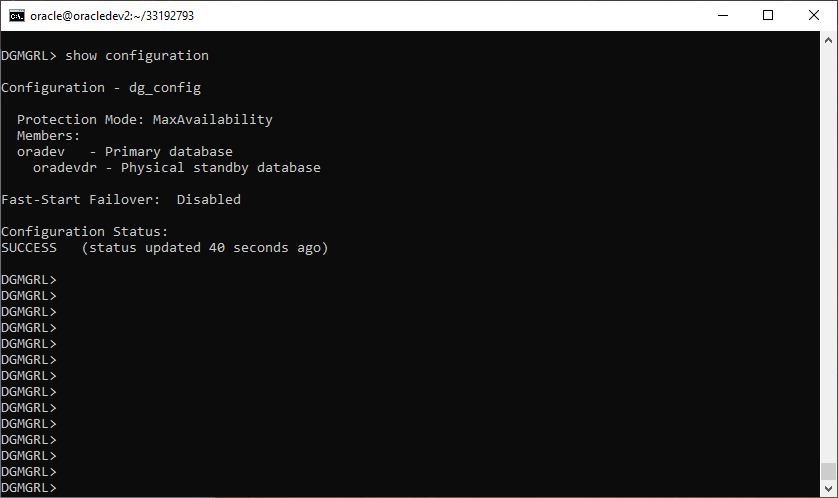
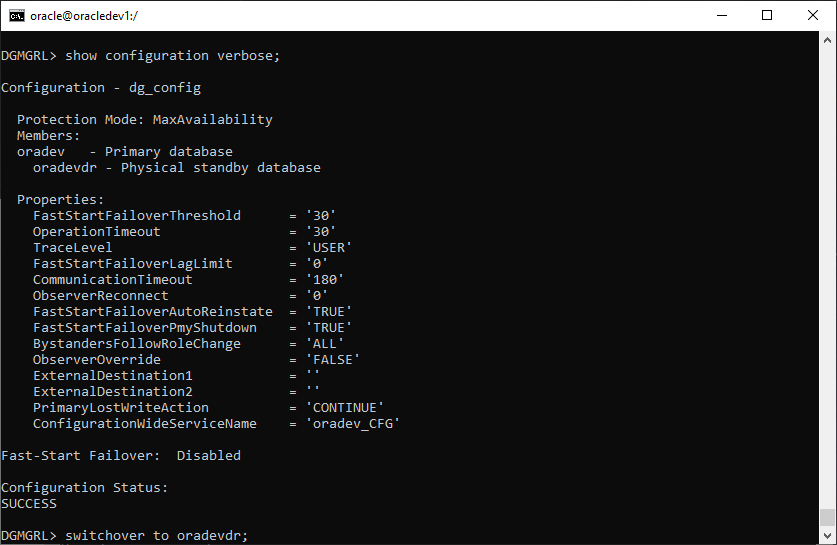
As a next step we connect to Primary's Data Guard Broker and after we see that it has synchronized, i.e. that the Configuration Status has turned to success, we switchover to Standby:
* It may take some time for the status to show success, so we run the show configuration command until it shows no error
dgmgrl "sys/Kwdikos1!"@ORADEV

show configuration verbose;

switchover to oradevdr;
After returning to Standby, we can now apply the patch to the Primary with the same process as we did before.
We connect to Primary and we stop the base which is now mount state and the listener:
lsnrctl stop

sqlplus / as sysdba
shutdown immediate;
exit;
Go to the folder where the patch is located:
cd $HOME

ls -ltr

cd 33192793
Now we can start the update process on the old Primary as well:
$ORACLE_HOME/OPatch/opatch apply
Patch 33192793 successfully applied.
Sub-set patch [29517242] has become inactive due to the application of a super-set patch [33192793].
Please refer to Doc ID 2161861.1 for any possible further required actions.
Log file location: /oracle/app/oracle/product/19.3.0/dbhome_1/cfgtoollogs/opatch/opatch2022-07-06_23-08-03PM_1.log

OPatch succeeded.
With that completed we connect to the database, raise it to mount state and raise the listener:
sqlplus / as sysdba
startup mount
exit;

lsnrctl start
Now we connect again to Secondary's Data Guard Broker and after we see that it has synchronized, i.e. that the Configuration Status has turned to success, we switchover to the old Primary:
* It may take some time for the status to show success, so we run the show configuration command until it shows no error
dgmgrl "sys/Kwdikos1!"@ORADEVDR

show configuration verbose;

switchover to oradev;
If it completes successfully we can activate it again Fast-Start Failover:
enable fast_start failover;
exit;
The patch on the Oracle binaries has been completed, but now it remains to pass the update to the database tables as well
To do this we need to run the command datapatch, so we connect to Primary and run the following:
$ORACLE_HOME/OPatch/datapatch -verbose
If it shows us an error, we can see more information about what is causing it by selecting the following view:
select * from OPATCH_XML_INV;

--https://support.oracle.com/epmos/faces/DocumentDisplay?_afrLoop=331756942002519&parent=EXTERNAL_SEARCH&sourceId=PROBLEM&id=1602089.1&_afrWindowMode=0&_adf.ctrl-state=l7kdhyc44_4
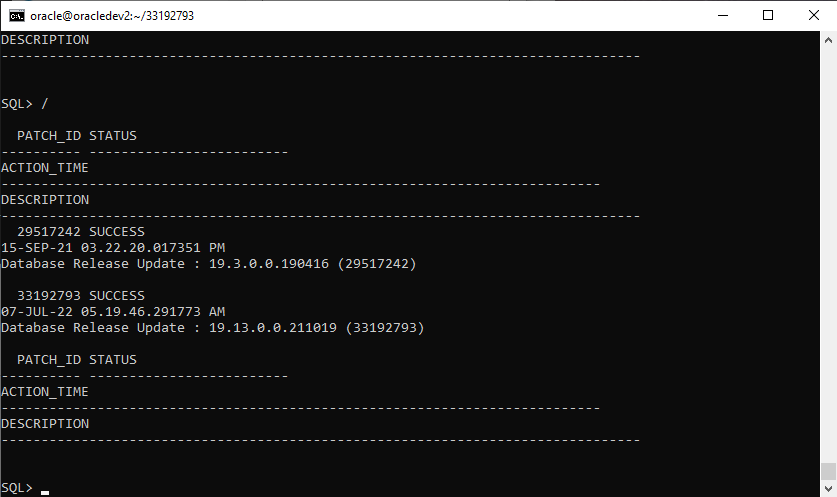
When the process is complete we connect to the database and run the following query to confirm that it has been updated:
sqlplus / as sysdba

select patch_id,status,action_time,description from dba_registry_sqlpatch order by action_time;
To delete the garbage left from the installation, run it opatch cleanup:
$ORACLE_HOME/OPatch/opatch util cleanup
If we want to rollback the patch...
In the event that we want to rollback the patch, we can, while we have downloaded the database, run the following command stating the patch id that we want to remove:
$ORACLE_HOME/OPatch/opatch rollback -id 31113348
However, after the rollback to the Oracle binaries is completed, we should run datapatch again (with the database uploaded) so that the changes to the database tables will also be passed:
$ORACLE_HOME/OPatch/datapatch -verbose