How we create a SQL Managed Instance in Azure
Certifications:
One of the possibilities we have in the Azure Cloud is to provide us with an entire Instance of SQL Server without having access to a Virtual Machine. This service you call Azure SQL Managed Instance.
What advantages does it have?
In contrast to the Azure SQL Databases that we know from the classics on-premise SQL Server instances are running. More specifically, we can use Agent, backup/restore using .bak files, db mail and others. While at the same time we continue to have advantages of Azure SQL Databases such as automatic patching, automatic backup and high availability.
But before you continue reading the article if you are not familiar with Azure you should read first this article which is dedicated to Azure infrastructure. It will be needed because it explains various concepts that we will encounter below such as Subscriptions and Resource Groups.
The example
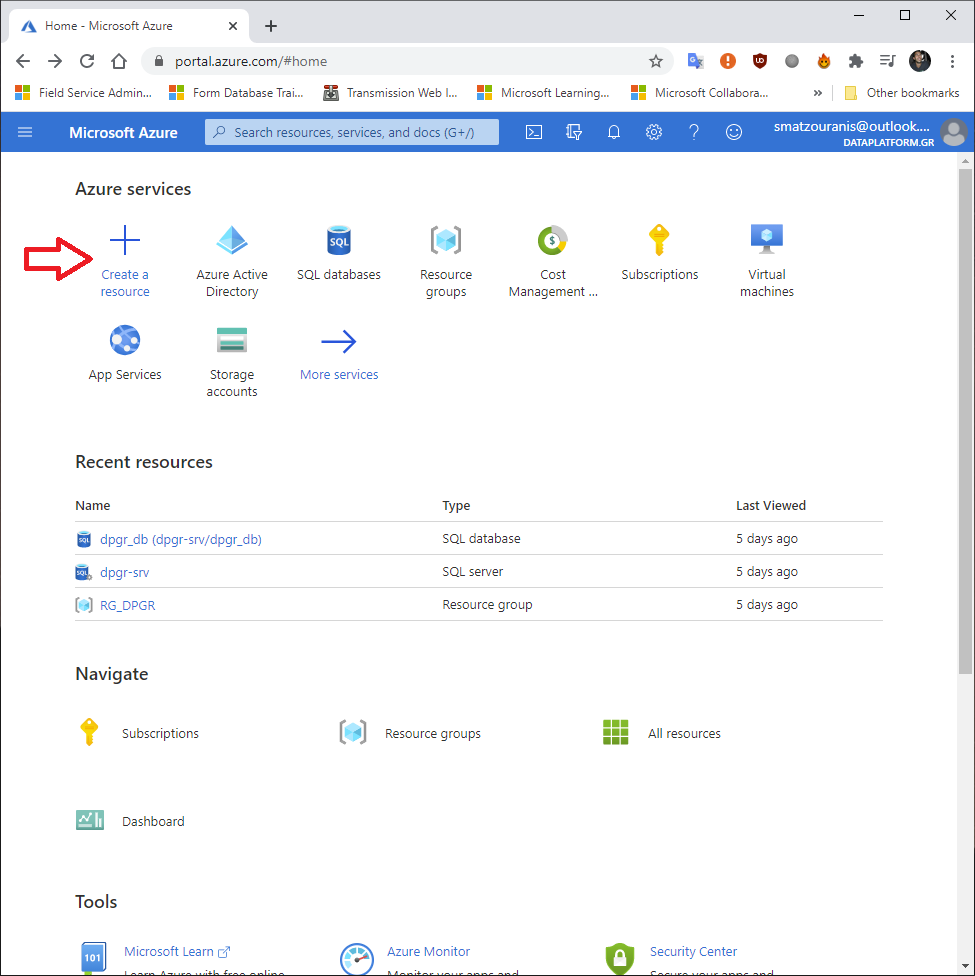
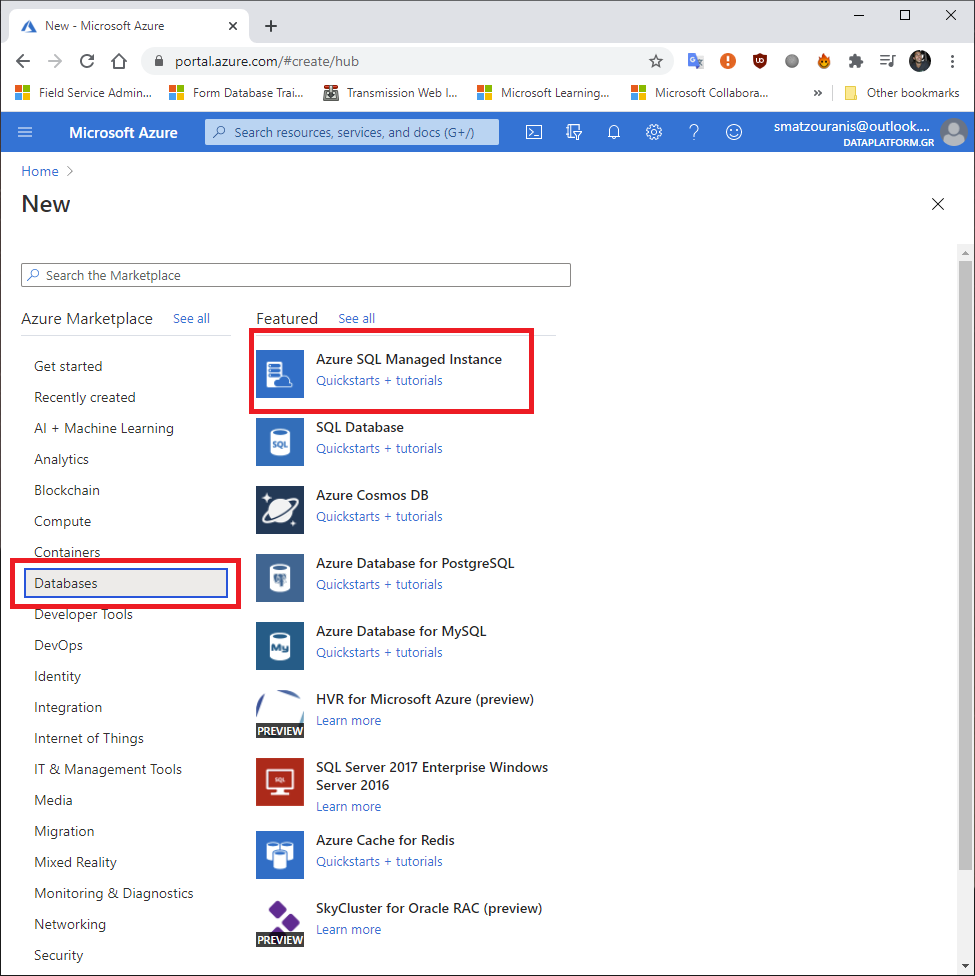
To begin with, we connect to Azure Portal . There we choose it Create a resource.
There we choose Databases and Azure SQL Managed Instance.
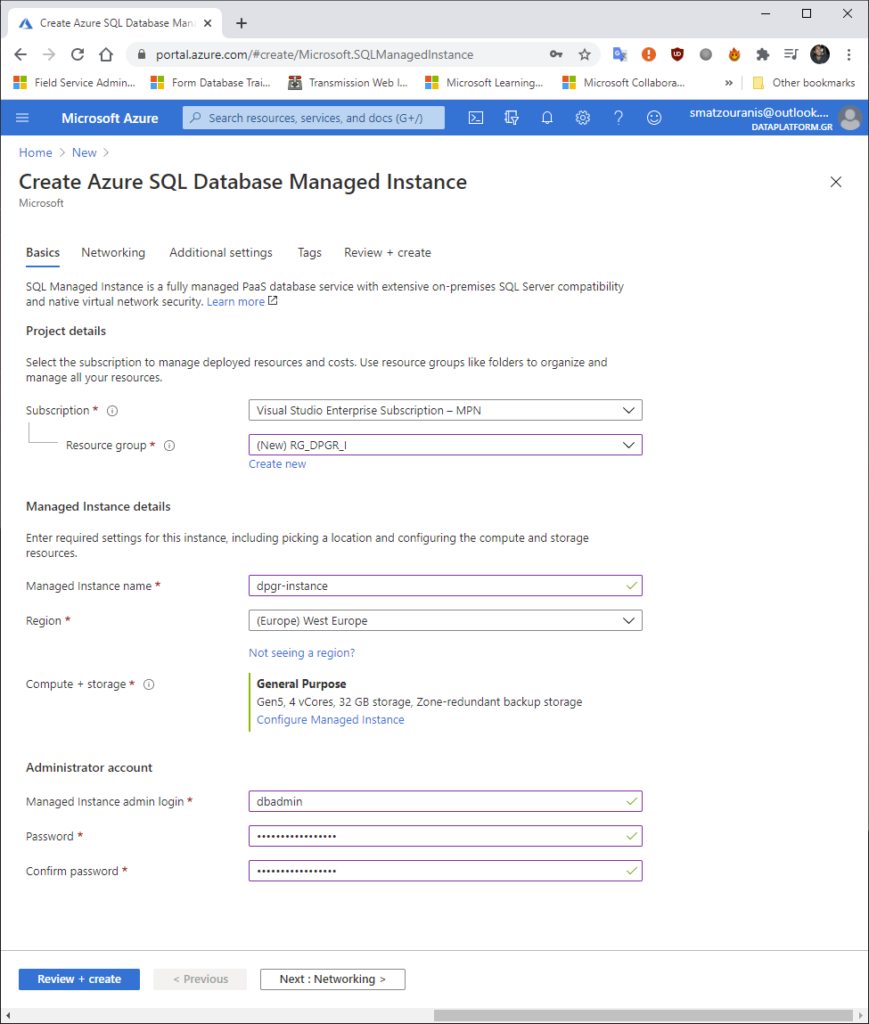
We define it Subscription that we have the charge (in my case I had one so it put it on itself).
The Resource Group it's basically a bucket of our infrastructure so we put one we already have or build a new one with it Create New simply filling in the Data Center it will belong to (I put ours in West Europe).
We put the name we want the instance to have.
We define the credentials we want the local admin to have.
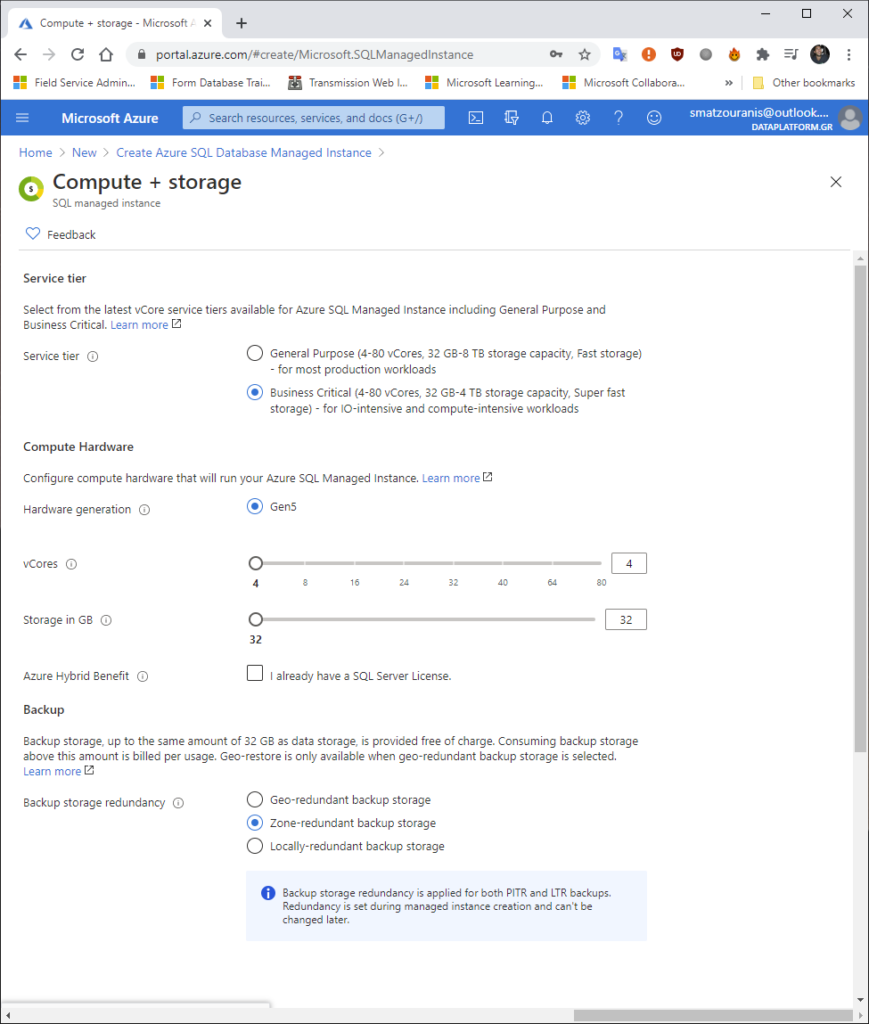
Choosing Configure in the Compute + storage the following image will appear. There we can choose Business Critical if we want to have a service like Availability Group that provides build in a read only replica or leave it General Purpose which from behind is like Failover Cluster Instance with shared Azure Storage.
We have the ability to define the Cores and Storage we need in order to have the corresponding charge.
If we have already purchased a corresponding SQL Server license we can select it Azure Hybrid Benefit which will further reduce the cost.
Finally, we can choose if we want the backups to be stored in different regions, in different data centers that belong to the same zone or only in the specific data center.
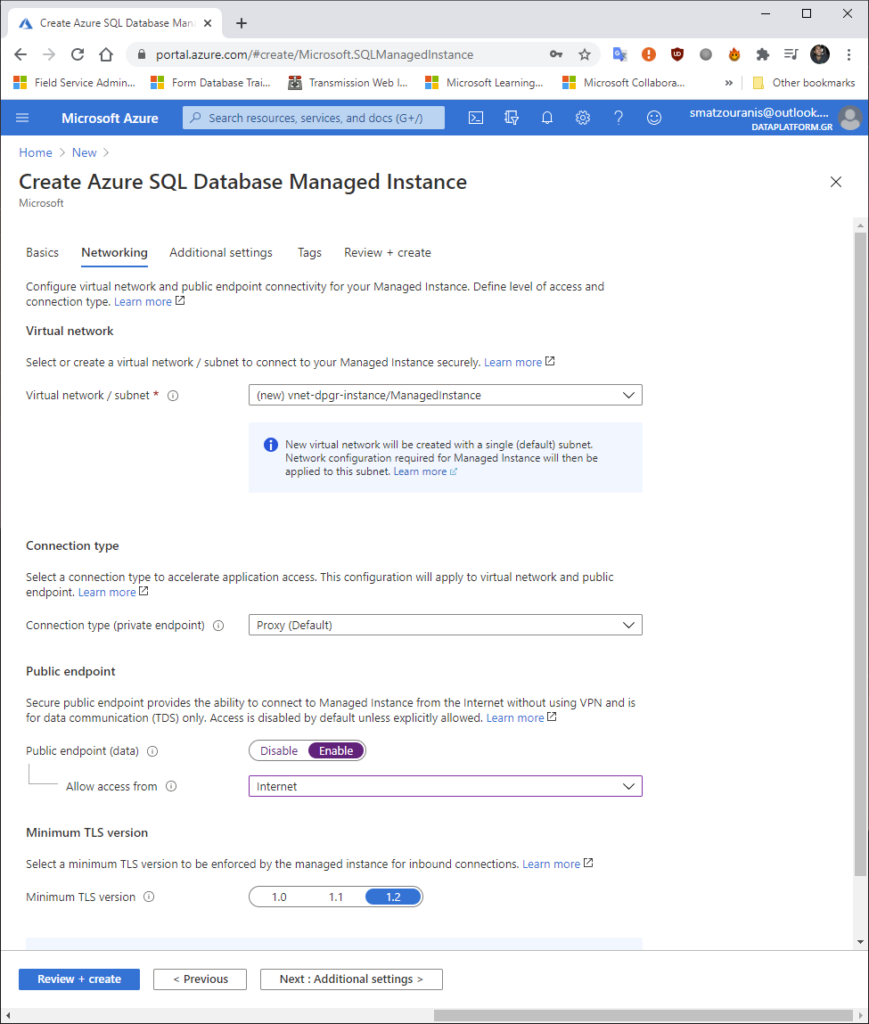
In the next settings we should define the name of the virtual network we will use, if we want it to be open public endpoint with access from the Internet and the security TLS level it will have.
Since, for example, I will not have an application connected but I will want to connect from my terminal via the Internet, I chose it.
Then we define the Collation we want the instance to have. In our case Greek_CI_AS.

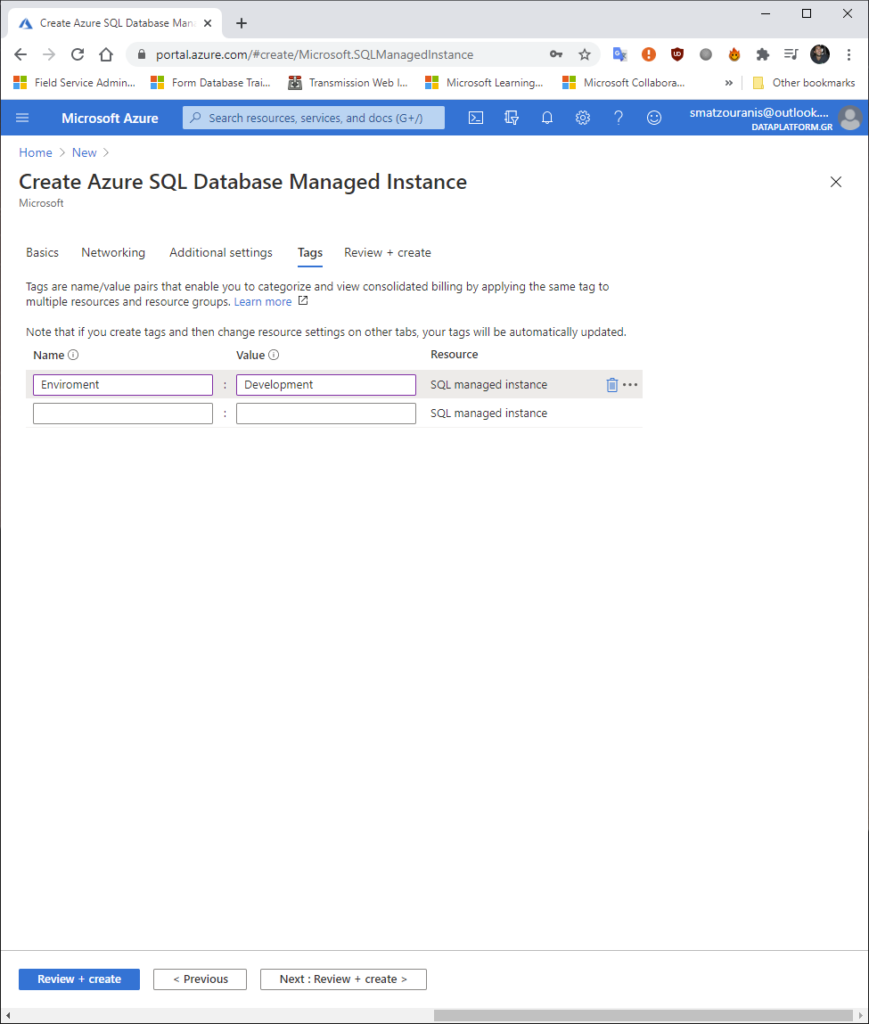
We may add tags so we can search if it is something for Development or is it for a production system.
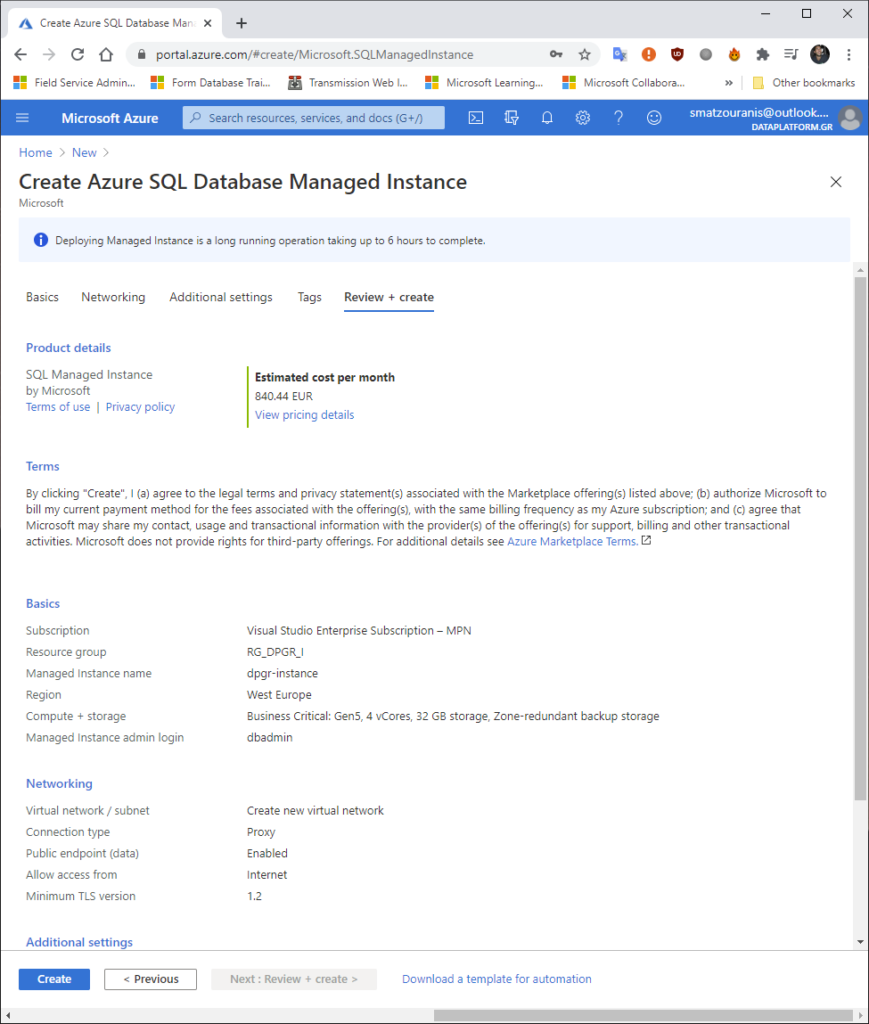
At the end, it shows us a Review with what we have chosen before pressing Create. It also gives us the option to download it as a template so that we can upload a corresponding base any time we want in the future (DevOps).
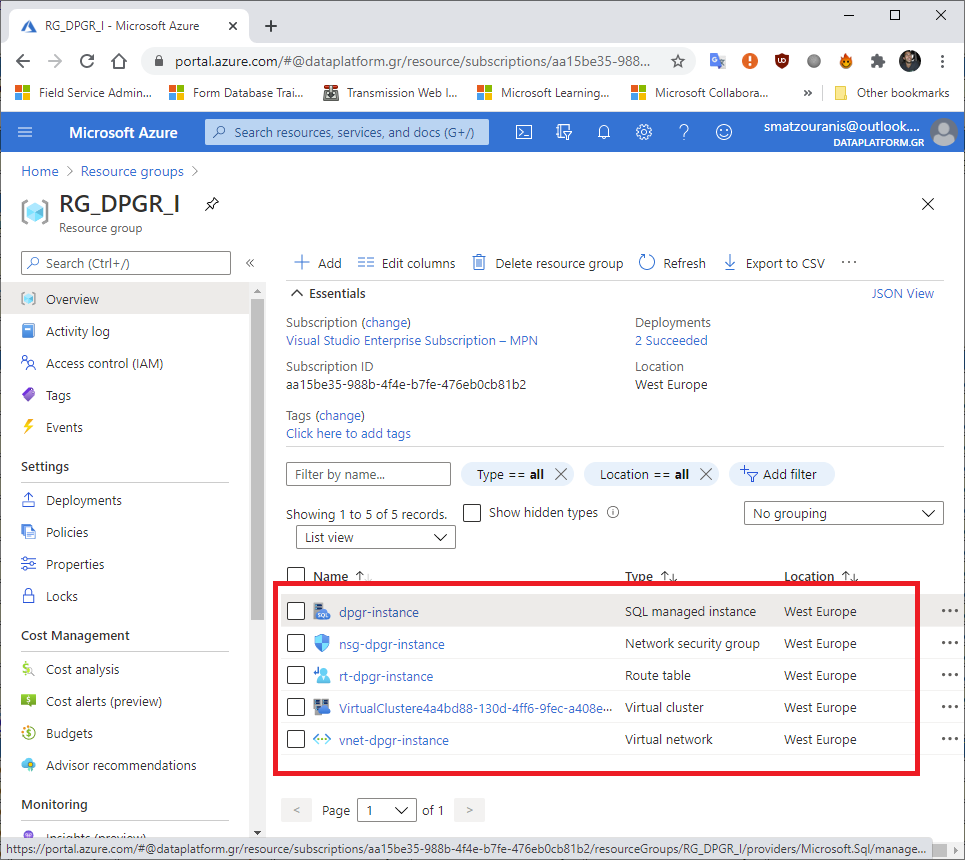
After ~ 4 hours we will see that its creation is complete.
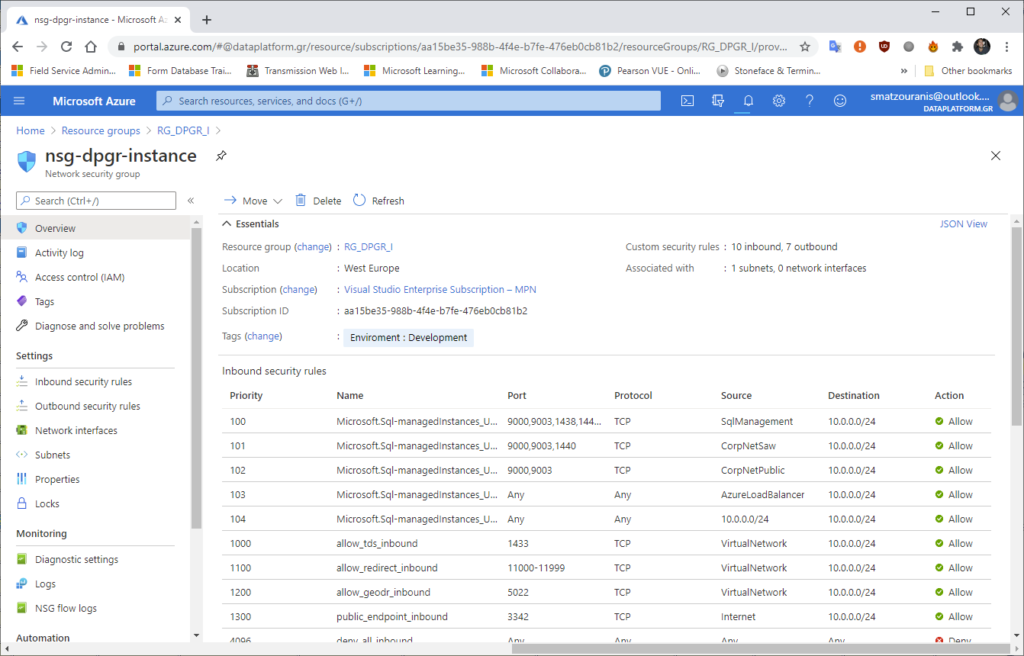
We see that one has been created network security group. From there we can set rules on what connections are allowed and what are not.
To connect we can see the connections strings in the tab below.
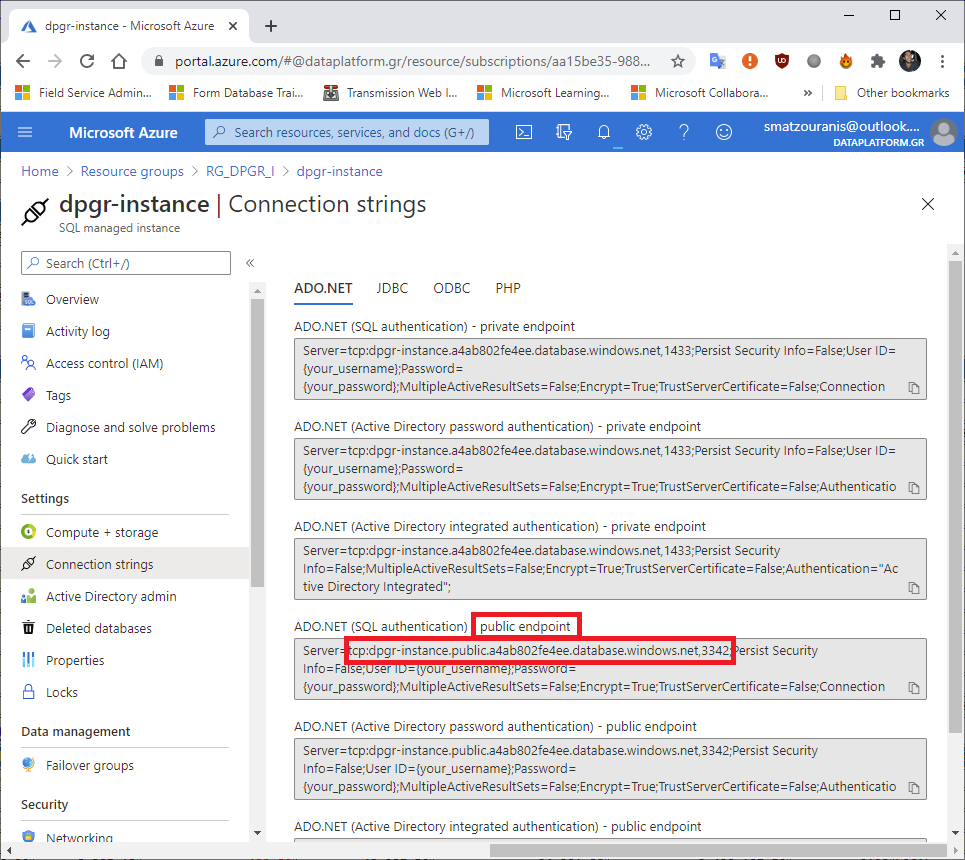
Since we use public endpoint (for direct access from the Internet) defines a different port than 1433.
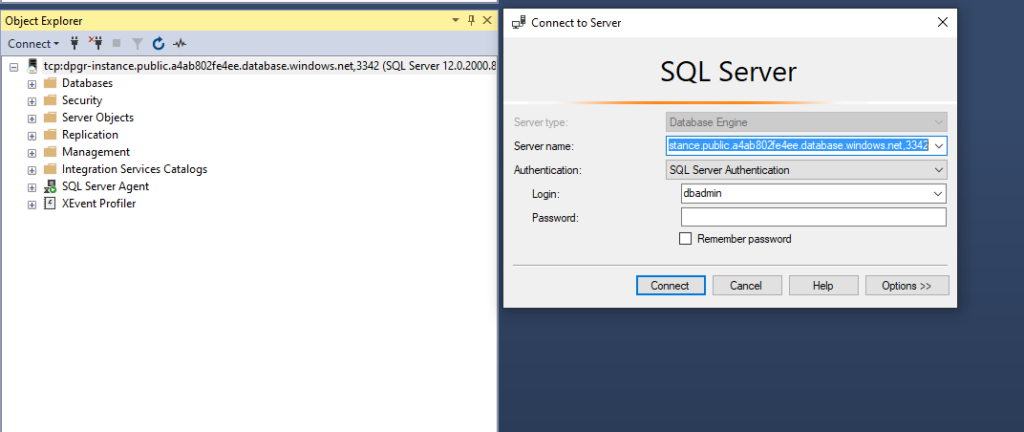
By setting the servername, port and credentials of the admin that he asked us to create at the beginning we can connect through SQL Server Management Studio.
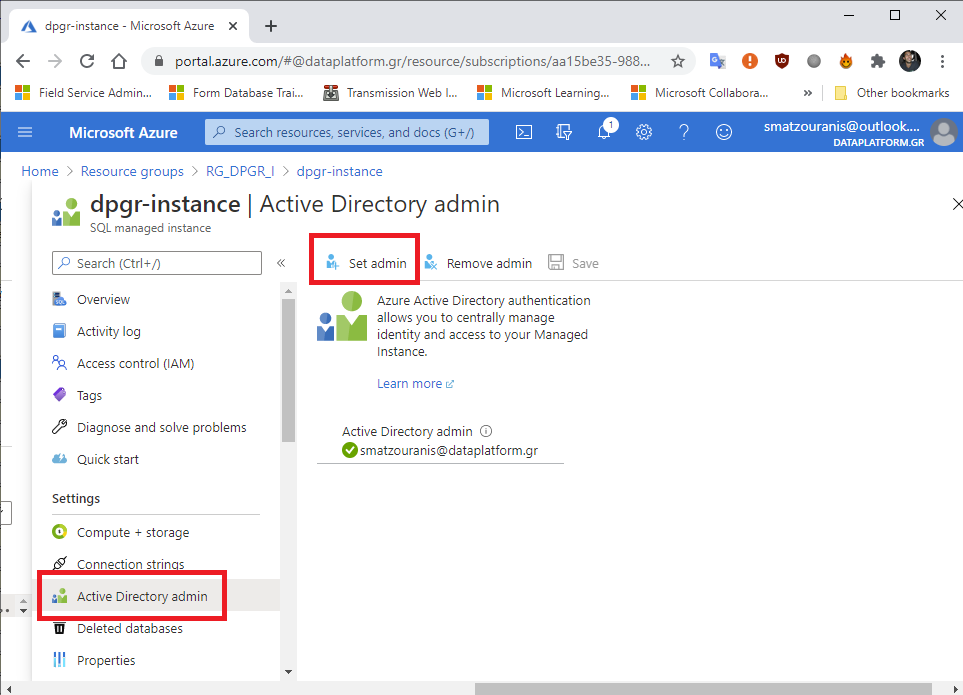
But we can also connect with an account we have created in Azure Active Directory. To grant permissions (RBAC) in accounts we set it to Access Control (IAM). But let's define my account directly as Active Directory Admin, but we see in the image below:
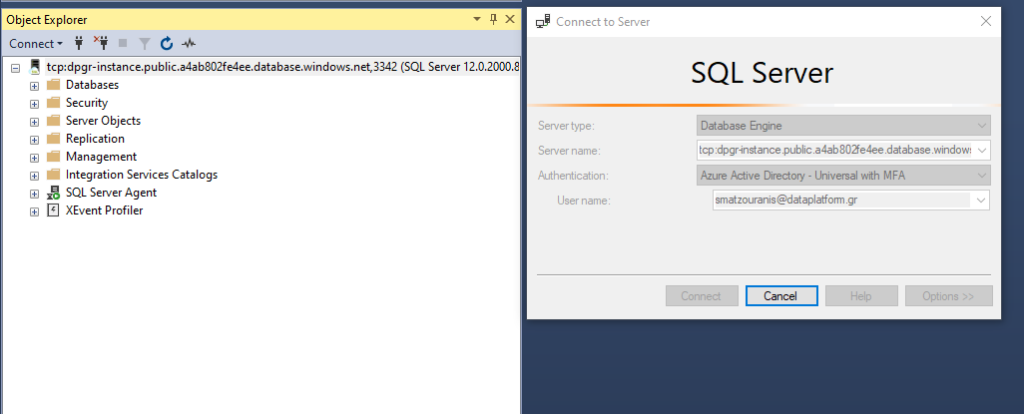
So we can now try connecting to Authentication type Azure Active Directory – Universal with MFA support.
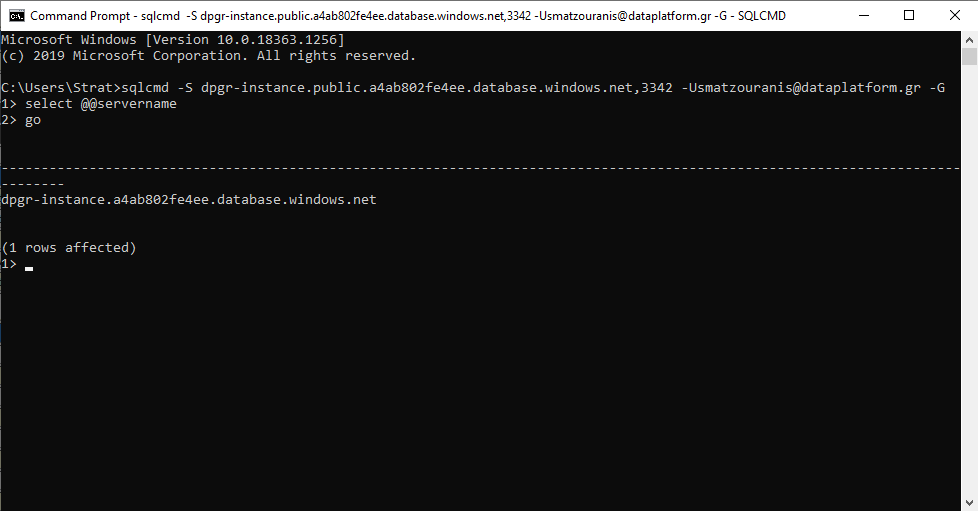
Finally, let's try to connect with sqlcmd directly using your Azure AD account:
sqlcmd -S dpgr-instance.public.a4ab802fe4ee.database.windows.net,3342 -Usmatzouranis@dataplatform.gr -G
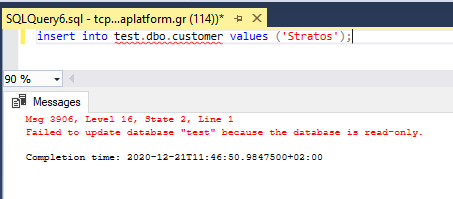
Read Only Replica because of Business Critical Service Tier?
During the creation of the instance we had chosen Business Critical Service Tier so that it provides us with builtin one readonly replica as it works in an Availability Group.
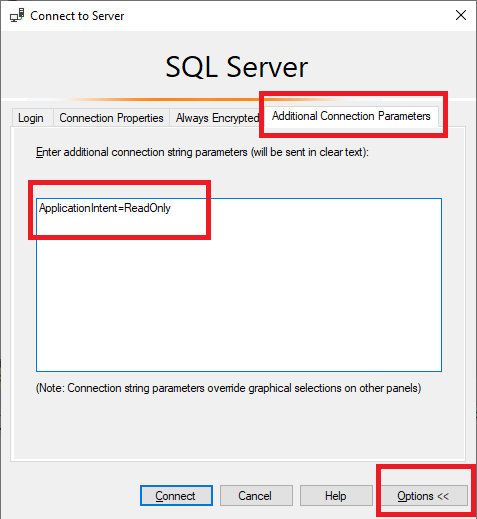
In order to connect to it, we must define the parameter in the connection ApplicationIntent=ReadOnly.
E.g. in SQL Server Management Studio before choosing connect we choose Options, Additional Connection Parameters and fill in the text there ApplicationIntent=ReadOnly.
If we go to perform an insert in a table we will see that we receive this message.