How do we set up a Windows Server as an NFS Server to have shared NFS disks on Unix
- How to convert a database from Physical Standby to Logical Standby in Oracle Data Guard - 2 June 2025
- How to roll back an Oracle Database using a restore point in a Data Guard environment - 28 April 2025
- How can we increase performance on Oracle GoldenGate Replicat target with parallelism? - 19 March 2025
In this article how we can have shared disks between Microsoft Windows Server and Unix through the protocol NFS. We will see step by step how to create a Microsoft Windows NFS Server and how to mount the disks on Unix (RedHat / Oracle Linux 8). In Oracle databases shared disks are necessary in clustering processes such as for installation Oracle Real Application Clusters (RAC) and very useful in Export / Import processes between systems.
The installation
On Windows Server (NFS Server)
For the installation we will use the example of the operating system Microsoft Windows Server 2019 Standard Edition.
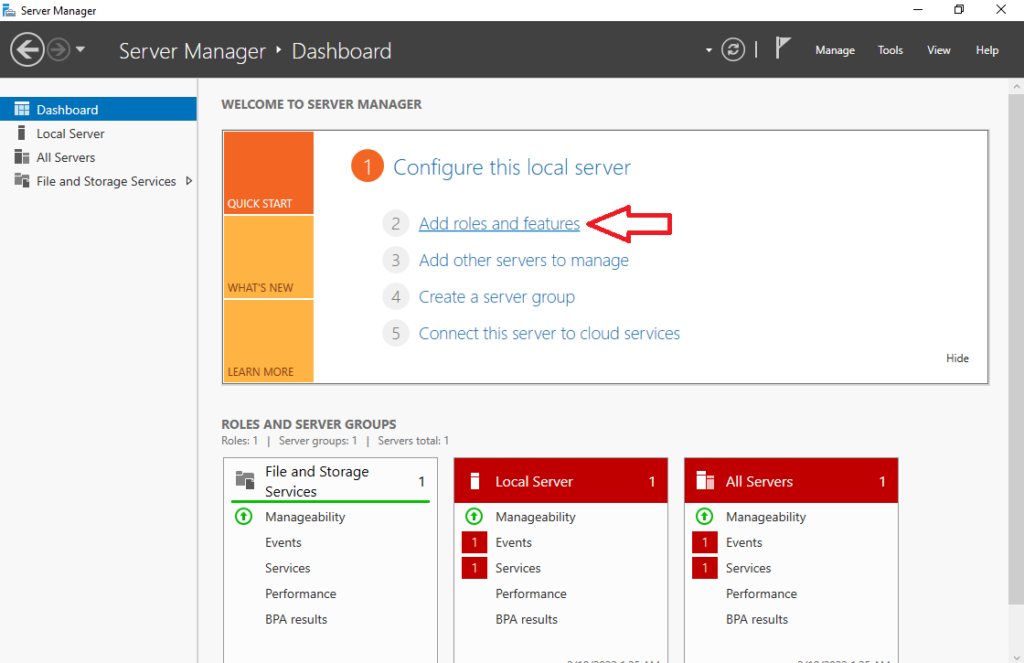
As a first step we select on the screen Server Manager, Add roles and features.
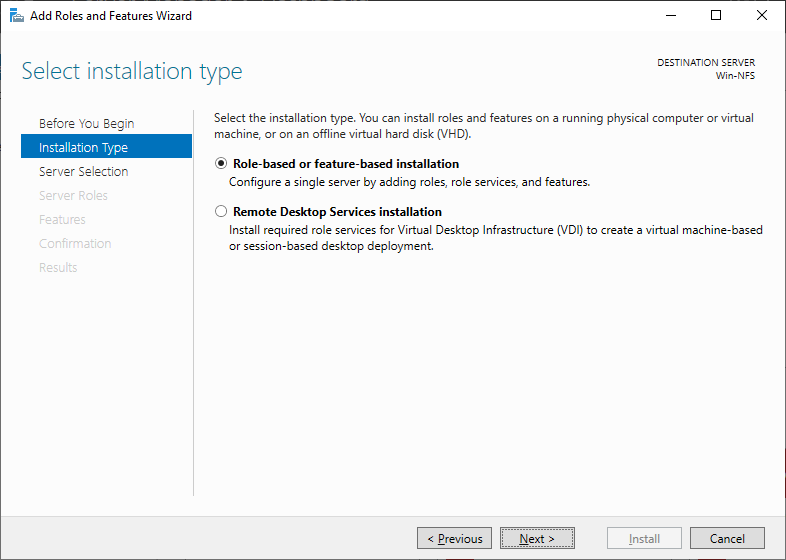
Then in the window that will appear at Installation Type we choose Role-based or feature-based installation.
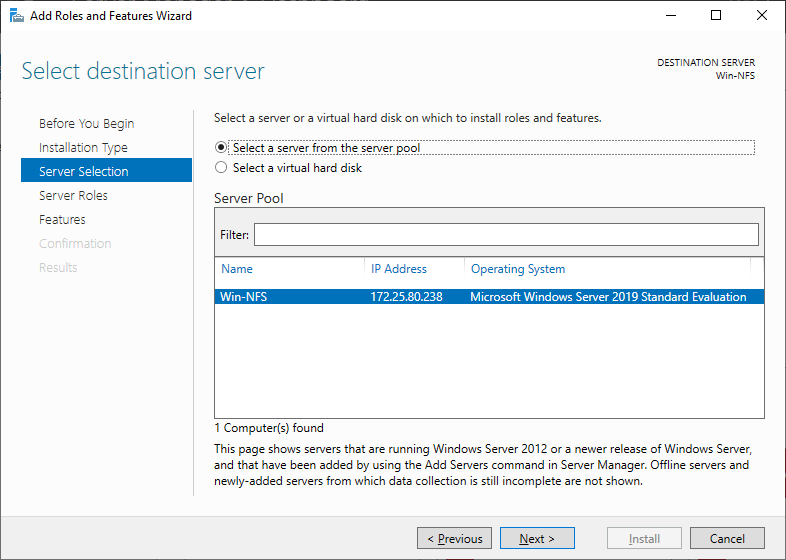
Then we choose Select a server from the server pool and choose our server.
In the next tab with Server Roles we select it Server for NFS located below the File and Storage Services, File and iSCSI Services.
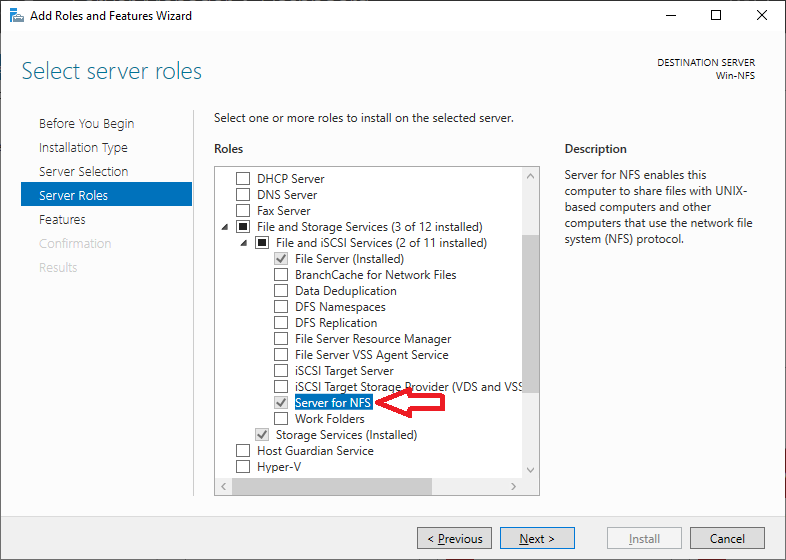
During the installation process it will ask us if we want it to restart and we will choose to do so.
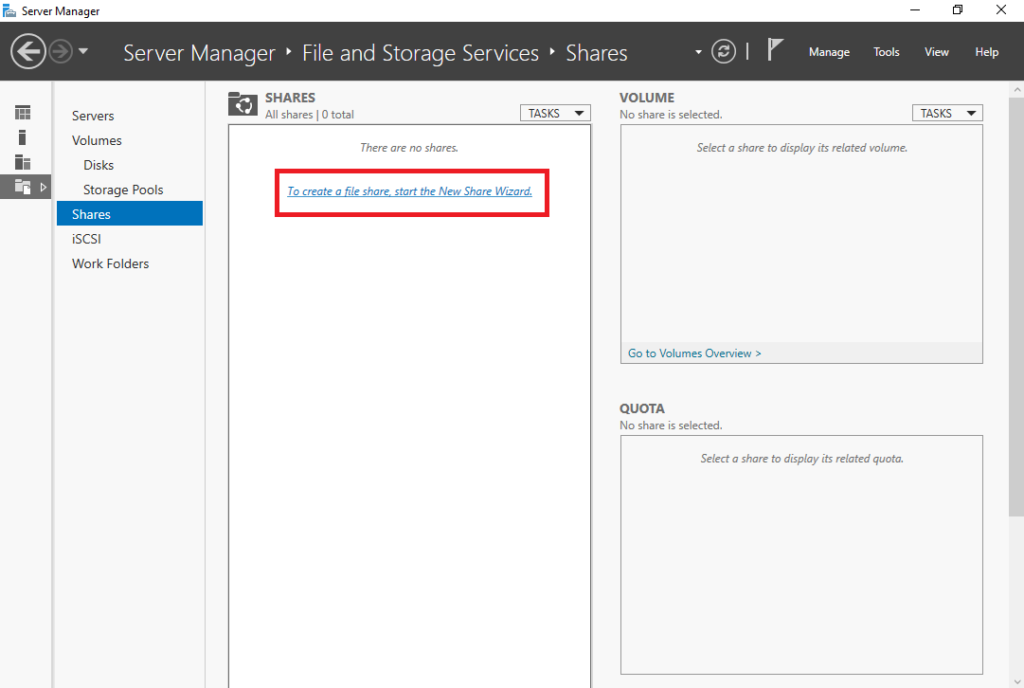
When the server opens again, go to its screen Server Manager, File and Storage Services and Shares. There we click on the option To create a file share, start the New Share Wizard.
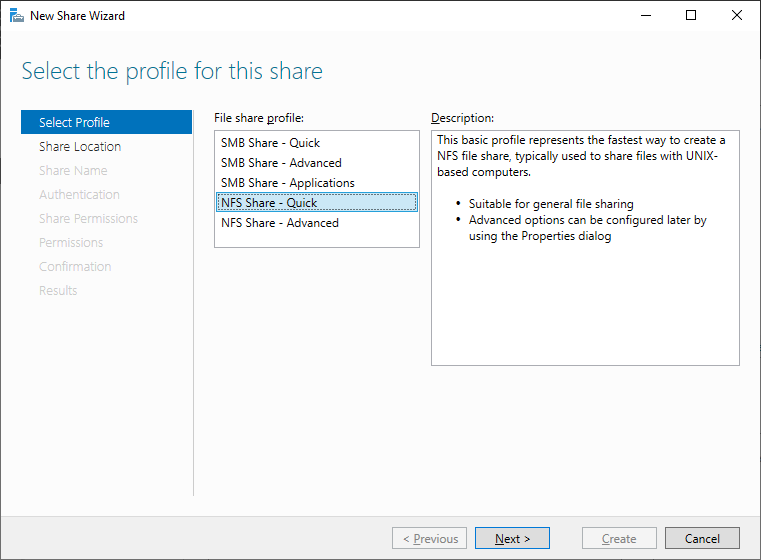
With the Wizard open, we choose NFS Share – Quick.
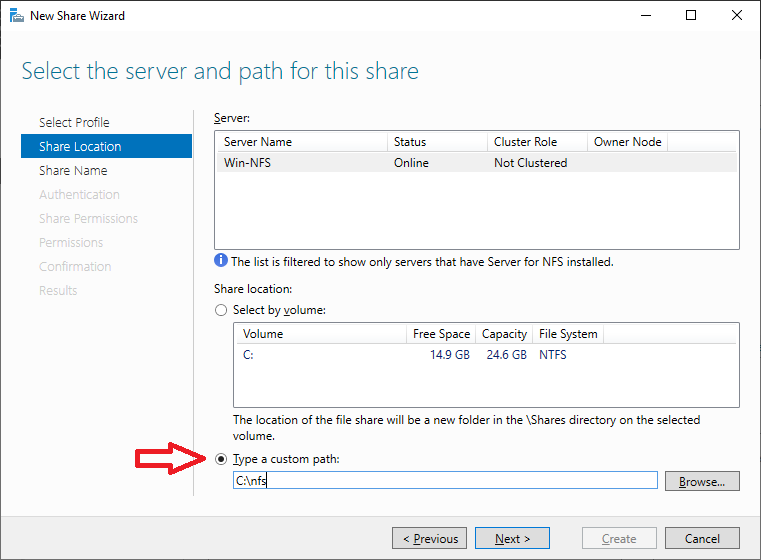
On the next screen we define if we want to do Share entire disk or specific folder. For example I have shared a folder named NFS.
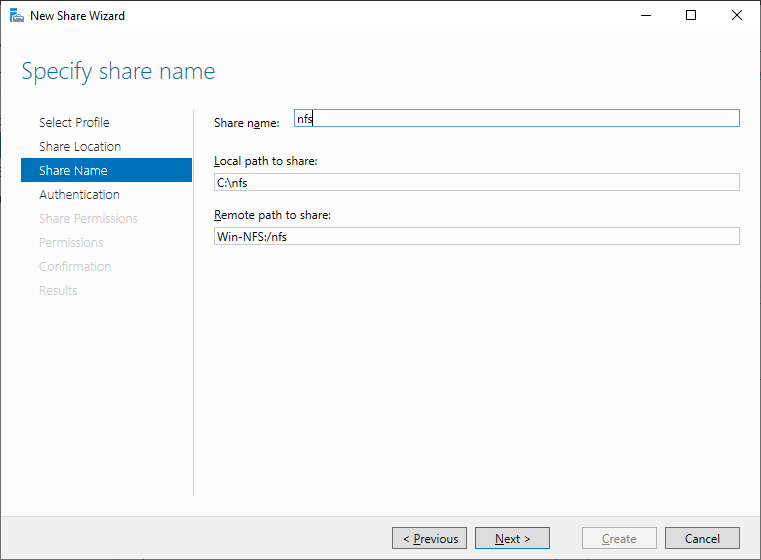
Then we define the name it will have Share and shows us the Remote path to share with which we will be able to mount it on Unix systems.
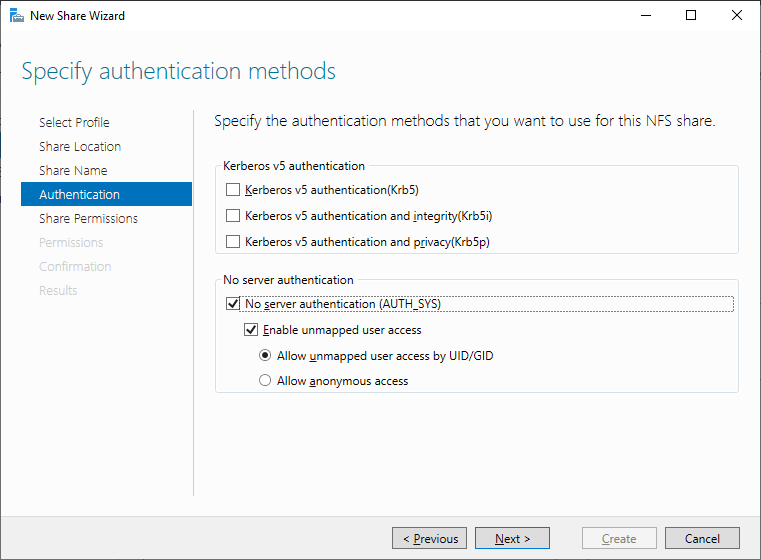
Then we choose the way it will do authentication. For this particular case we choose No server authentication (AUTH_SYS), Enable unmapped user access, Allow Unmapped user access by UID/GID .
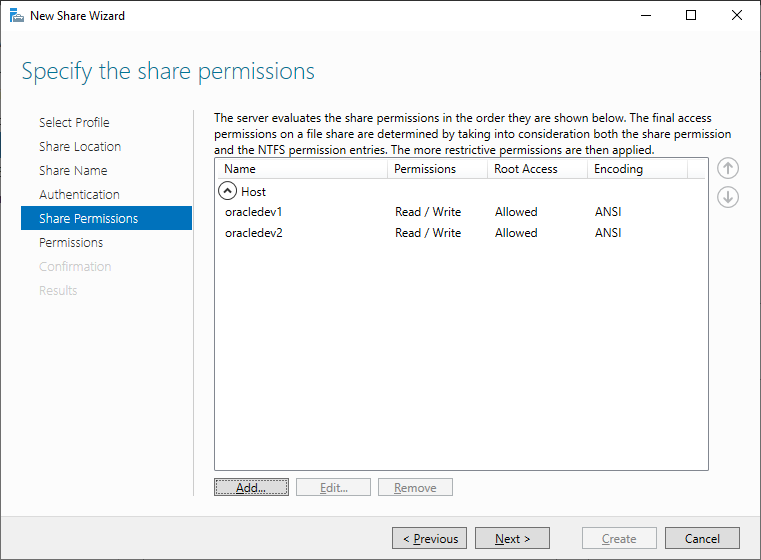
On the next screen selecting Add… we will add the machines that will have access and the right that they will have.
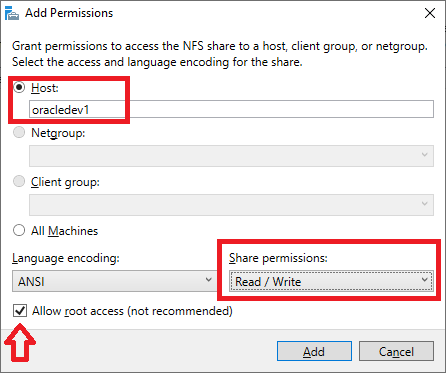
After we choose Add…, we define at Host the name of the machine, as Share permissions Read / Write and Allow root access.
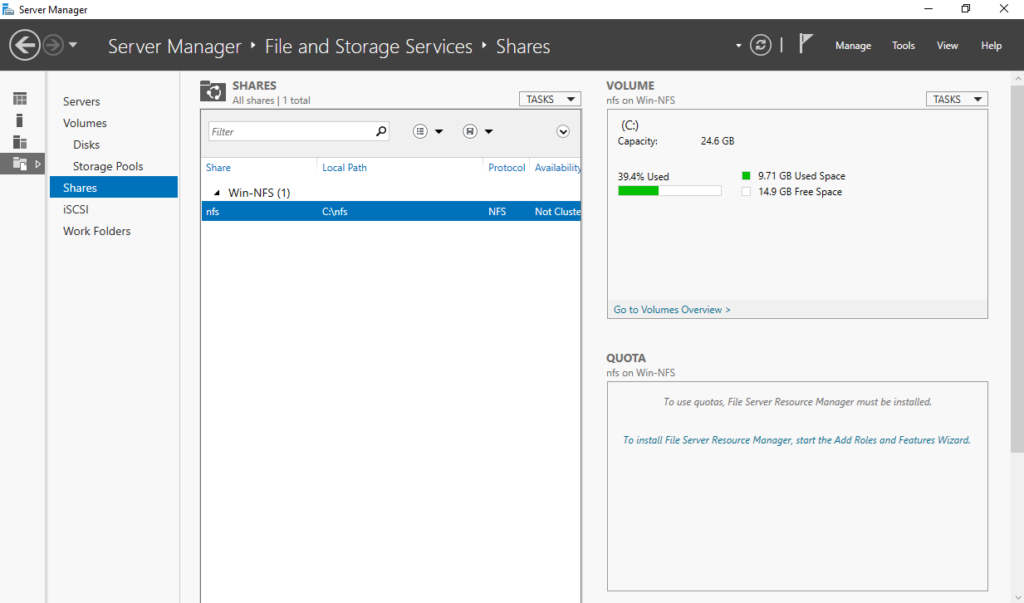
Now we will see that it has been created NFS Share in the Server Manager and we can from the TASKS to repeat the process to add more if desired.
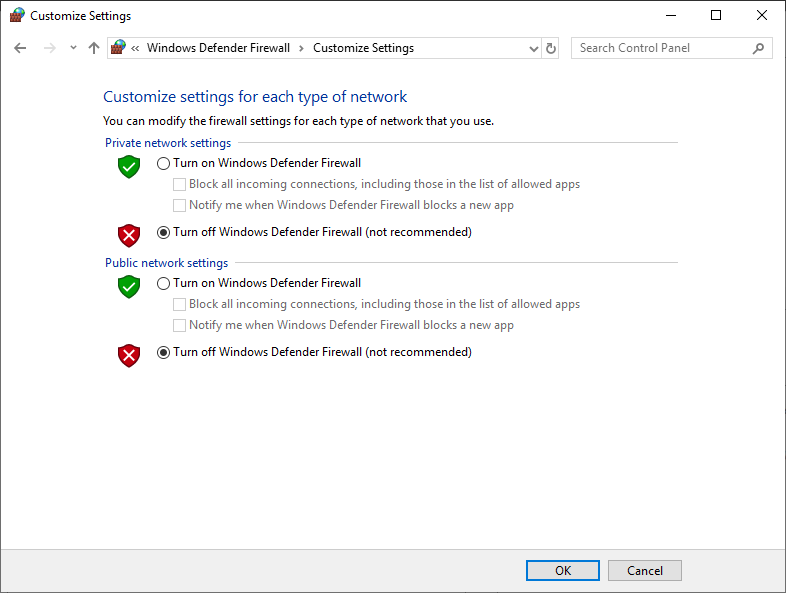
Finally we make sure that it does not cut us Windows Defender Firewall. In this case I turned it off.
On Unix machines
Now we should go to each Unix machine (which in our case is Oracle Linux 8) and do mount the NFS Share.
First we connect with root user:
su rootWe create the folder in which the File System will be mounted:
mkdir -p /oracle/nfsTo be sure that we will not cut our rights to the NFS Server, go to the exports file:
vi /etc/exportsAnd we add the following entry for each mount share:
/oracle/nfs *(rw,sync,no_wdelay,insecure_locks,no_root_squash)
Then we restart the service:
chkconfig nfs on
service nfs restart
Then we go to the fstab file to add the nfs shares we want to mount:
vi /etc/fstabThe only thing we will have to configure from the following. is the first parameter with the Remote path to share (image 08) and the name of the folder we created to mount the File System:
win-nfs:/nfs /oracle/nfs nfs rw,bg,hard,nointr,tcp,vers=3,timeo=600,rsize=32768,wsize=32768,actimeo=0 0 0
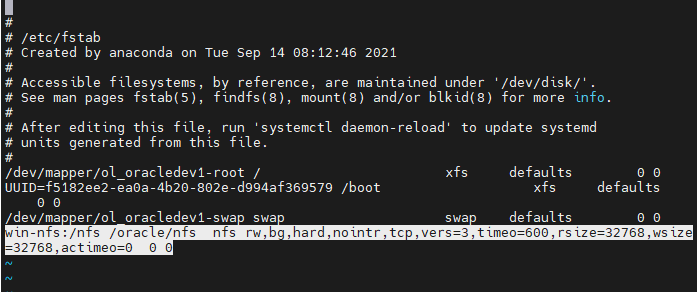
Then we mount it NFS Share with the following command with the name of the folder we set to mount:
mount /oracle/nfsFinally, define the user we want to be the owner of this folder and the rights he will have (the folder):
chown -R oracle:oinstall /oracle/nfs
chmod -R 775 /oracle/nfs
To see that the disk has been mounted, execute the following:
dfAnd to see the owner and the rights of the folder that has been mounted in the File System, we run the following:
ls -la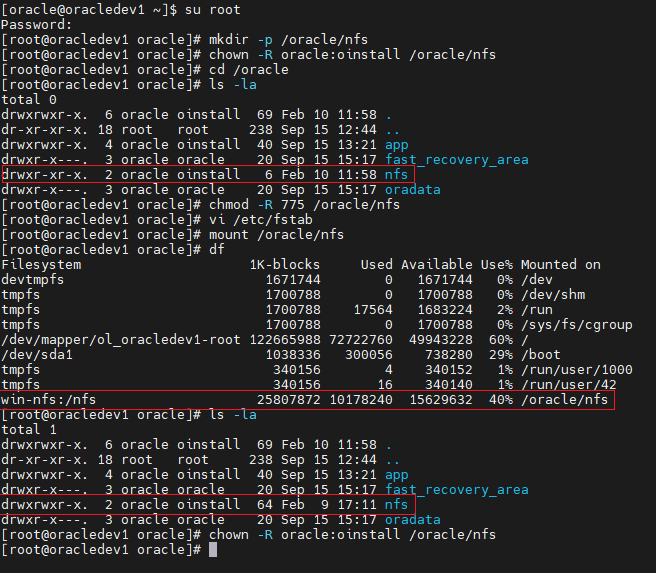
If we want to add other NFS Shares we repeat the process.


