How to install Enterprise Manager Cloud Control for Oracle database monitoring and administration

- How to convert a database from Physical Standby to Logical Standby in Oracle Data Guard - 2 June 2025
- How to roll back an Oracle Database using a restore point in a Data Guard environment - 28 April 2025
- How can we increase performance on Oracle GoldenGate Replicat target with parallelism? - 19 March 2025
In this article we will see how to install it step by step Oracle Enterprise Manager Cloud Control in Oracle Linux / Red Hat Linux. This tool provides the ability to manage Oracle databases through a centralized web interface. It not only manages the databases installed on the local server, but also those that are remote.
Some features it offers us:
- Performance dashboards per hardware resource and per service that uses it.
- Security management such as user access, profiles, data masking and transparent data encryption.
- Backup programming.
- Task scheduling.
- Manage and install High Availability such as Data Guard.
- Management of the size of the tablespaces and data / log / control files that make up the database.
- Management of the base schema in tables, views, indexes, procedures, triggers, etc.
- Export performance reports such as blocking sessions, AWR, ADDM and ASH.
- Execute Export/Import tasks of the base.
- Run performance tuning tools like SQL Tuning Advisor, SQL Access Advisor.
- View Alert Log and trace file.
The prerequisites
We should have installed the software for Oracle Database. The steps are detailed in the article here.
In case the installation is in Oracle Linux 8 / Red Hat Linux 8 the following libraries should be installed if they are not already:
*if we have followed the steps to install the Oracle Database software as mentioned there is no need to install them again.
binutils-2.30-49.0.2.el8
gcc-8.2.1-3.5.0.1.el8
gcc-c++-8.2.1-3.5.0.1.el8
glibc-2.28-42.0.1.el8.x86_64
glibc-devel-2.28-42.0.1.el8.x86_64
glibc-devel-2.17-55-i686
libaio-0.3.110-12.el8.x86_64
libaio-devel-0.3.110-12.el8.x86_64
libgcc-8.2.1-3.5.0.1.el8.x86_64
libstdc++-8.2.1-3.5.0.1.el8.x86_64
libstdc++-devel-8.2.1-3.5.0.1.el8.x86_64
libnsl.x86_64
sysstat-11.7.3-2.el8
motif-2.3.4-16.el8.x86_64
motif-devel-2.3.4-16.el8.x86_64
redhat-lsb-4.1-47.0.1.el8.x86_64
redhat-lsb-core-4.1-47.0.1.el8.x86_64
openssl-1.1.1-8.0.1.el8
make-4.2.1-9.el8
We should download the software for it Oracle Enterprise Manager Cloud Control from the official Oracle site here.
The installation
Installing the base repository
To begin with, we should create a repository base for the application. So after we have installed the Oracle Database software, we execute the following command with the oracle user through a terminal that brings up a graphic:
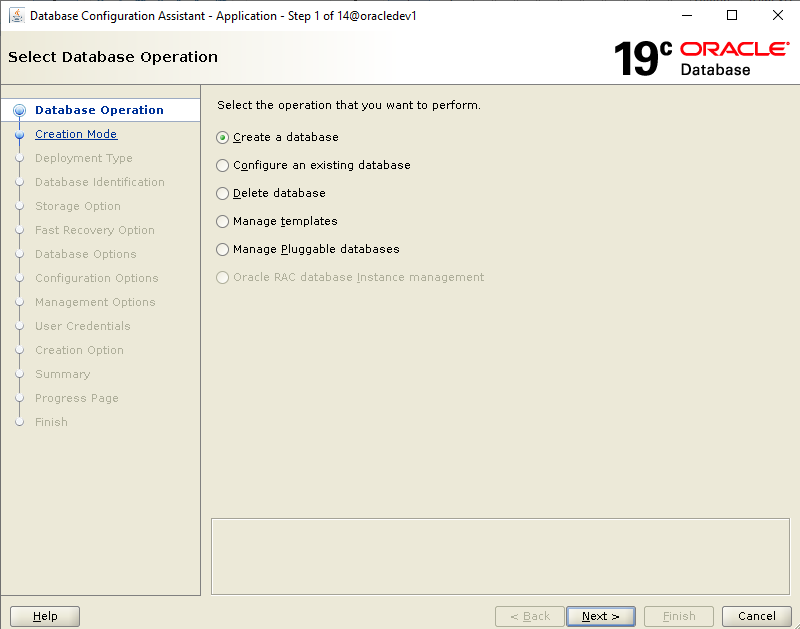
$ORACLE_HOME/bin/dbcaAs a first choice we choose Create a database:
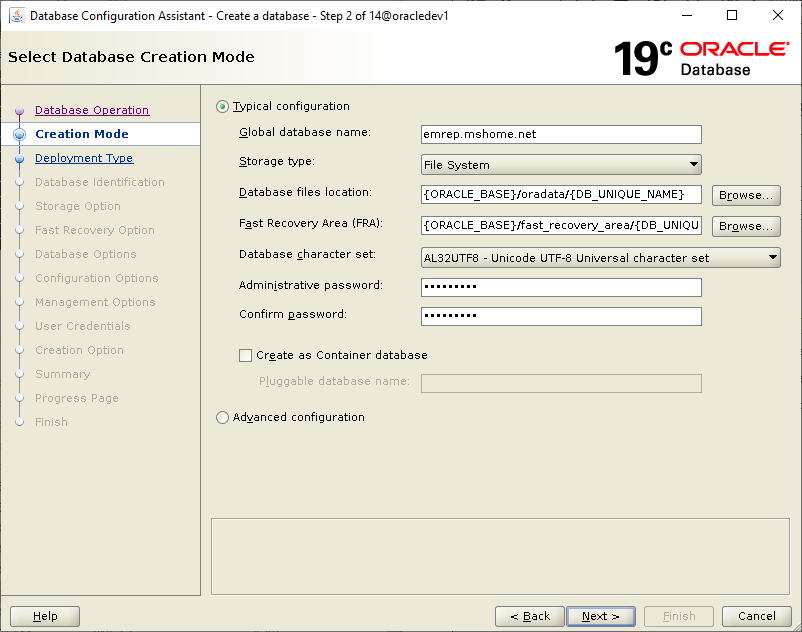
We leave the choice Typical configuration and we define it base name (emrep), the Administrator password and remove the option Create as Container database:
After the installation is complete we connect to the base with sqlplus and run the following settings.
In the terminal we write:
export ORACLE_SID=emrep

sqlplus / as sysdba
And after we connect to sqlplus the following accompanied by a base restart:
alter system set parallel_min_servers=0 scope=both;
alter system set "_allow_insert_with_update_check"=true scope=both;
alter system set session_cached_cursors=200 scope=spfile;
alter system set processes=600 scope=spfile;
alter system set pga_aggregate_target=450M scope=both;
alter system set sga_target=800M scope=both;
alter system set shared_pool_size=600M scope=both;
alter system set parallel_max_servers=8 scope=both;
exec DBMS_AUTO_TASK_ADMIN.DISABLE;
shutdown immediate;
startup;
exit;
Installing the software for Oracle Enterprise Manager Cloud Control
First, we create the two folders where the software will be installed. THE middleware contains the software for hosting the application and o agent the software that collects the data:
mkdir -p /oracle/app/oracle/middleware
mkdir -p /oracle/app/oracle/agent
We set these two paths in the user environment:
export OMS_HOME=/oracle/app/oracle/middleware

export AGENT_HOME=/oracle/app/oracle/agent
We can add them permanently to bash_profile so we don't write them every time we connect:
vi $HOME/.bash_profileThen we go to the folder where we downloaded the software and start the installer:
cd $HOME/Downloads

./em13500_linux64.bin
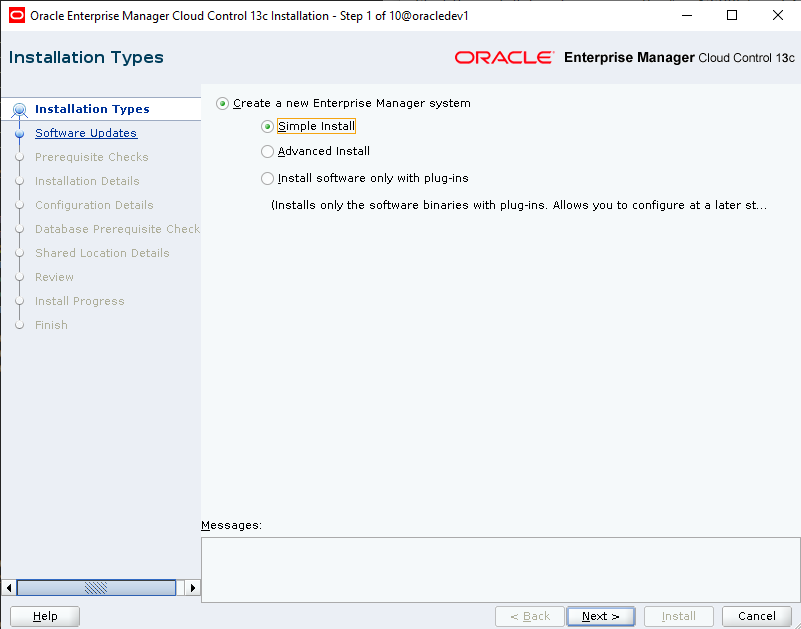
On its first screen we choose Simple Install:
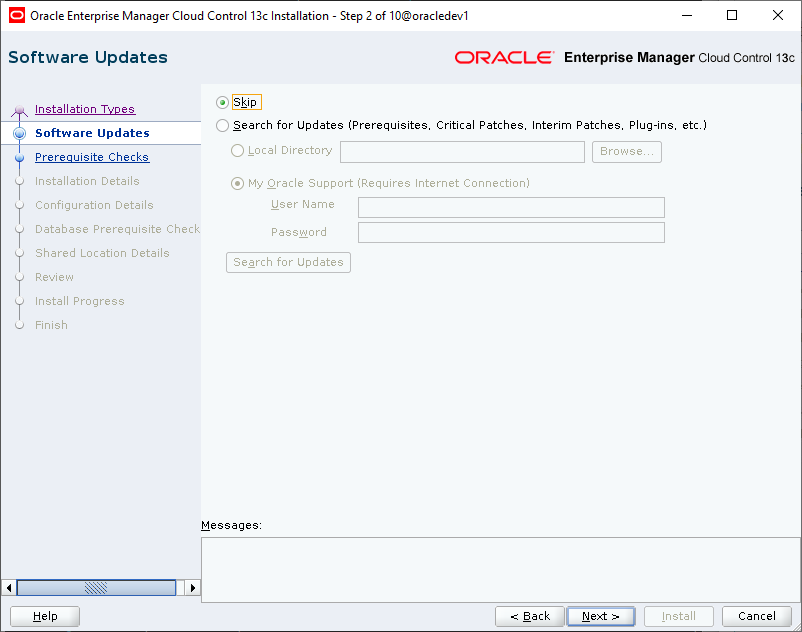
Afterward Skip:
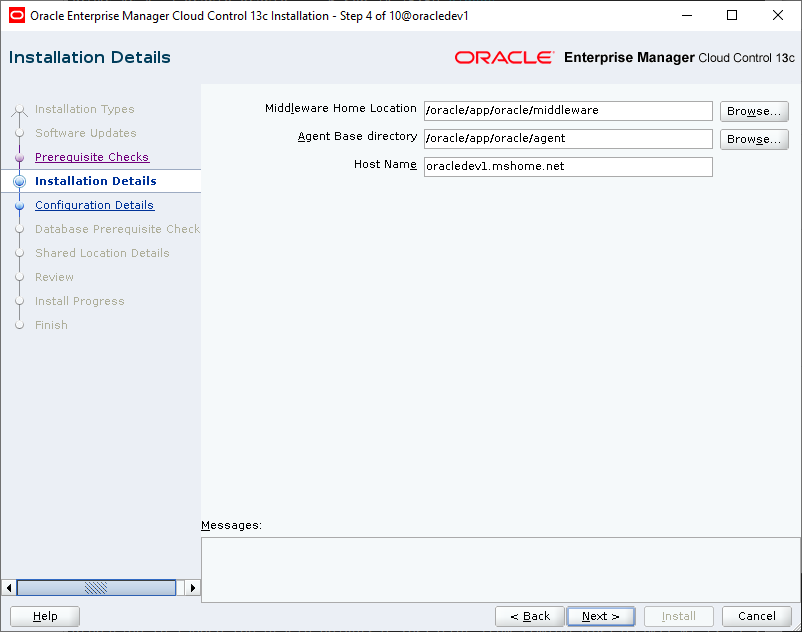
On the next screen, put the two paths with the folders we created before and the hostname:
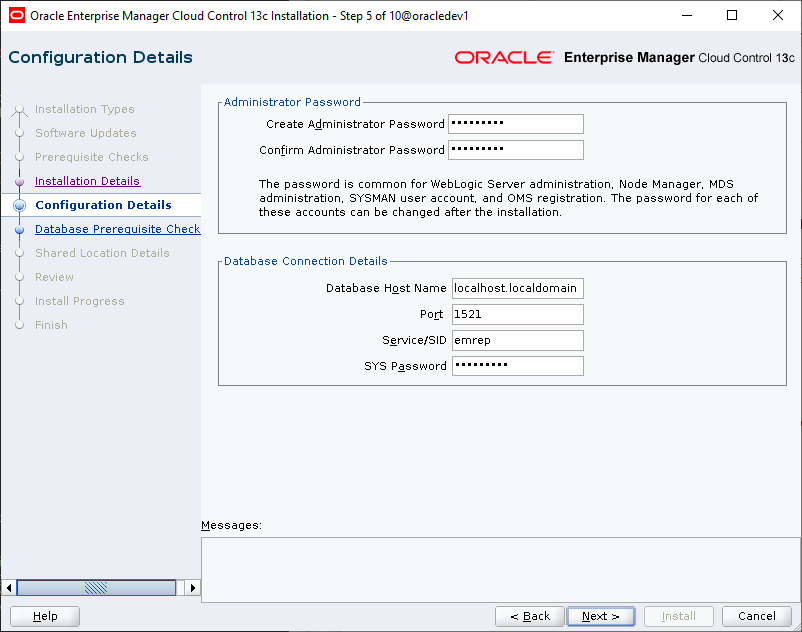
Next we set the password for the user sysman with which we will connect to the web interface, as host name localhost.localdomain, the door, the name of the base and its code:
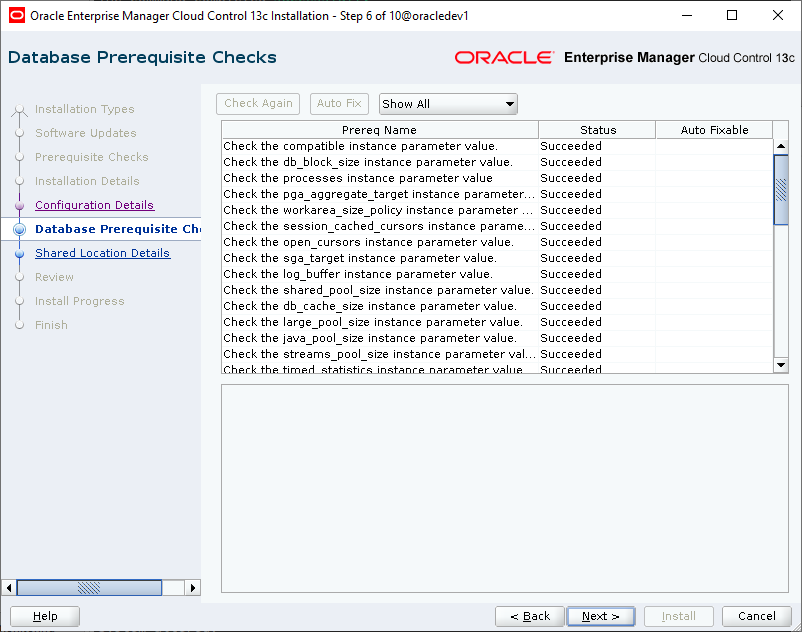
Before starting the installation it will check that there is no setting error. In some of them it gives us the possibility to Auto Fix:
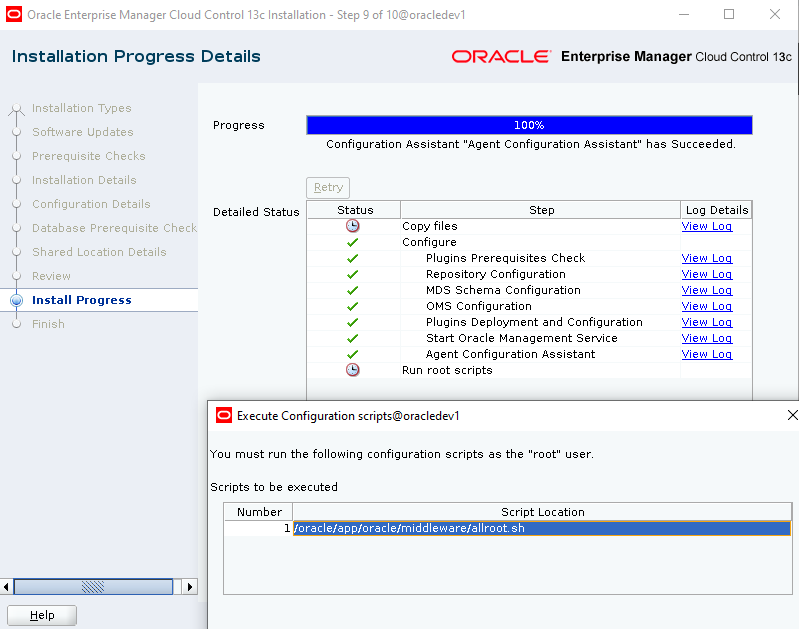
Then when the installation is complete we will be asked to run a script with the root user on the operating system:
At the end it will show us the information with which we can connect to the web interface:
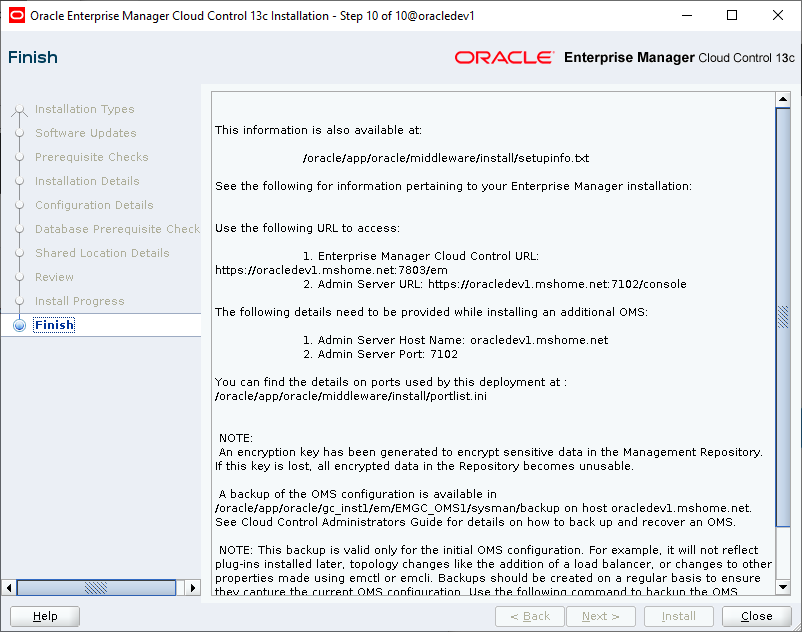
We can see this information and the status of the service again in the future with the following command:
$OMS_HOME/bin/emctl status oms -details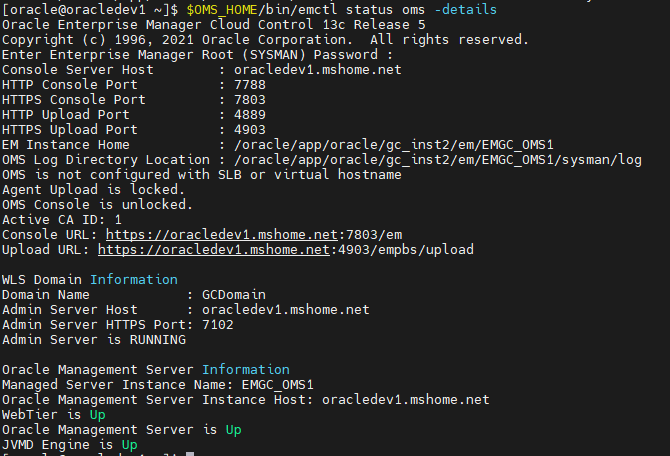
Using Oracle Enterprise Manager Cloud Control
We can finally connect to the Enterprise Manager web interface by copying the above link into the web browser. For example if we want to connect with the HTTP protocol, we put the following:
http://oracledev1.mshome.net:7788/emTo connect, enter the user's credentials sysman which we created during installation:
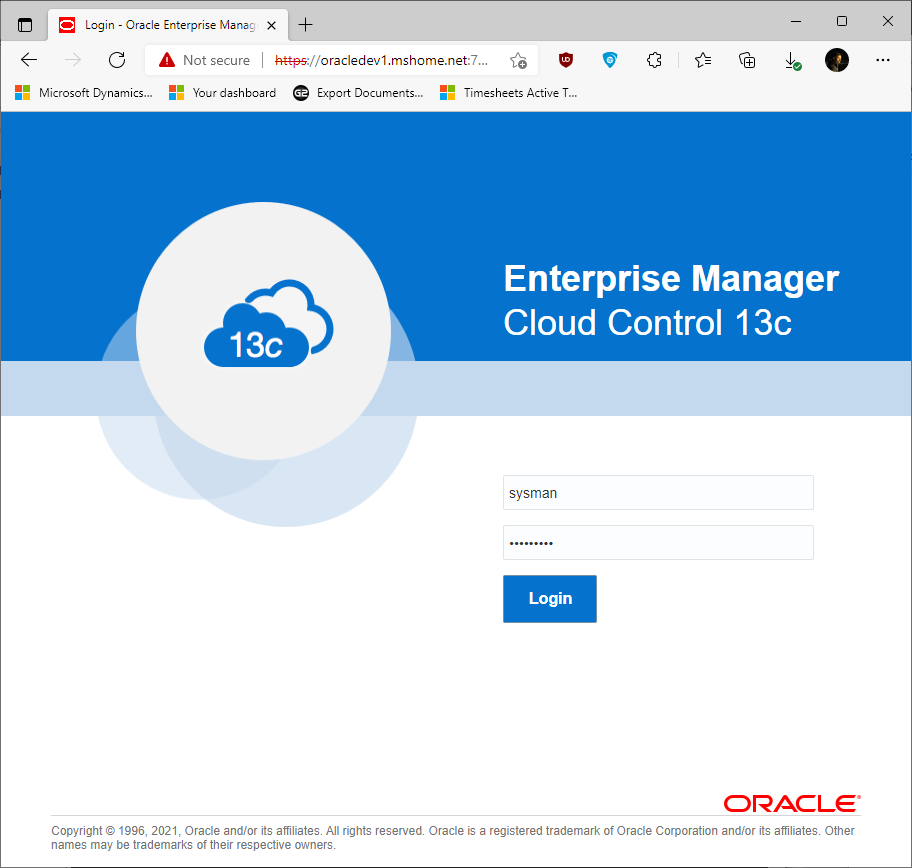
As soon as we connect, it will ask us which web interface template we want to use. In our case we want for Database Administration.
On the home screen there are as many databases as have been added to be managed by the Enterprise Manager.
To add bases for management we select Setup, Add Target, Add Targets Manually:
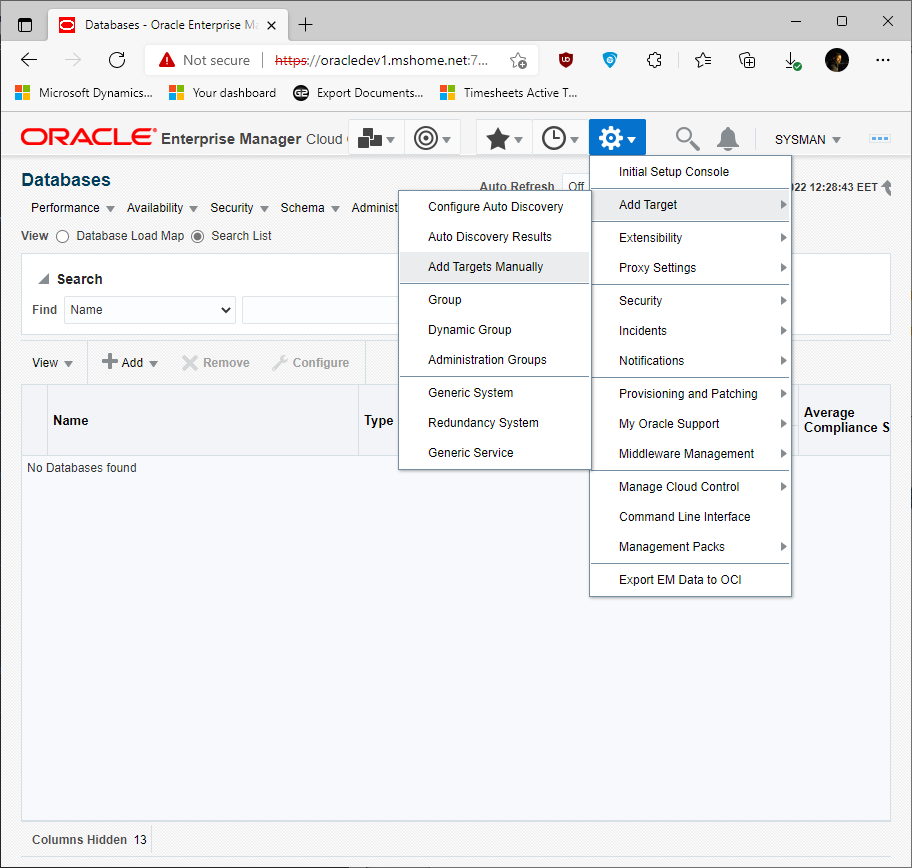
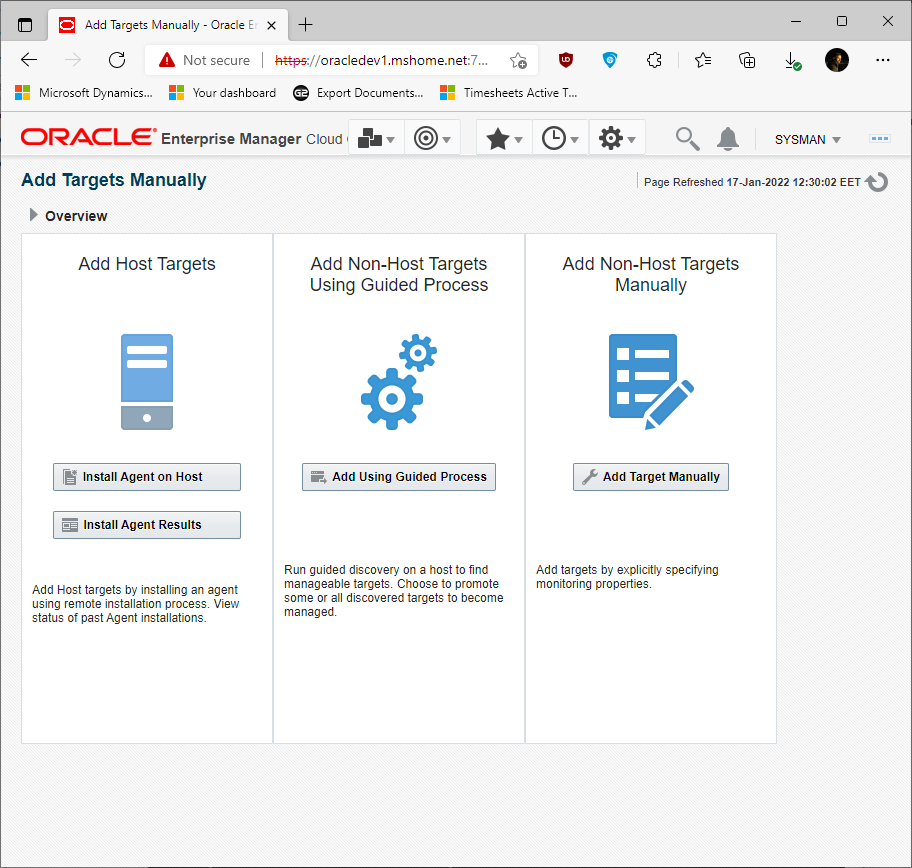
Then we choose Install Agent on Host to install the software on other servers that host databases that we want to manage:
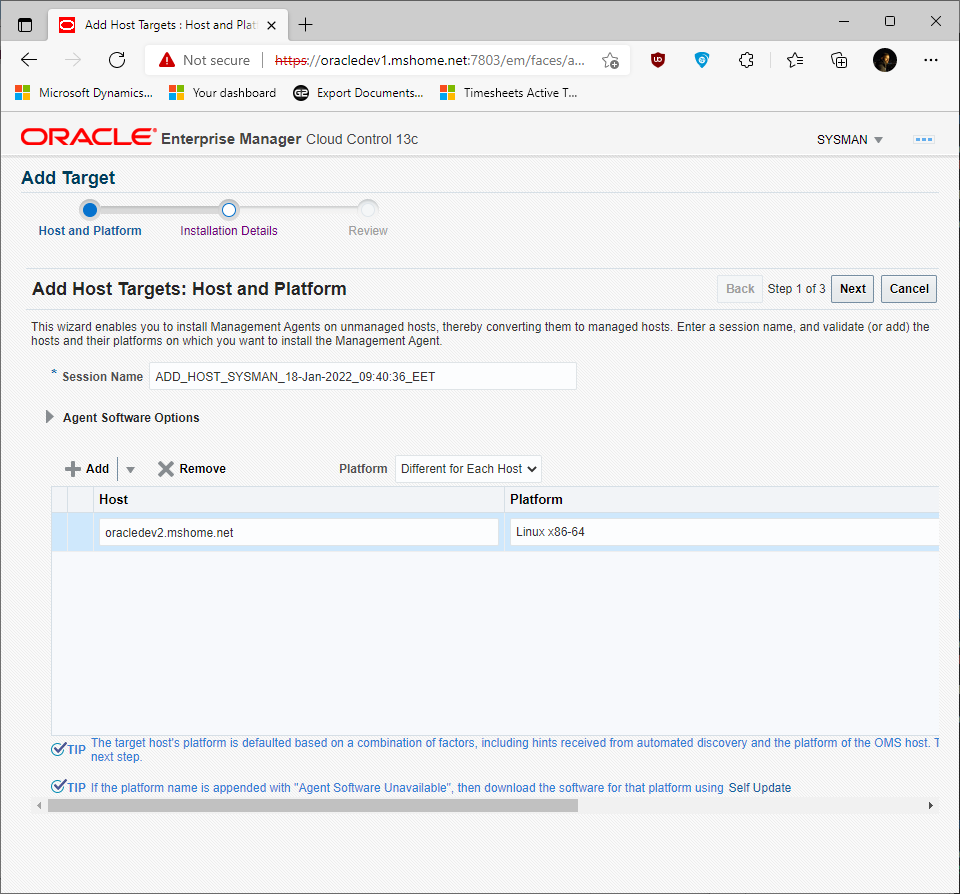
On the next screen we choose Add, we complete it hostname and operating system which the remote database server uses:
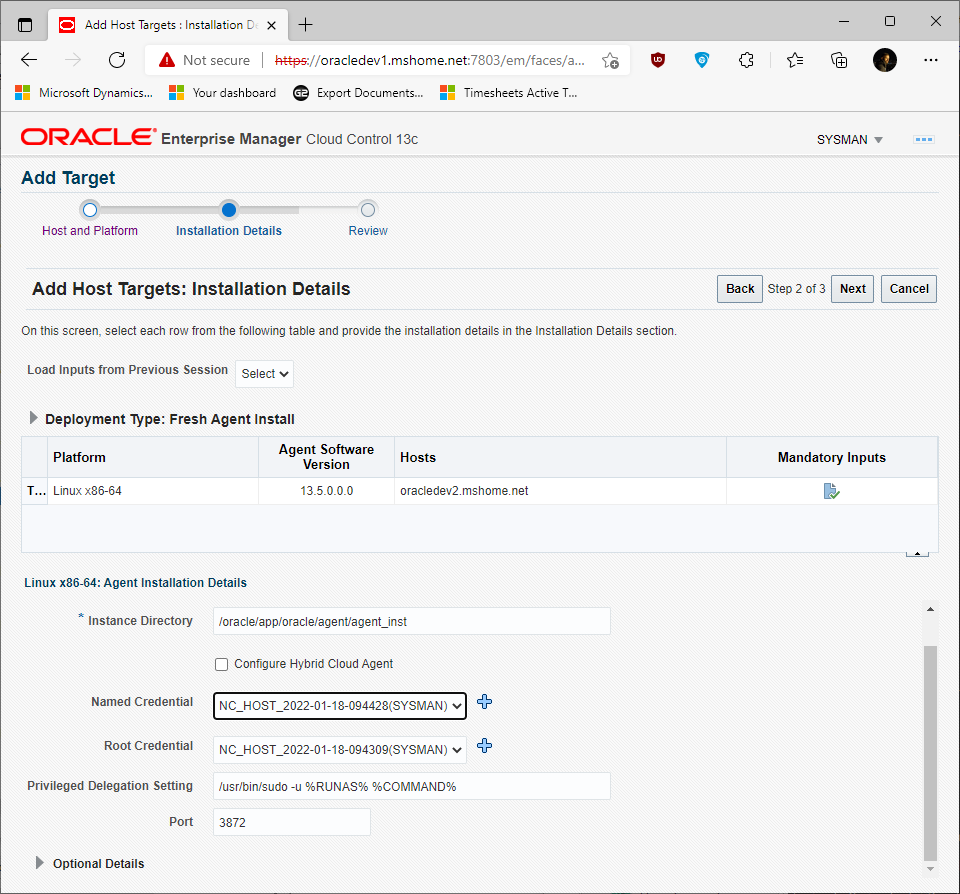
Then we define the path where the agent software will be installed and the credentials for Oracle and the Root user that will be used for the installation:
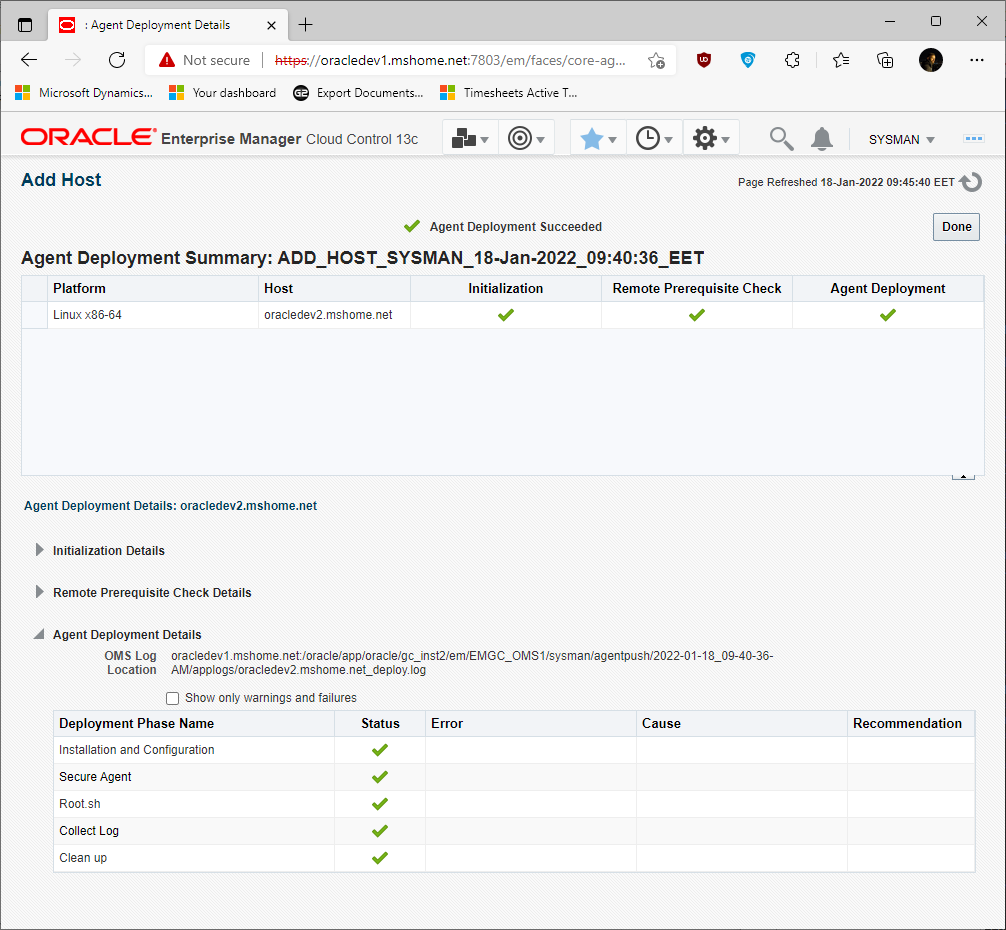
When the installation is complete it will inform us that the Agent deployment was successful:
To add the bases, we go back to the main screen and select Add, Oracle Database:
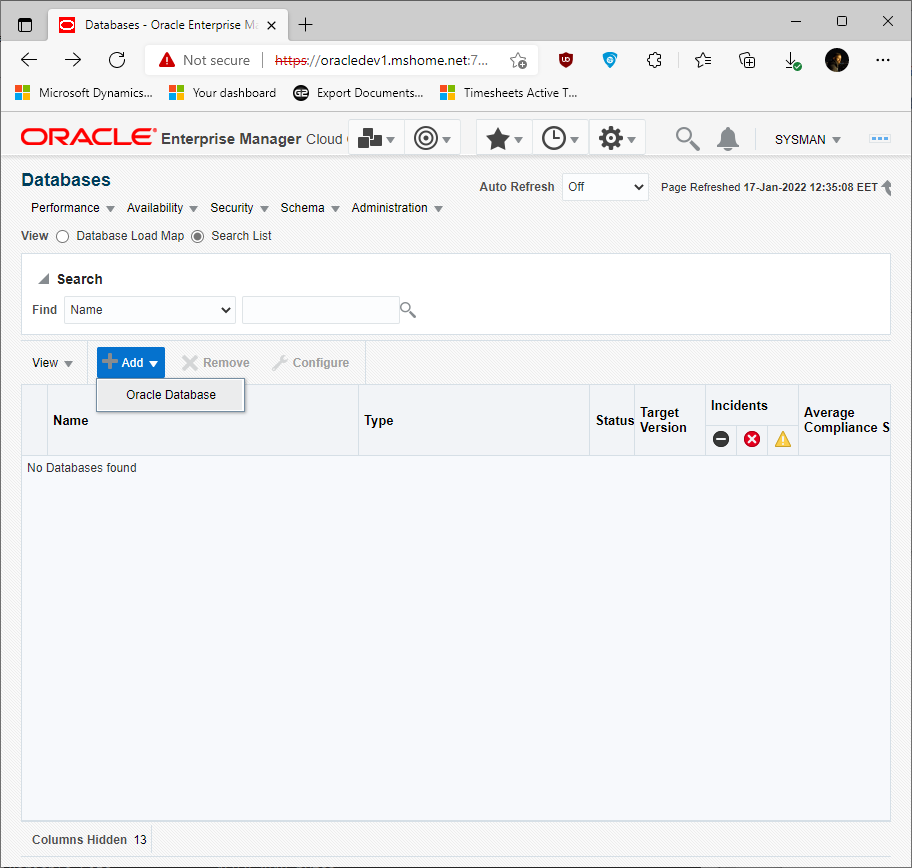
We fill in the hostname of the server that contains the bases.
Then on the next screen we choose the bases we want and define the credentials with which it will be connected. We can also add the listener:
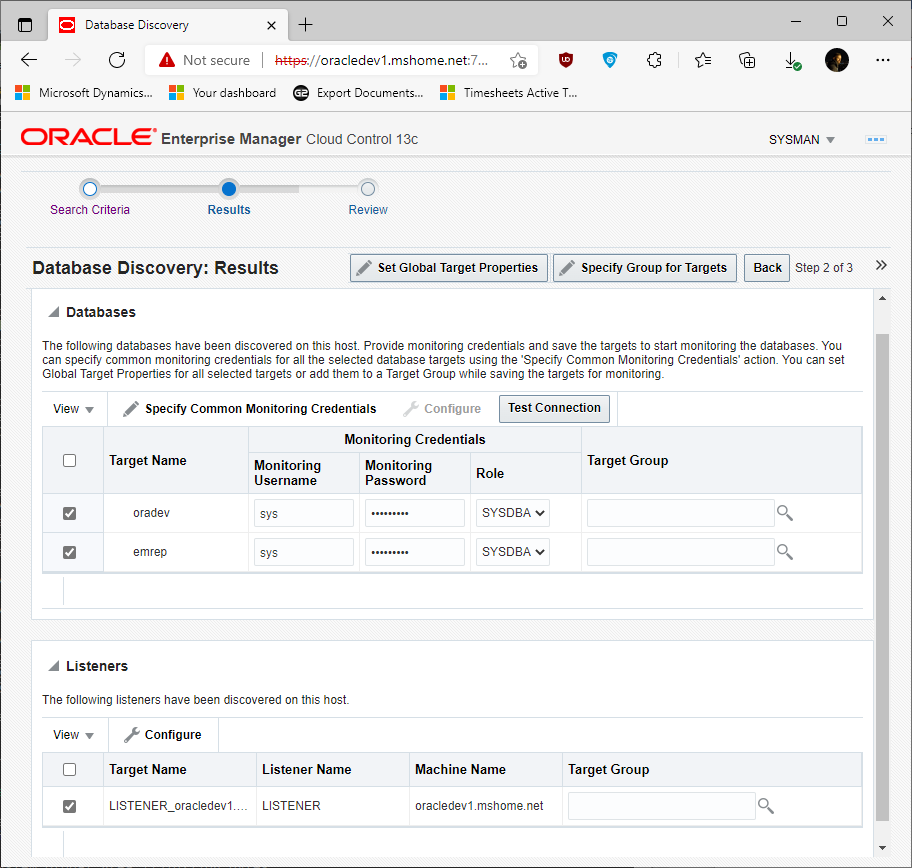
We repeat the process for each server that contains the databases we want to manage:
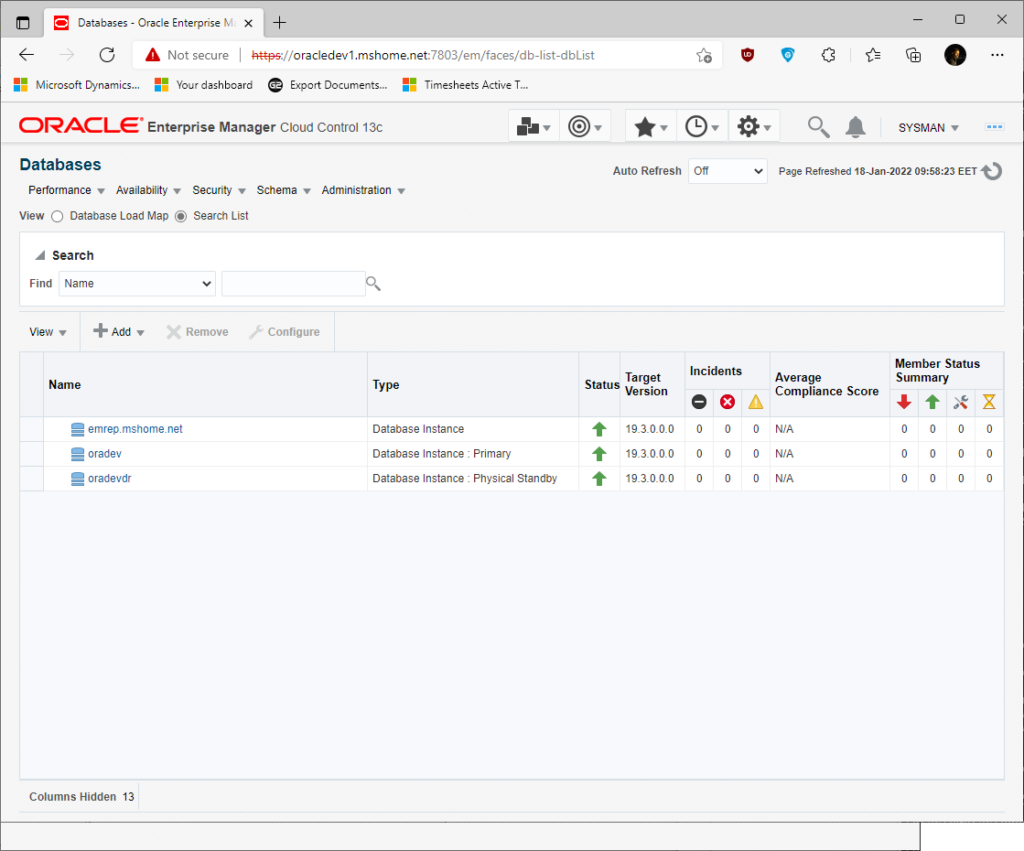
Some of the tasks we can do through Oracle Enterprise Manager Cloud Control
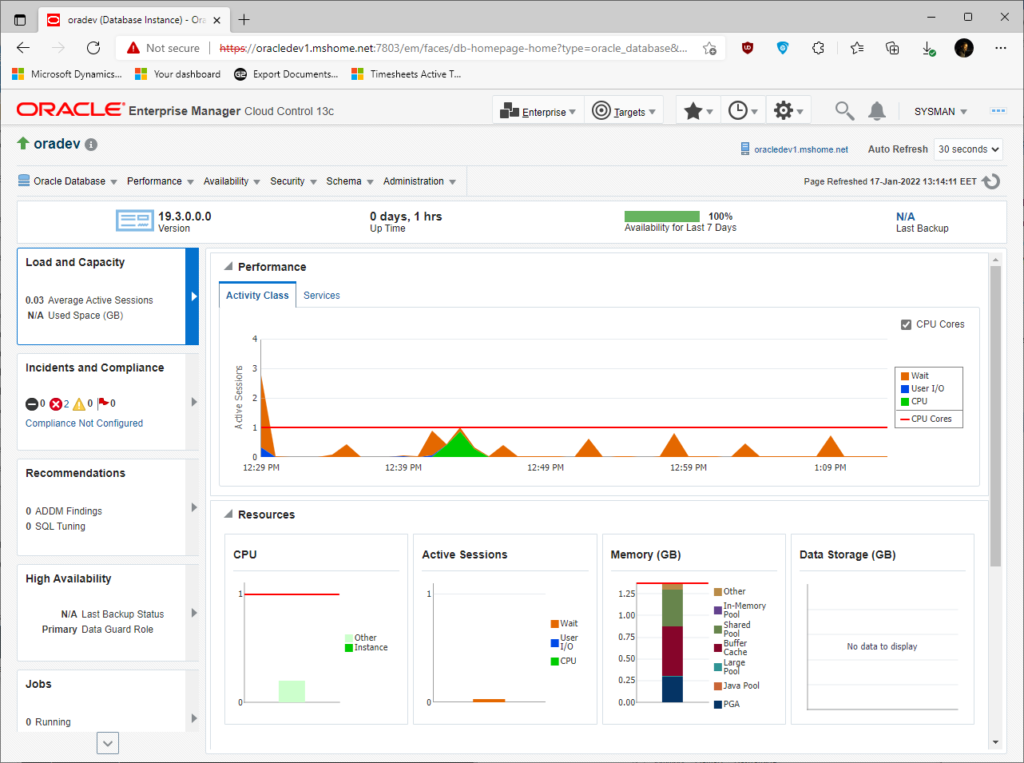
By choosing one of the bases we will initially see it Performance Dashboard which can be done Auto Refresh:
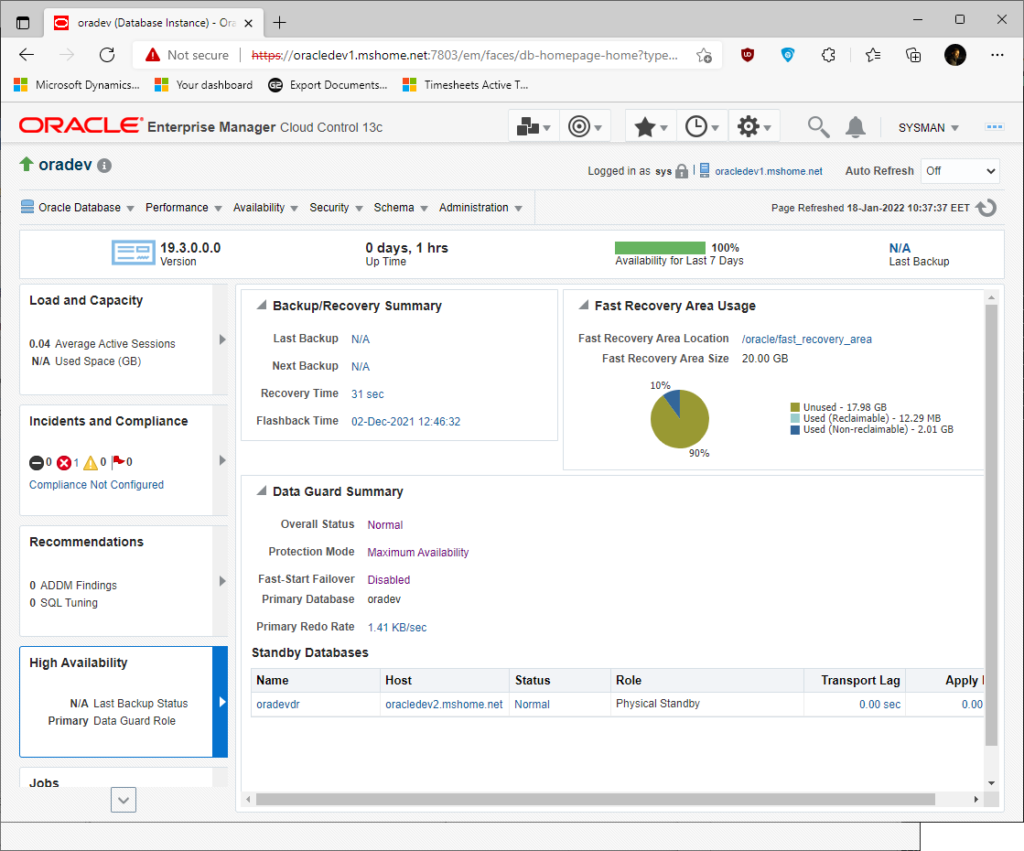
In the tab High Availability we can see the Backup status, the use of the Fast Recovery Area and the Data Guard status:
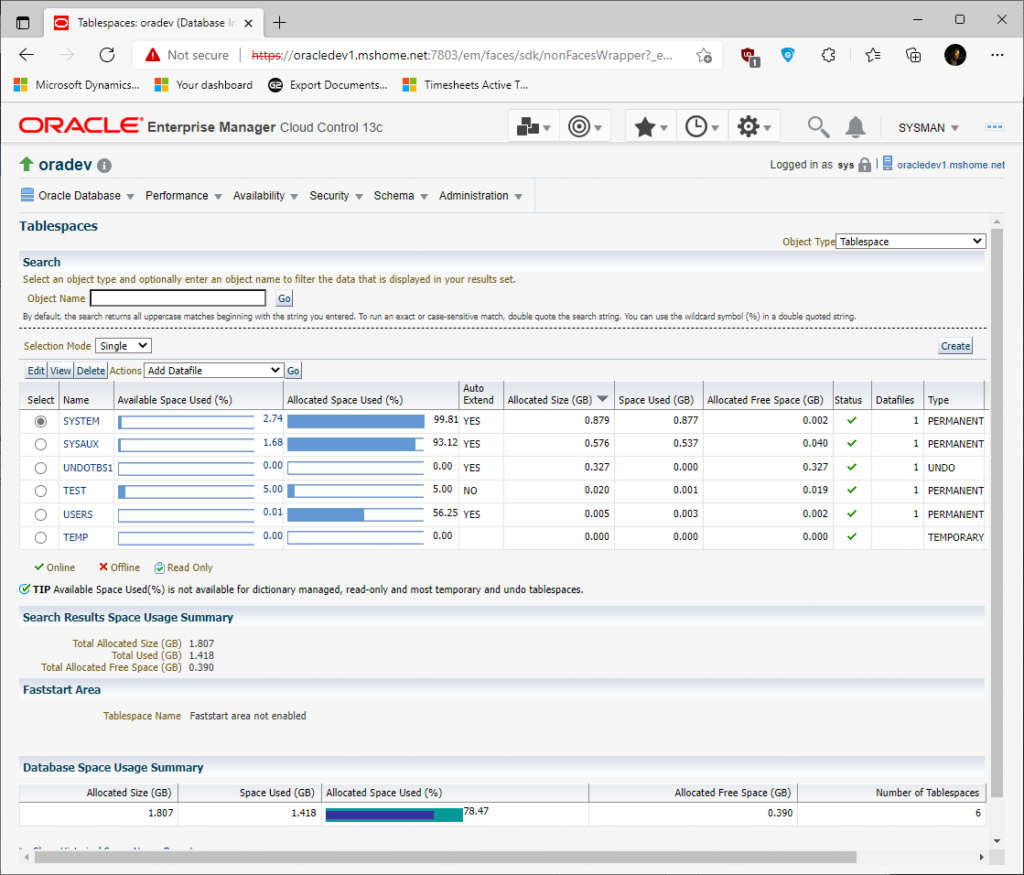
Let's see her capacity of tablespaces we go to the menu, Administration, Storage, Tablespaces:
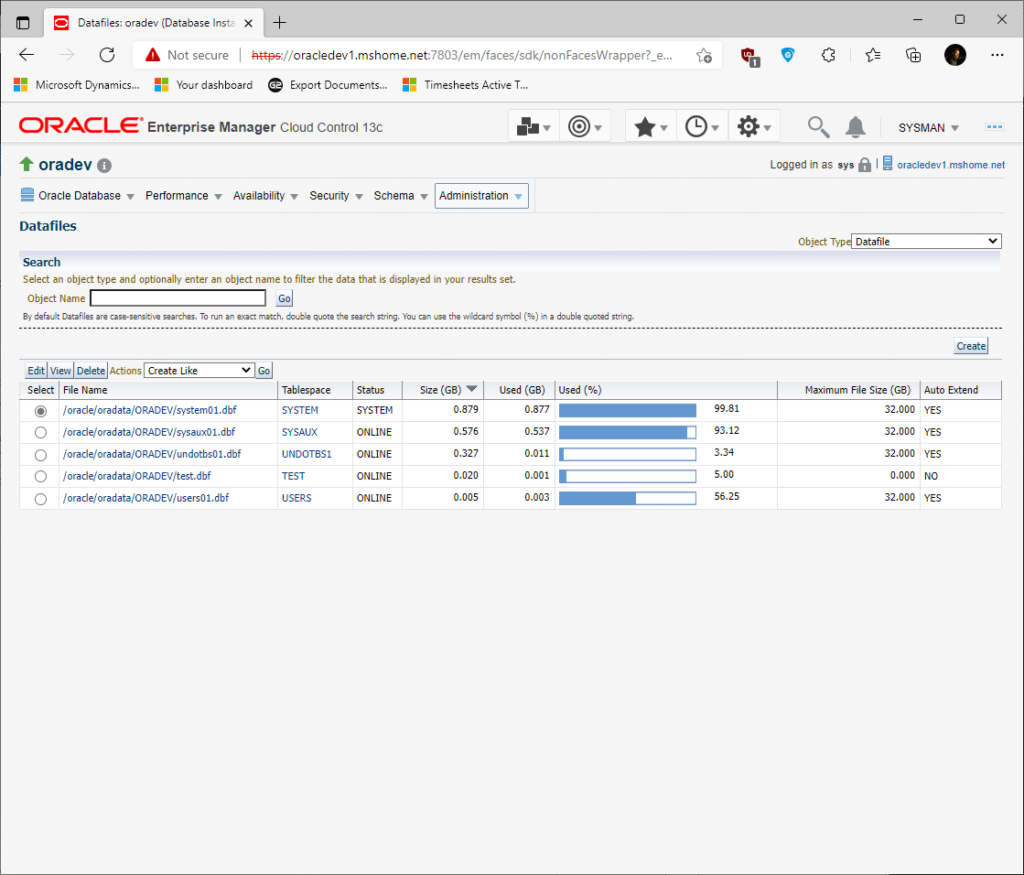
Let's see her capacity of the datafiles we go to the menu, Administration, Storage, Datafiles:
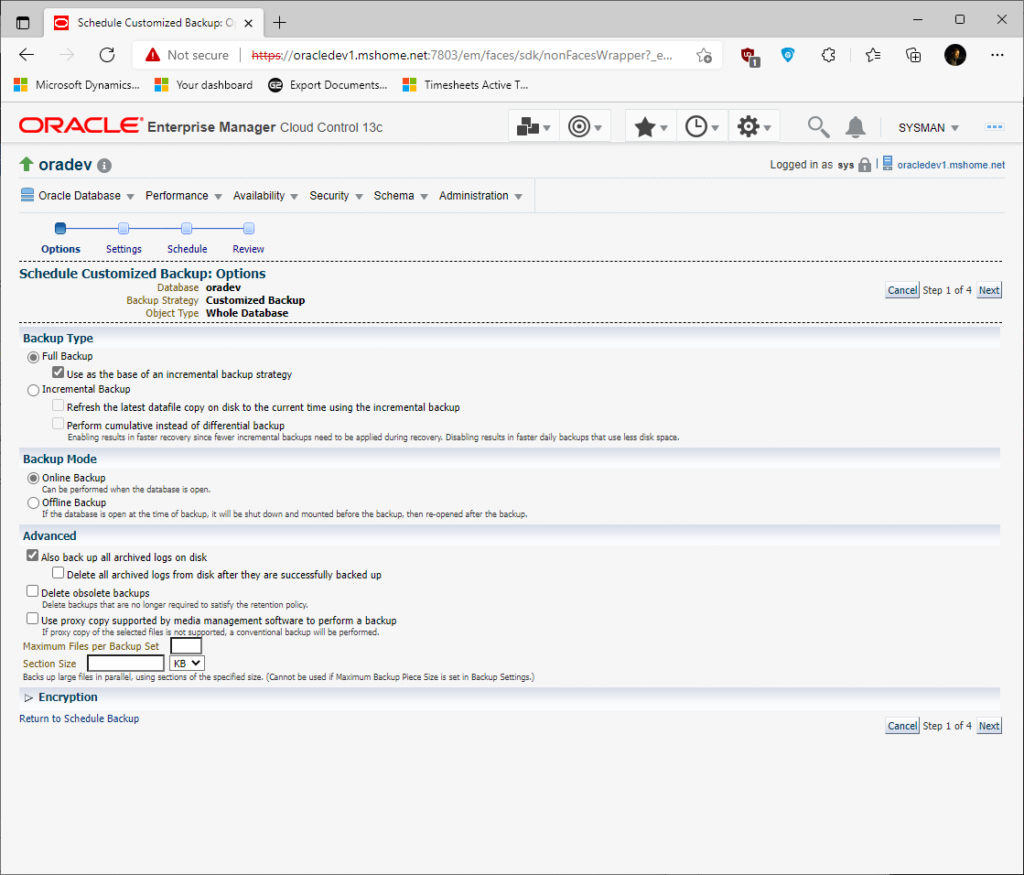
To set the schedule to become the base backup we go to the menu, Availability, Back & Recovery, Schedule Backup…:
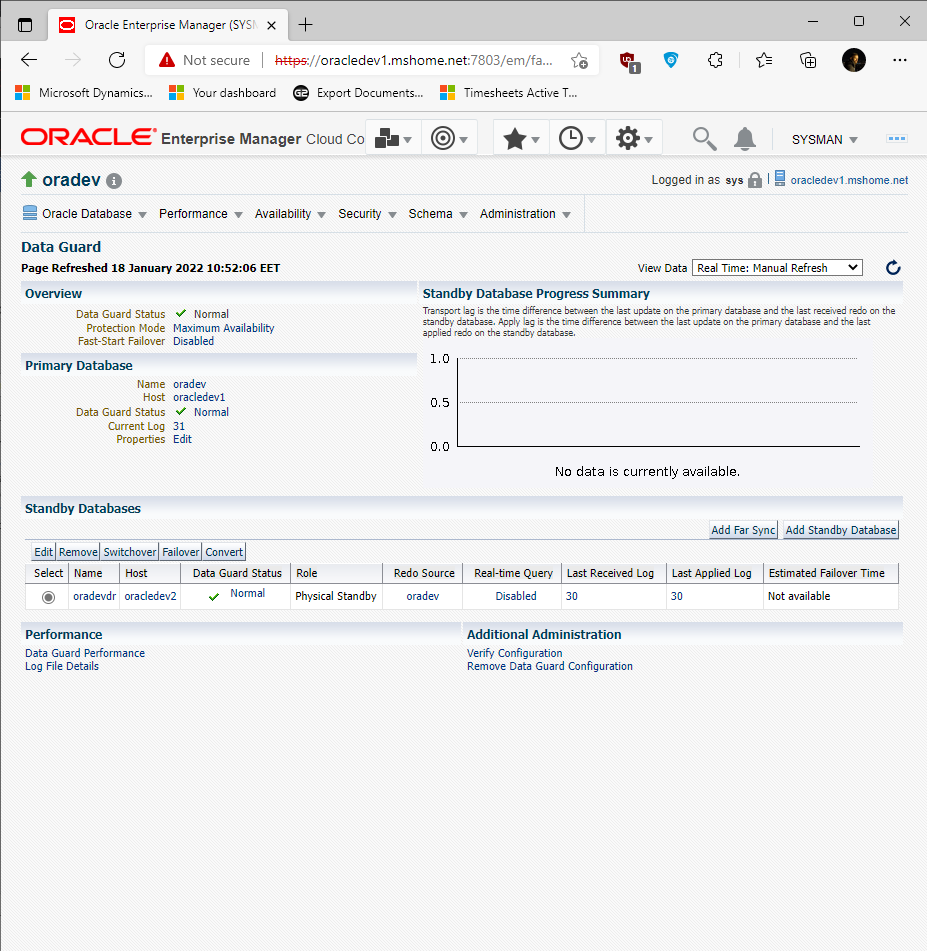
To manage it Data Guard (if we have) and do various tasks like switchover, we go to the menu, Availability, Data Guard Administration:
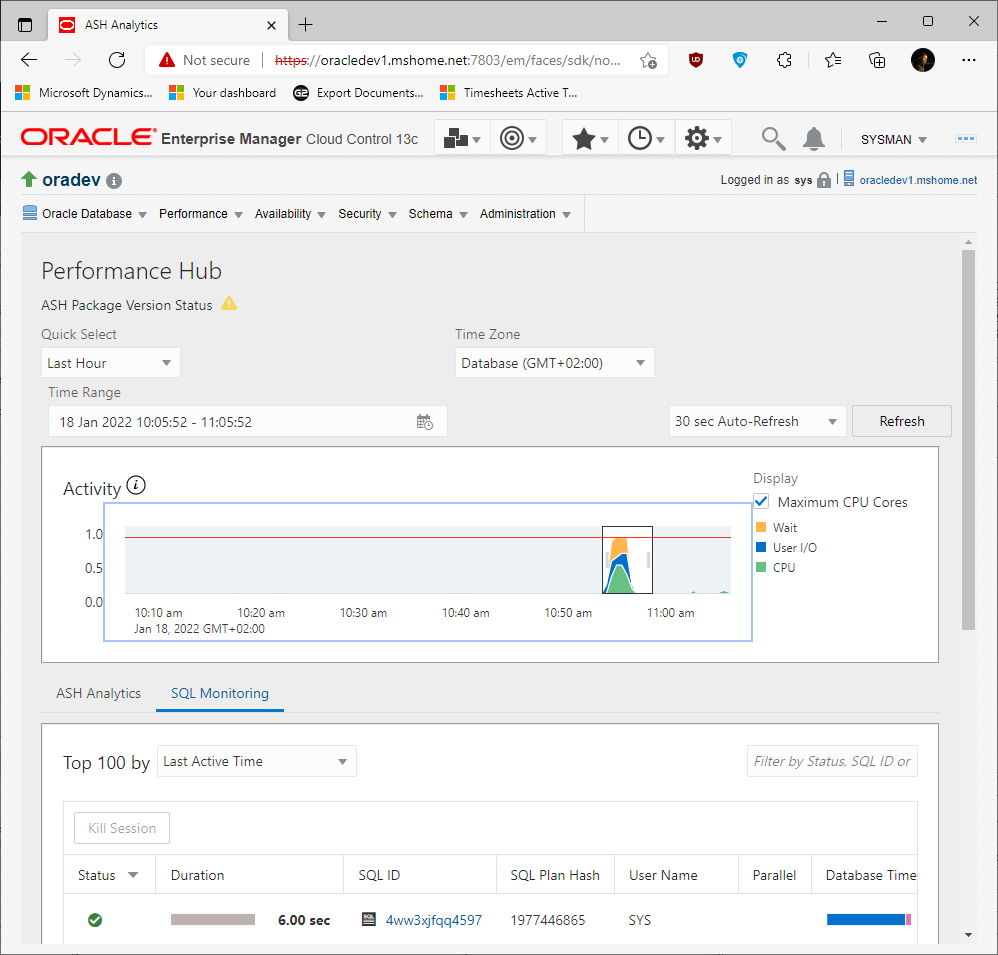
To see system performance and the SQL queries that consume the most resources, we go to the menu, Performance, Performance Hub, SQL Monitoring:
How do we stop and start Enterprise Manager?
To start the Enterprise Manager manually, we must first start the base with the listener, then the OMS and finally the Agent:
$ORACLE_HOME/bin/lsnrctl start

$ORACLE_HOME/bin/sqlplus / as sysdba
startup
exit;

$OMS_HOME/bin/emctl start oms
$AGENT_HOME/agent_inst/bin/emctl start agent
Accordingly, to stop him, we execute:
$AGENT_HOME/agent_inst/bin/emctl stop agent
$OMS_HOME/bin/emctl stop oms -all


