How to replicate tables from Oracle Database to SQL Server using GoldenGate
- How to convert a database from Physical Standby to Logical Standby in Oracle Data Guard - 2 June 2025
- How to roll back an Oracle Database using a restore point in a Data Guard environment - 28 April 2025
- How can we increase performance on Oracle GoldenGate Replicat target with parallelism? - 19 March 2025
In this article we will see how we can copy table entries from Oracle Database which is on Unix to SQL Server that is on Windows with its use Oracle GoldenGate.
What is GoldenGate
Oracle GoldenGate is a tool that allows us to copy and format data between databases, without affecting the operating system or RDBMS being used. The updating of the tables can be either in one direction with a target (unidirectional), or to several targets (broadcast), or bidirectional.
For example, we can transfer table data using GoldenGate from Oracle to Oracle, from Oracle to SQL Server, from SQL Server to SQL Server, or from Oracle simultaneously to SQL Server, MySQL, DB2 and PostgreSQL.
How GoldenGate works
GoldenGate uses three processes: Extract, Data Pump (in case we use a remote server) and Replicat.
The Extract is responsible for recording the committed transactions from the tables we have defined and storing them in a file called local trail. Then the Data Pump sends the data from the local trail file to the remote server via TCP/IP and writes the data to the file named remote trail. In the end the Replicat reads the remote trail and applies the changes to the target databases.

The prerequisites
For starters we should have set it up Oracle Database Software on the primary and on the standby server and Oracle Database in primary to archivelog mode. How we do these installations can be seen step by step in the article here.
We should download the version Oracle GoldenGate separately for each system from here. The Oracle on Linux x86-64 edition for Oracle Server and the SQL Server on Windows x86-64 edition for SQL Server.
On the Windows Server that has SQL Server we will need to download and install it Oracle Database Client from here.
The installation / configuration in the source
On Unix Oracle Database server (source)
For example, I have created an Oracle Database that will be the source with the name oracledb:
su oracle
dbca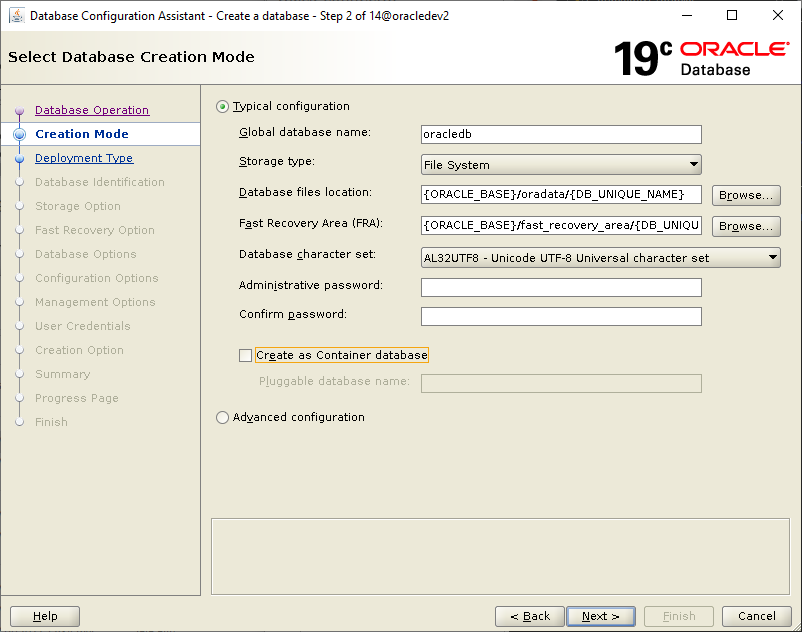
After the installation is complete, we connect to the database with sqlplus and make the necessary changes for GoldenGate to work:
export ORACLE_SID=oracledb

sqlplus / as sysdba
shutdown immediate; startup mount; alter database archivelog; alter database add supplemental log data; alter database force logging; alter database open; alter system switch logfile; alter system set enable_goldengate_replication=true scope=both;
Then we stay in sqlplus and create the user that GoldenGate will connect to the database:
create user ggadmin
  identified by passw0rd
  default tablespace USERS
  temporary tablespace TEMP
  quota unlimited on users;
-- Grant/Revoke role privileges
grant connect to ggadmin;
grant resource to ggadmin;
-- Grant/Revoke system privileges
grant select any table to ggadmin;
grant select any dictionary to ggadmin;
grant flashback any table to ggadmin;
grant create session to ggadmin;
grant alter session to ggadmin;
exec dbms_goldengate_auth.grant_admin_privilege('ggadmin');
For the needs of the example I have created the user in the database STRATOS with the table CUSTOMERS and it's the one I want replicated:
create user STRATOS IDENTIFIED BY PASSW0RD
  default tablespace USERS
  temporary tablespace TEMP
  profile DEFAULT
  password expire
  quota unlimited on users;
-- Grant/Revoke role privileges
grant connect to STRATOS;
grant resource to STRATOS;
-- Table Creation
create table stratos.customers (id int, name varchar(50));
insert into stratos.customers values (1,'Stratos');
insert into stratos.customers values (2,'Nikos');
insert into stratos.customers values (3,'George');
commit;
Then we add to tnsnames.ora the following record with the connection information to the instance by putting as host the machine name and as service_name the name of the database:
vi $ORACLE_HOME/network/admin/tnsnames.ora
oracledb=
  (DESCRIPTION =
    (ADDRESS_LIST =
      (ADDRESS = (PROTOCOL = TCP)(HOST = oracledev2)(PORT = 1521))
    )
    (CONNECT_DATA =
      (SERVICE_NAME = oracledb)
    )
  )
If we don't have DNS servers we should go to hosts file and set a record with the IP of the remote SQL Server:
su root
vi /etc/hosts
We create the folder where the GoldenGate installation will be located, go to the folder where we downloaded the GoldenGate setup and unzip it:
su oracle

mkdir /oracle/app/oracle/goldengate

cd $HOME/Downloads

unzip *.zip
After the unzip is complete, go into the files of the folder and run the installer:
cd fbo_ggs_Linux_x64_Oracle_shiphome/Disk1

./runInstaller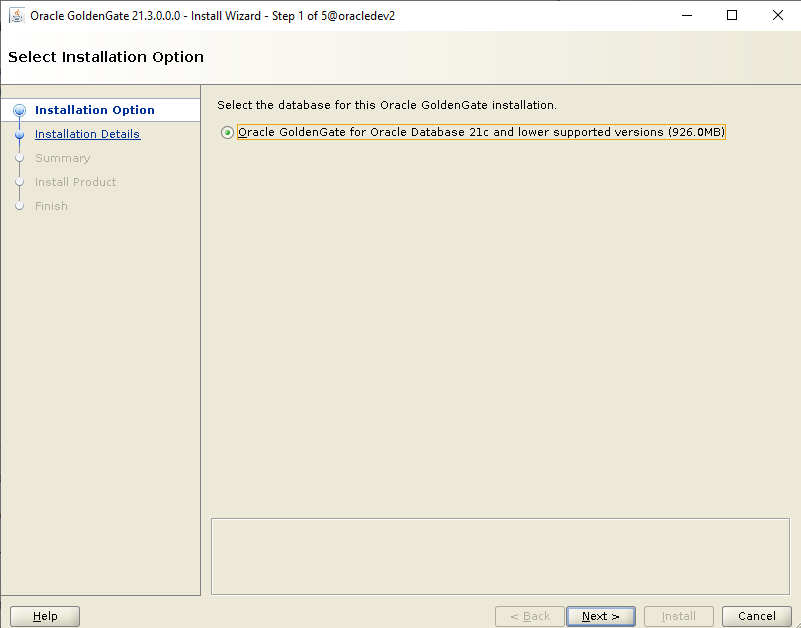
In the Software Location put the folder we created before to contain the installation and set the door, or default is 7809:
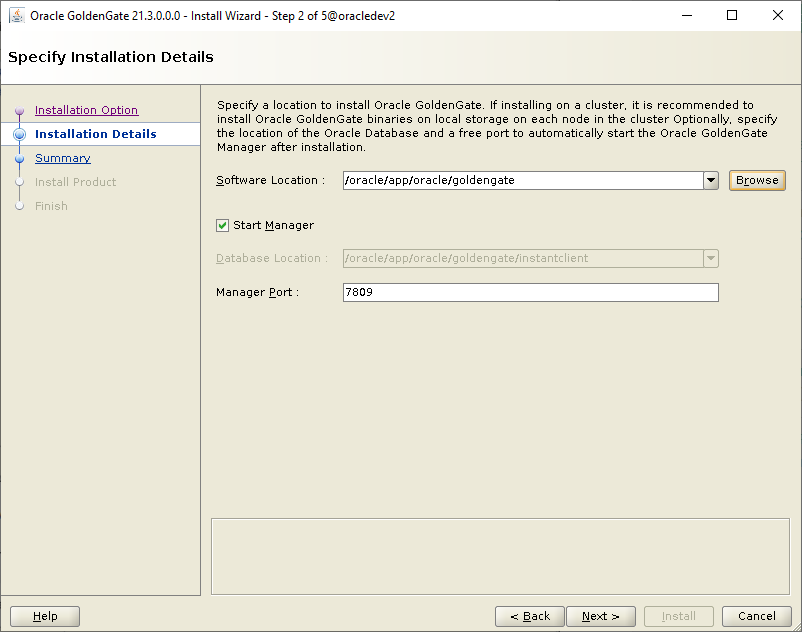
When the installation is complete, the path of GoldenGate and the tnsnames.ora go to bash_profile and add the following:
vi $HOME/.bash_profile
export GGHOME=/oracle/app/oracle/goldengate
export TNS_ADMIN=$ORACLE_HOME/network/admin
export PATH=$PATH:$ORACLE_HOME/bin:$GGHOME
To load the changes we either logout login or run the following:
source ~/.bash_profileNow we can connect to the GoldenGate interface by running the following:
ggsci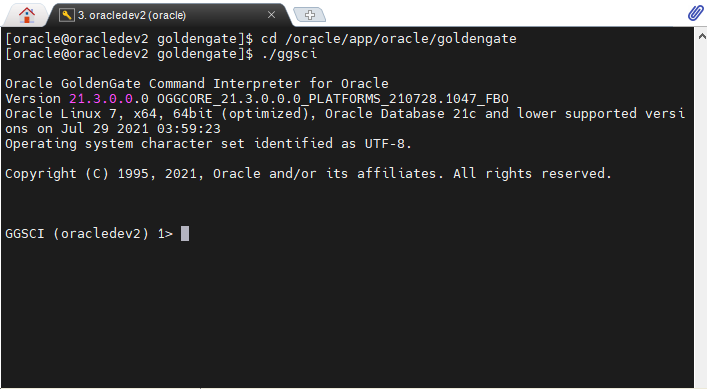
We write to create the folders in case the installer has not already done so:
create subdirs
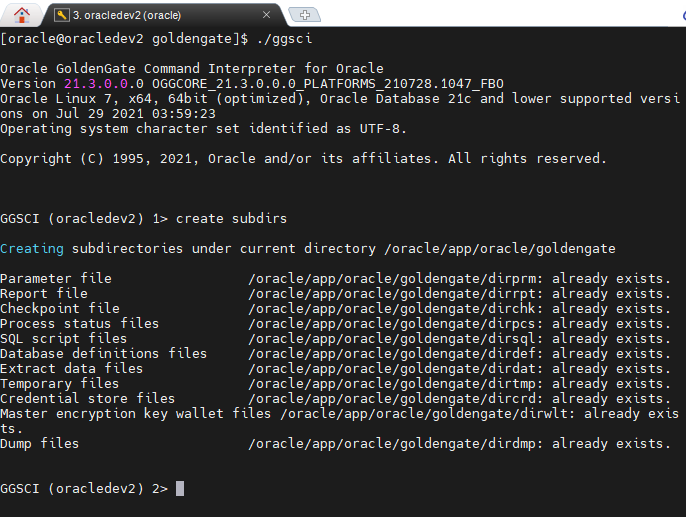
We modify the GoldenGate Manager parameter file and add the following:
edit params mgr
PORT 7809
PURGEOLDEXTRACTS ./dirdat/*, MINKEEPHOURS 2
AUTOSTART EXTRACT *
AUTORESTART EXTRACT *, RETRIES 10, WAITMINUTES 5, RESETMINUTES 60- PORT: It is the minimum variable that the file must have and defines the port of the Manager.
- PURGEOLDEXTRACT: It is the location where the trail file with the data is stored and we define it to keep at least 2 hours.
- AUTOSTART : We define which processes to start automatically when the Manager starts.
- AUTORESTART: We define which processes should be restarted after an error.
Then we start him GoldenGate Manager:
start manager
With the following command we can see the status of the processes:
info all
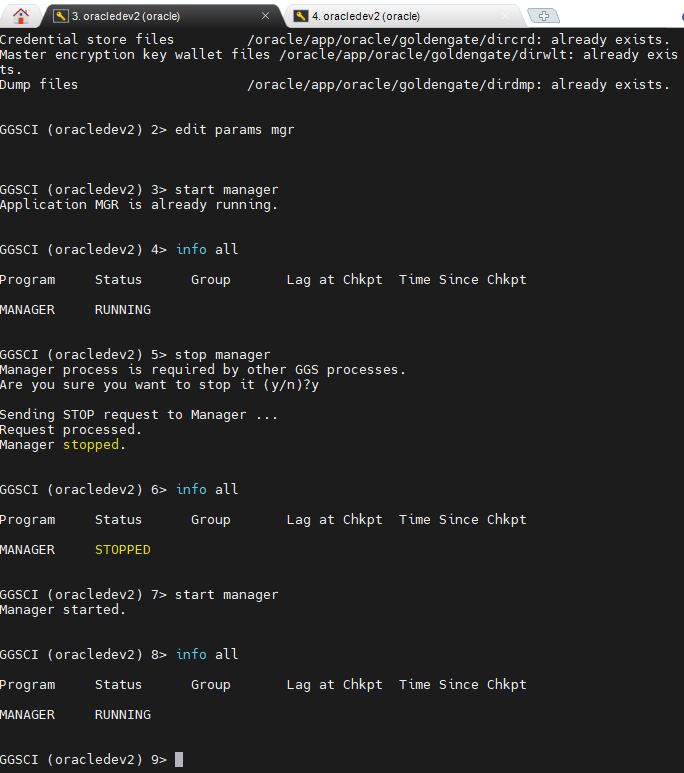
In the next step we make it Credentialstore. There we can define database users keeping the password locally encrypted. In the command we should set the name of the user we created before (ggadmin), the name of the record we passed to tnsnames.ora (oracledb) with the database connection and as alias the name we will call it:
add credentialstore
alter credentialstore add user ggadmin@oracledb alias ggadmin
To connect we run the following:
dblogin useridalias ggadmin

After connecting with the user, we set supplemental logging to be enabled for each table we want to replicate:
add trandata stratos.customers
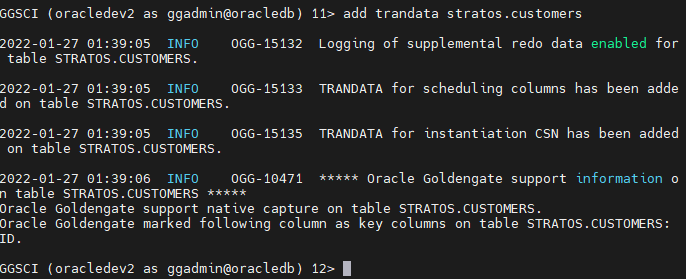
In the case that we want to activate supplemental logging in all the tables of a schema then we can instead of trandata to do schematrandata:
add schematrandata stratos
Creating the Extract process in the source
Now we're building it Extract process that will export the data to the local trail file:
register extract ora_ext database
Then we modify it and add the following:
edit param ora_ext
EXTRACT ora_ext
USERIDALIAS ggadmin
RMTHOST sqlserverhost.mshome.net, MGRPORT 7809
RMTTRAIL ./dirdat/aa
GETTRUNCATES
TABLE STRATOS.*;- EXTRACT: We set the name of the process.
- USERIDALIAS: Set the name of the alias we made for the base user in the Credentialstore.
- RMTHOST: We set the hostname of the remote SQL Server. If we do not use a DNS server, we put the record we passed in /etc/hosts.
- MGRPORT: We define the port that the GoldenGate Manager has on the remote SQL Server.
- RMTTRAIL: We define the path and the name that the trail files will have.
- GETTRUNCATES: We enable the ability to record the truncates of the tables so that if all records are deleted, this is also done in the target.
- TABLE: We define the tables we want to transfer, in this case we put the user's schema and * since the schema contains only the table we want.
- TRANLOGOPTIONS: We optionally set settings for the export like parameter MINEFROMACTIVEDG which allows us in an Active Data Guard environment to use Standby instead of Primary (this function is not compatible with the integrated process and only works in the classic configuration).
To add process as integrated, we should run the following with the extract process name:
add extract ora_ext, integrated tranlog, begin now

add rmttrail ./dirdat/aa, ext ora_ext
Installation / configuration on the target
On Windows SQL Server (target)
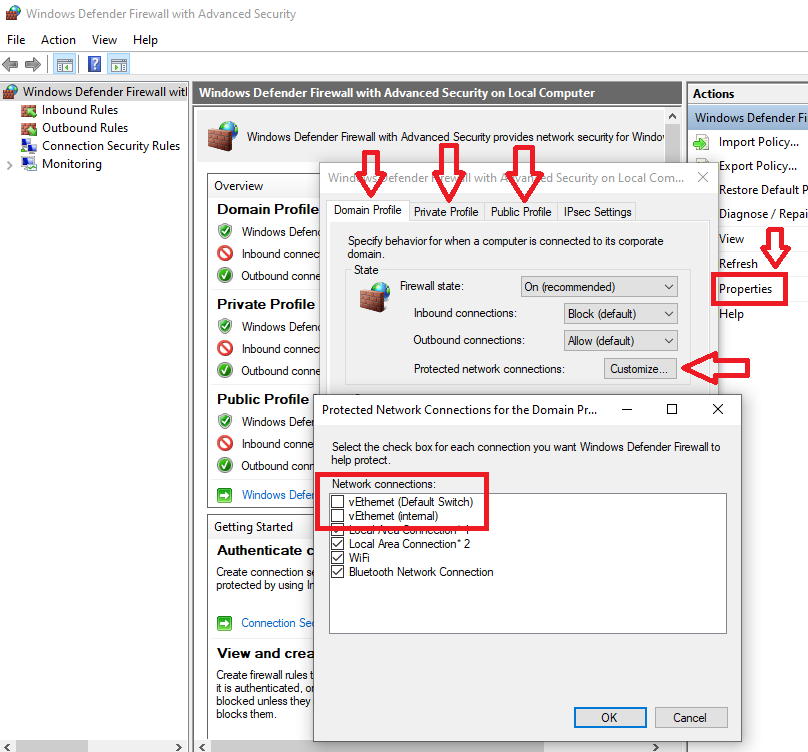
First, let's go to Windows Firewall and we will disable it on the network cards that have internal communication between them. To do this we go Windows Defender Firewall with Advanced Security, Action, Properties, Domain Profile, Customize… and we pull out those connections. We follow the same steps for the tabs Private Profile and Public Profile:
In the case that we do not use a DNS Server, we must add a record to C:\Windows\System32\drivers\etc\hosts with the IP and the name of the remote Oracle Database server.
Then we test that it is pinging:
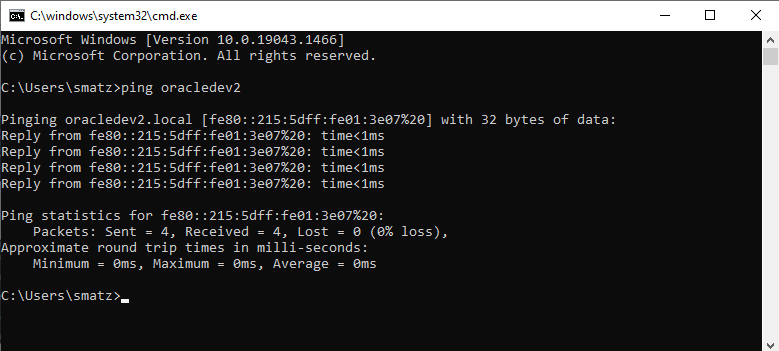
Then and after we have installed the Oracle Database Client as we mentioned in the prerequisites, we go and add to tnsnames.ora the script for connecting to the remote Oracle Database:
*In the example it is located in the path C:\app\client\user\product\19.0.0\client_1\network\admin
oracledb=
  (DESCRIPTION =
    (ADDRESS_LIST =
      (ADDRESS = (PROTOCOL = TCP)(HOST = oracledev2)(PORT = 1521))
    )
    (CONNECT_DATA =
      (SERVICE_NAME = oracledb)
    )
  )
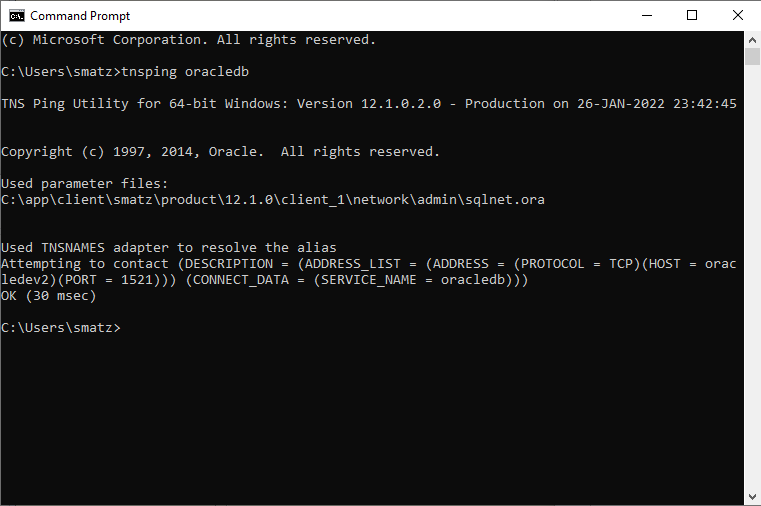
We tnsping to see that the entry we added to tnsnames.ora is working:
tnsping oracledb
Now to create the database user that will manage GoldenGate, we open it Microsoft SQL Server Management Studio, connect to the instance and under security select right click New Login…:
We choose SQL Server authentication, The choise enforce password policy and as default database we define the one where we want the table entries to go:
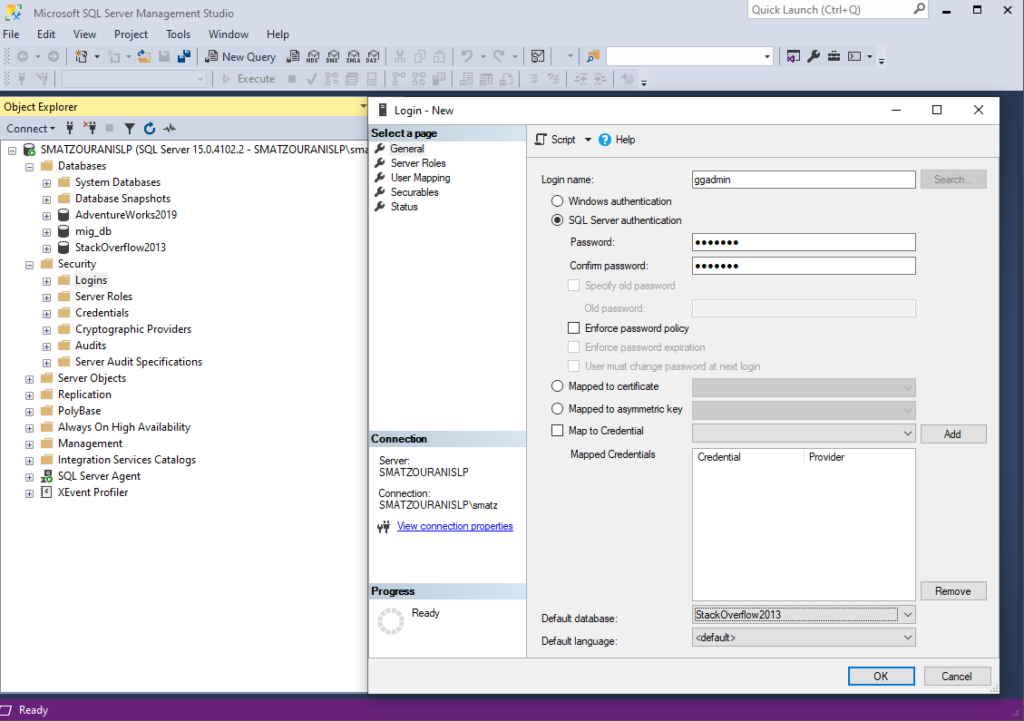
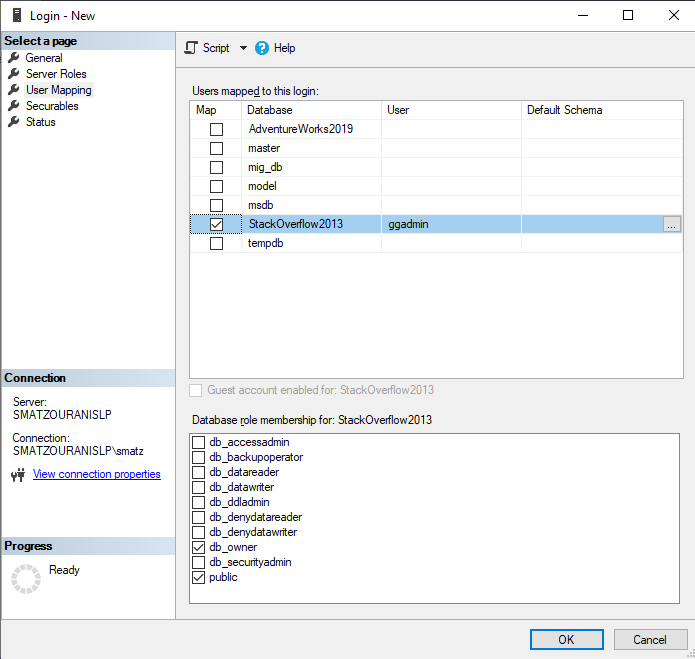
In the tab User Mapping do we choose this database, as a role db_owner and OK:
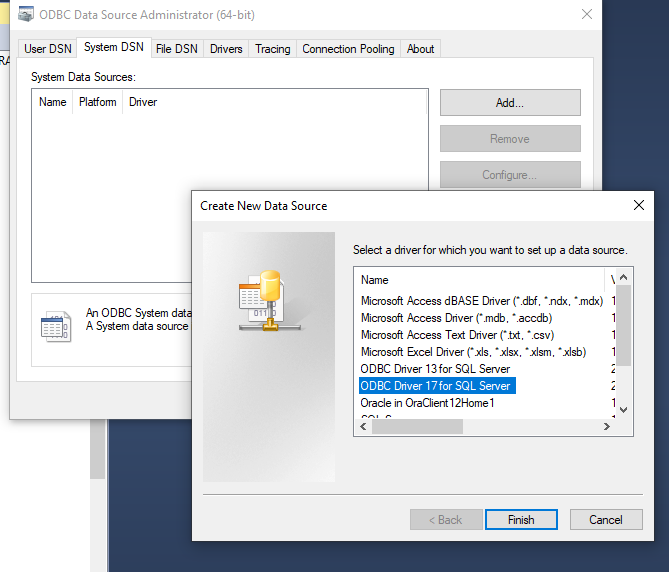
Now to be able to connect to the database from GoldenGate we need to make ODBC. So we open the program ODBC Data Source Administrator (64-bit), let's go System DSN, Add... and select ODBC Driver 17 for SQL Server:
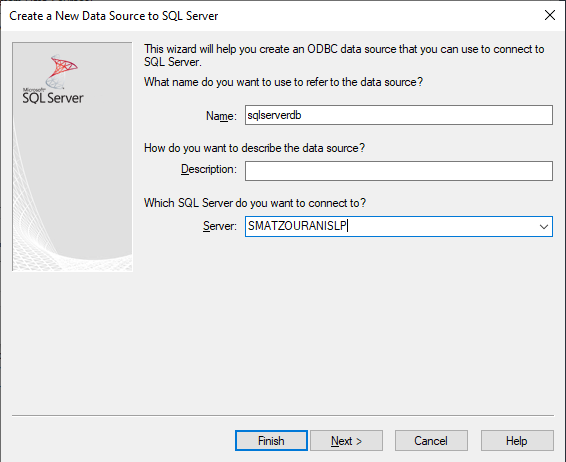
We define the name with which we will call the connection to the base and as server we put the name of the server we are currently on:
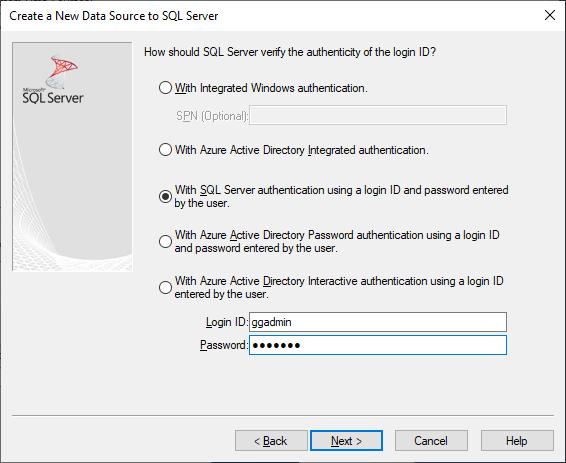
Then we choose With SQL Server authentication using a login ID and password entered by the user and add the username and password we created before:
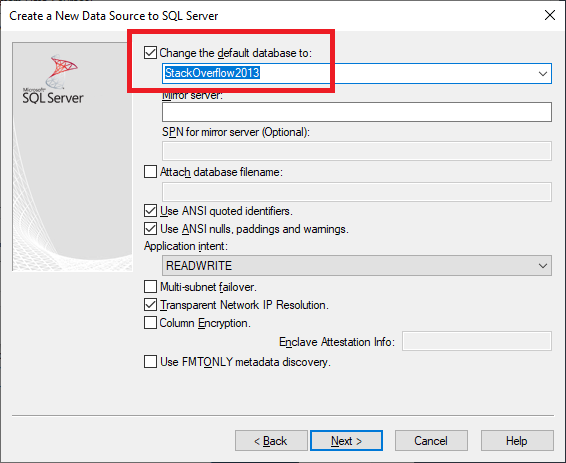
On the next screen we select Change the default database to and define the database we want the table records to go to:
To install GoldenGate on Windows, first unzip the setup files in the folder C:\goldengate .
Open Command Prompt as Administrator and go to the folder:
cd C:\goldengateTo connect to the GoldenGate interface, run the following:
ggsci.exeTo create the required folder we run the following command:
create subdirs
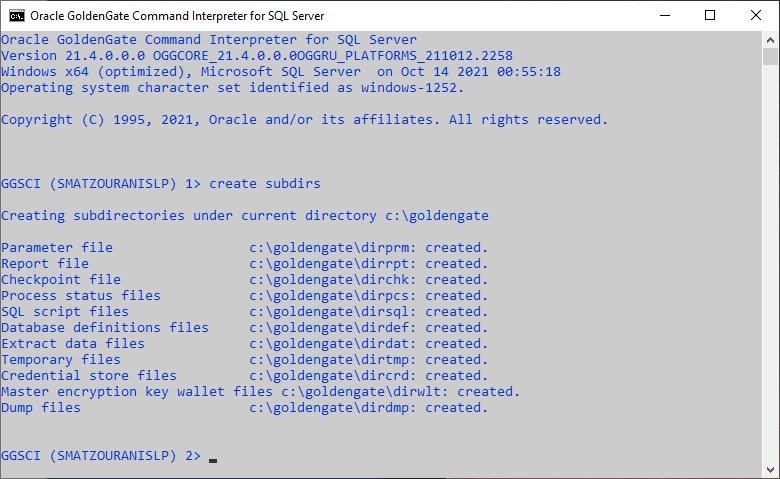
We modify its parameter file GoldenGate Manager and add the following:
edit param mgr
PORT 7809
PURGEOLDEXTRACTS ./dirdat/*, MINKEEPHOURS 2
AUTOSTART REPLICAT *
AUTORESTART REPLICAT *, RETRIES 10, WAITMINUTES 5, RESETMINUTES 60- PORT: It is the minimum variable that the file must have and defines the port of the Manager.
- PURGEOLDEXTRACT: It is the location where the trail file with the data is stored and we define it to keep at least 2 hours.
- AUTOSTART : We define which processes to start automatically when the Manager starts.
- AUTORESTART: We define which processes should be restarted after an error.
We are modifying it GLOBALS parameter file that applies to all GoldenGate processes, so we can assign a name to the at local Windows Service account, and the table checkpoint which will contain the information with the apply of replication in SQL Server:
edit param ./GLOBALS
MGRSERVNAME GOLDENGATEsrv
CHECKPOINTTABLE dbo.CHECKPOINTTABLE
To add the service to Windows, do the following:
shell install addservice addevents

To start GoldenGate's local service from Command Prompt, run the following:
net start GOLDENGATEsrv
In the next step, open the GoldenGate interface again and configure it Credentialstore. As we said before there we can define database users keeping the password locally encrypted. In the command we should define the name of the user we created before (ggadmin), the ODBC we created (sqlserverdb) with the database connection and as alias the name we will call it:
ggsci.exeadd credentialstore alter credentialstore add user ggadmin alias ggadmin
We now connect by running the following command:
dblogin sourceDB sqlserverdb useridalias ggadmin
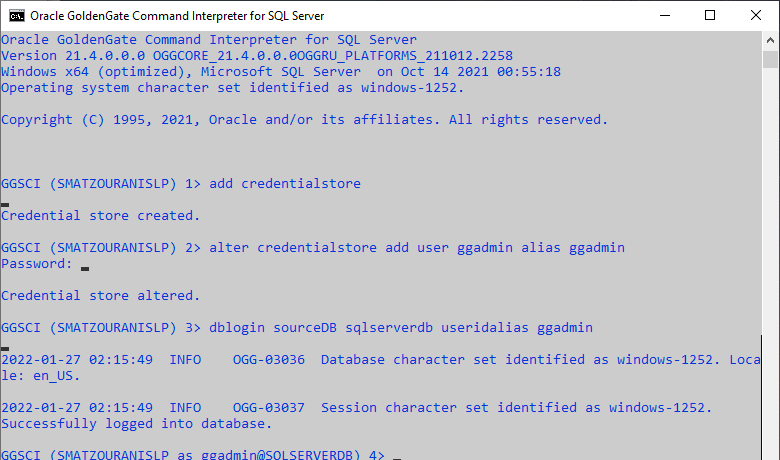
We add him checkpoint table for replication:
add checkpointtable
Creating the Replicat process on the destination
Now we're building it Replicat process which will import the data from the trail file adding the following parameters:
edit param sql_rep
REPLICAT sql_rep
TARGETDB sqlserverdb, USERIDALIAS ggadmin
DISCARDFILE ./dirrpt/ora_discard.txt, APPEND, MEGABYTES 50
BATCHSQL
REPERROR(60,TRANSABORT, MAXRETRIES 10, DELAYSECS 10)
FUNCTIONSTACKSIZE 500
SOURCECHARSET PASSTHRU
DISCARDROLLOVER AT 03:00 ON TUESDAY
REPORTROLLOVER AT 03:00 ON TUESDAY
HANDLECOLLISIONS
GETTRUNCATES
MAP STRATOS.CUSTOMERS, TARGET DBO.CUSTOMERS;
- REPLICAT: We set the name of the process.
- TARGETDB: We define the ODBC we created with the target database.
- USERIDALIAS: Set the name of the alias we made for the base user in the Credentialstore.
- DISCARDFILE: We define the file containing the table records that failed to pass
- DISCARDROLLOVER: We define when the discard files will be cleaned.
- REPORTROLLOVER: We define when the report files will be cleaned.
- BATCHSQL: We set it to group the statements in groups (select, insert, update, delete) to run them in parallel with greater performance.
- TRANSABORT: Helps us control deadlocks. In the event that a transaction fails, it aborts and executes it again from the beginning.
- FUNCTIONSTACKSIZE: We set the limit on how many parallel arguments the process can accept in memory.
- SOURCECHARSET PASSTHRU: We define not to convert the character set so that there is no risk of corrupting data.
- HANDLECOLLISIONS – NOHANDLECOLLISIONS: Parameter that handles duplicate and wrong records. We return it to HANDLECOLLISIONS in case the Replicat Process fails to start due to the above cases, if we do not want or cannot solve the problems manually (these entries will appear in the DISCARDFILE).
- GETTRUNCATES: We activate to allow the truncates of tables that are emptied in the source to be applied.
- MAP: We define the relationship between the source and target tables. In this case we want the tables to go to the DBO schema.
To make it Replicat process we run the following:
add replicat sql_rep, exttrail ./dirdat/aa
Start the Extract process on the source
On the Oracle Database server (source)
We connect again to the GoldenGate interface from the Unix server:
su oracle
ggsci
We see the status of the processes and we start the Extract process that we have made:
info all

start ora_ext
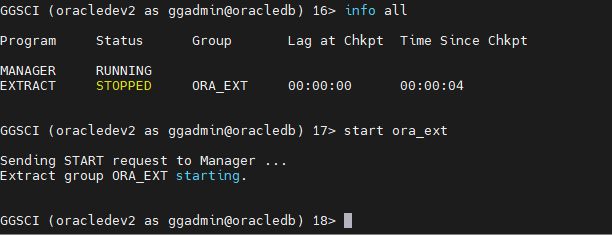
At this point we will see that the Windows SQL Server that is the target will have built it remote trail file in the following path C:\goldengate\dirdat:
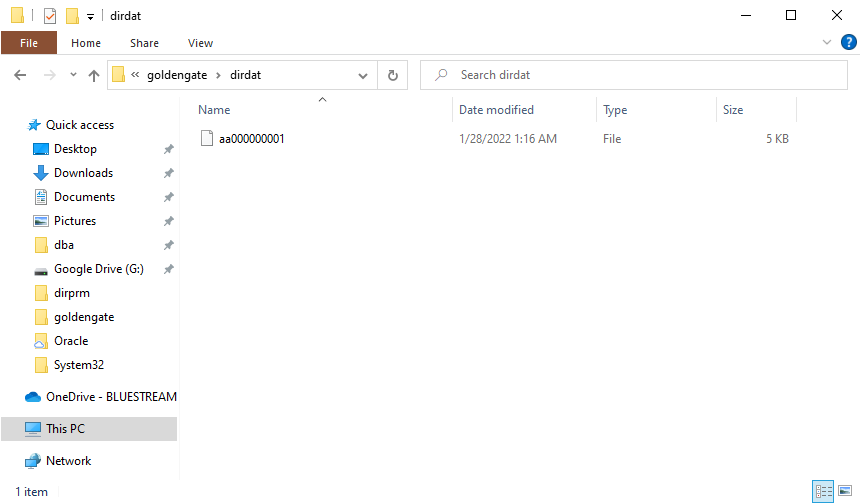
Transferring tables from Oracle Database (source) to SQL Server (target)
On Windows SQL Server (target)
Before we start the Replicat process we should transfer the tables we want from Oracle Database to SQL Server.
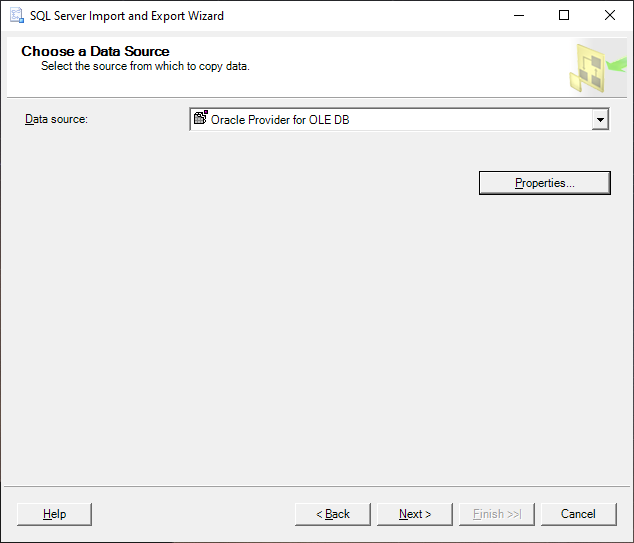
To transfer the original table from the Oracle Database we open the program SQL Server 2019 Import and Export Data (64-bit) and we choose as Data source: Oracle Provider for OLE DB:
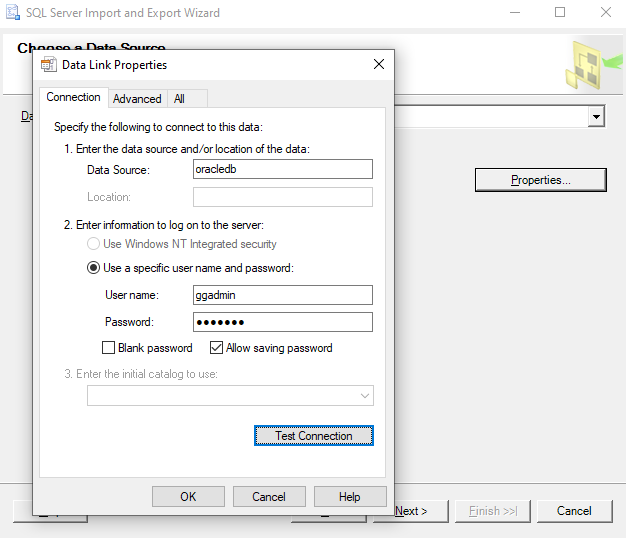
Before we press Next on Properties as Data Source we set the record we added to tnsnames.ora (oracledb) and the credentials we created in Oracle Database as a GoldenGate administrator:
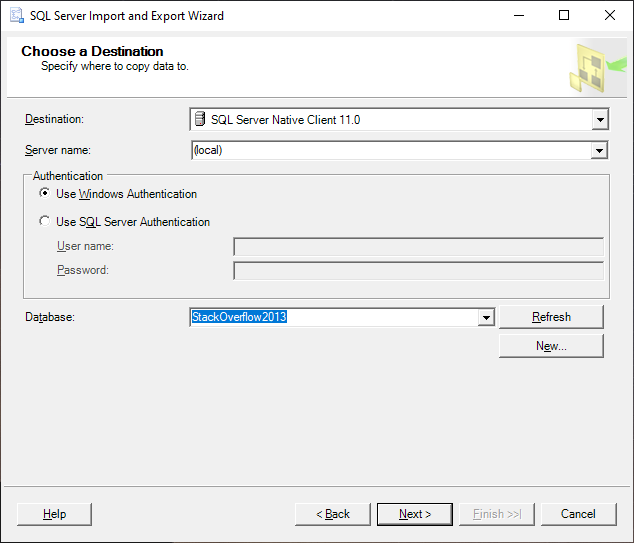
On the next screen as Destination we define SQL Server Native Client 11.0 , local, Use Windows Authentication and as Database the database where we want the table records to go:
We look for the table we want to replicate, we select it and in Destination we change the format to DBO:
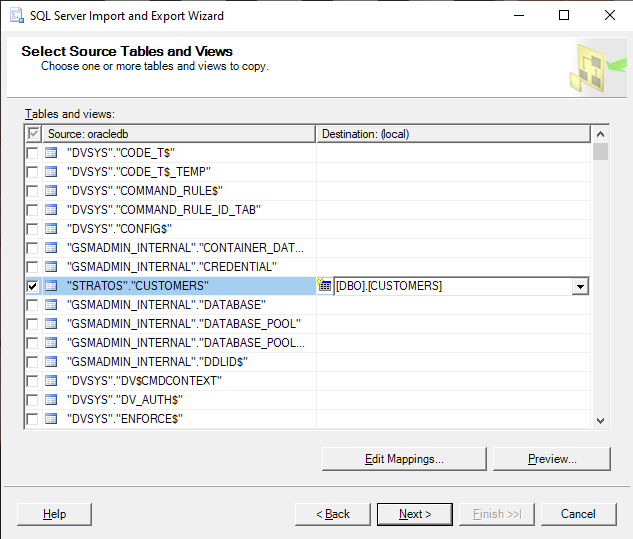
At the end we choose Run immediately:
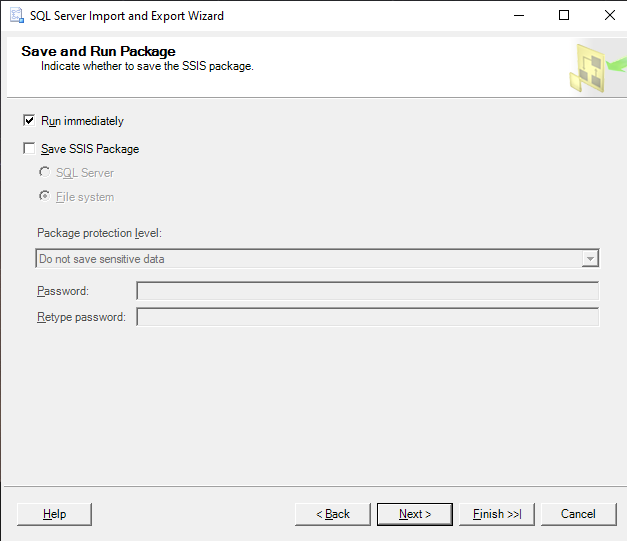
Alternatively for very large tables we can save the process as an SSIS package and execute it from the Command Prompt with the following command:
dtexec /file transferpackage.dtsx
However, since when it is finished it will not create the Primary Key with unique values in the table by itself, we will have to run the following query:
alter table dbo.customers add primary key (id);
Start the Replicat process on the target
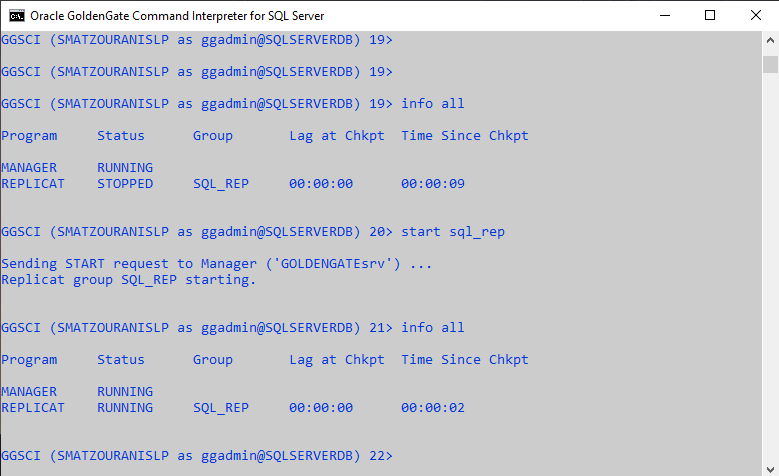
It's time to start it Replicat process on the target Windows SQL Server.
We connect to GoldenGate and run the following:
cd c:\goldengate

ggsci.exe
start sql_rep
The test
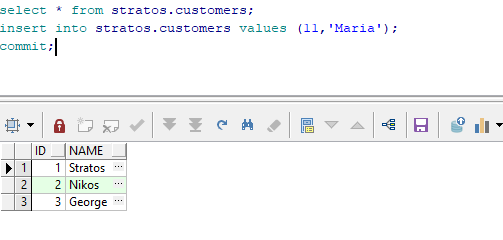
To test if it works, all we have to do is change one record in the table in the Oracle Database:
insert into stratos.customers values (11,'Maria');
commit;
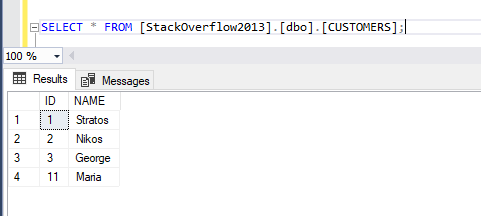
Now if we SELECT the table in SQL Server we will see that the write has passed:
select * from dbo.customers;
Monitoring
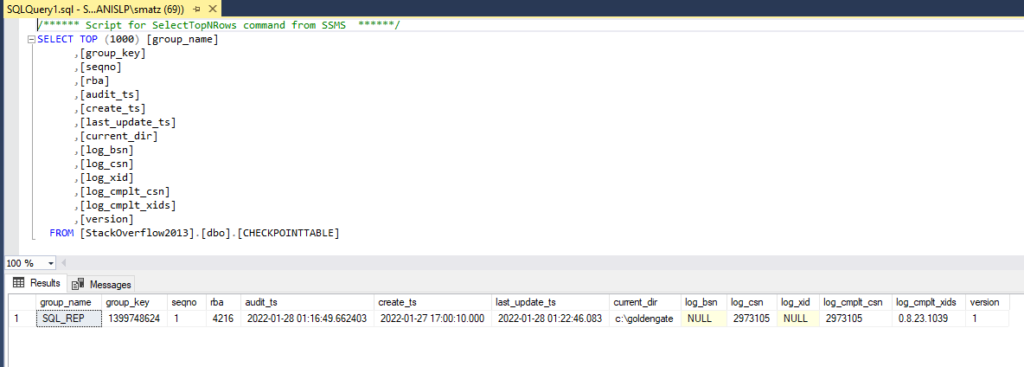
We can see his evolution Replicat process on the target SQL Server by SELECTing the table checkpoint:
select * from dbo.checkpointtable;
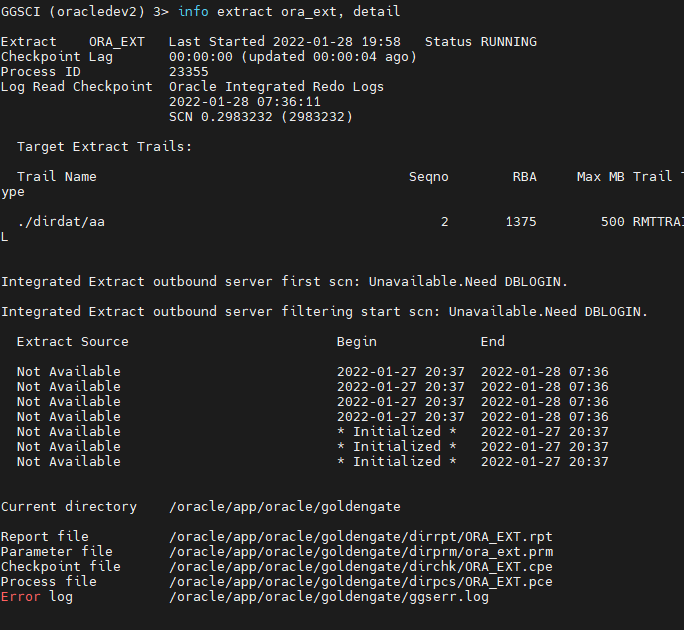
We can find information about it Extract process for its status, when it ran and the delay it has running through the GoldenGate interface of the source server the following:
info extract ora_ext, detail
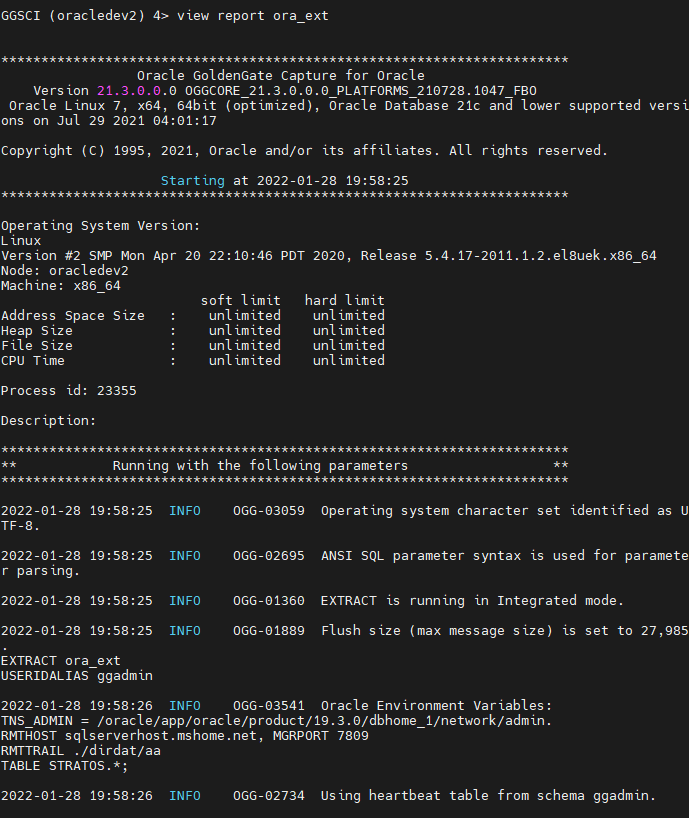
We can also generate a detailed report for a process that contains the log by running the following through the GoldenGate interface of the source server:
view report ora_ext
In case we do not know if the process is stuck and the state in which it is, we run the following to see its status:
send extract ora_ext, status
Sending STATUS request to EXTRACT ORA_EXT ...
EXTRACT ORA_EXT (PID 18940028)
  Current status: In recovery[1]: Processing data

  Current read position:
  Redo thread #: 1
  Sequence #: 740643
  RBA: 5722361548
  Timestamp: 2022-01-25 03:49:51.000000
  SCN: 10.49577561 (42999250521)
  Current write position:
  Sequence #: 3870
  RBA: 1300
  Timestamp: 2022-01-25 15:34:32.843931
  Extract Trail: ./dirdat/aa
We can also see the performance of an extract or replicate with the following command:
stats ora_rep
Replicating from STRATOS.CUSTOMERS to DBO.CUSTOMERS:

*** Total statistics since 2022-05-03 23:42:59 ***

    Total inserts                                17.00
    Total updates                                0.00
    Total deletes                                0.00
    Total discards                               0.00
    Total operations                             17.00


*** Daily statistics since 2022-05-03 23:42:59 ***

    Total inserts                                17.00
    Total updates                                0.00
    Total deletes                                0.00
    Total discards                               0.00
    Total operations                             17.00


*** Hourly statistics since 2022-05-03 23:42:59 ***

    Total inserts                                17.00
    Total updates                                0.00
    Total deletes                                0.00
    Total discards                               0.00
    Total operations                             17.00

*** Latest statistics since 2022-05-03 23:42:59 ***
    Total inserts                                17.00
    Total updates                                0.00
    Total deletes                                0.00
    Total discards                               0.00
    Total operations                             17.00
Finally, we can see up to which trailfile can be auto purged and with what settings we have for auto purging:
SEND MGR GETPURGEOLDEXTRACTS
Sending GETPURGEOLDEXTRACTS request to MANAGER ...

PurgeOldExtracts Rules
Fileset                              MinHours  MinFiles   UseCP
/goldengate/dirdat/*                    1         1         Y
OK
Extract Trails
Filename                        Oldest_Chkpt_Seqno
/goldengate/dirdat/aa                          45
Sources:
- Oracle GoldenGate for Windows and UNIX (Choosing Capture and Apply Modes)
- Configuring Capture in Integrated Mode
- Oracle GoldenGate Parameters
- Oracle 12c (PDB) Replication to SQL Server 2016
- Preparing the Database for Oracle GoldenGate
- Configuring Classic Capture in Oracle Active Data Guard Only Mode
- INFO EXTRACT
- VIEW REPORT


