How to install an Oracle Real Application Cluster (RAC) on Linux using Direct NFS

- How to convert a database from Physical Standby to Logical Standby in Oracle Data Guard - 2 June 2025
- How to roll back an Oracle Database using a restore point in a Data Guard environment - 28 April 2025
- How can we increase performance on Oracle GoldenGate Replicat target with parallelism? - 19 March 2025
In this article we will see step by step how to install an Oracle Database that belongs to Real Application Cluster (RAC) on a Linux operating system (Oracle Linux 7.7) with shared NFS disks without using Oracle ASM (Automatic Storage Management). Connectivity between Oracle Database and NFS Server is done directly through its technology Oracle Direct NFS, improving the performance at the I/O level as well as the other resources (CPU, RAM).
In the example we will see we will create a 2-node Oracle RAC that contains two Database Servers with Oracle Linux 7.7 operating system and an NFS Server with Windows Server 2019. We will install the Oracle Grid Infrastructure and Oracle Database software on a shared NFS share although we will be able, due to redundancy, to do them separately, either locally or in NFS Shares.
What is Oracle Real Application Cluster (RAC)
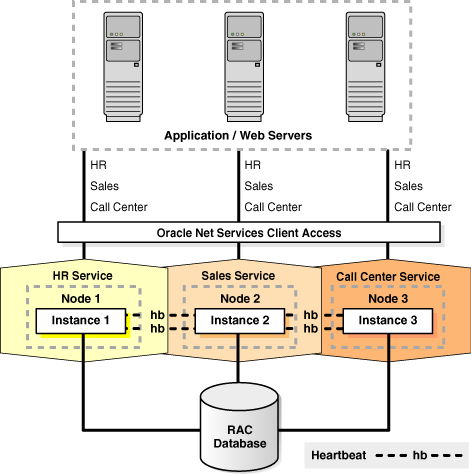
The Oracle RAC is a software that allows us to connect multiple servers (up to 100) in a cluster for Oracle Database which appears as a server to the end user or application. It provides us with the combined power of all servers and we have the ability to Read/Write from any server-node belonging to this cluster. So it is a very good solution for High Availability and Load Balancing.
Detailed information about Oracle RAC and how it works is available in the article here.
The prerequisites
First, let's download the software for the Oracle Database Grid Infrastructure (Oracle Database Grid Infrastructure 12.1.0.2.0 for Linux x86-64) and the software for Oracle Database (Oracle Database 12.1.0.2.0 for Linux x86-64) from the link here.
We need an NFS Server with various NFS shares. At least one for the Grid Infrastructure software and for Oracle Database which for example we will say “/oracle/nfs” (unless we install the software locally on both servers). An NFS share for the database files/oracle/oradata” and one for fast_recovery_area (FRA) “/oracle/fra". How to set up a Windows Server 2019 as an NFS Share and how to mount disks on Linux is described in detail in the article here.
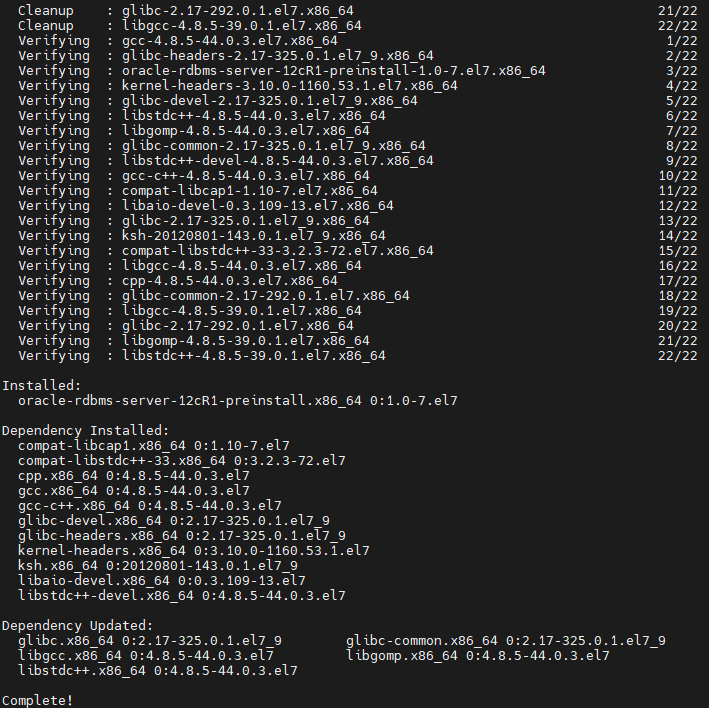
We should install the required libraries in our operating system. To do this we run the following on each Oracle Linux Server:
yum install oracle-rdbms-server-12cR1-preinstall -y
If we didn't already have a user on the operating system oracle we should set the password for it:
passwd oracle
At the operating system level we have defined the names oracledev1 and oracledev2 as hostname:
su root

vi /etc/hostname
oracledev1Respectively:
oracledev2Then disable the firewall on both machines:
systemctl stop firewalld
systemctl disable firewalld
We also change the entry for SELINUX to permissive in the following file:
vi /etc/selinux/config
SELINUX=permissiveFor the network we have two network adapters one with public ip and one with private ip.
In the oracledev1 we put public ip 172.25.94.41 and private 192.168.10.101:
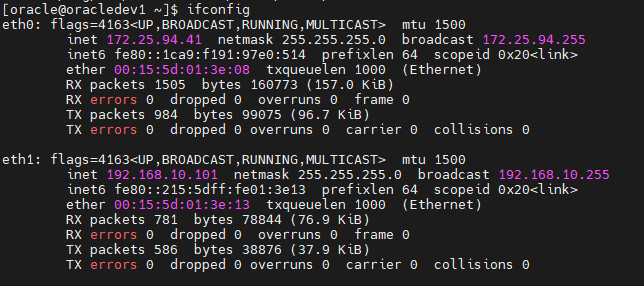
In the oracledev2 we put public ip 172.25.94.42 and private 192.168.10.102:
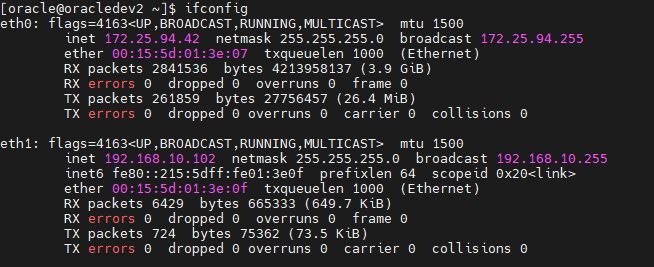
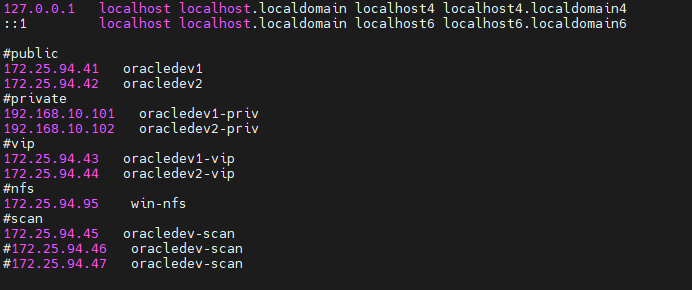
Then we add to each Linux in the file /etc/hosts the IP of the NFS Server (win-nfs), the public and private IPs. We also define a VIP (Virtual Internet Protocol) IP for everyone who belongs to the same subnet as the public IP:
vi /etc/hosts
#public
172.25.94.41   oracledev1
172.25.94.42   oracledev2
#private
192.168.10.101   oracledev1-priv
192.168.10.102   oracledev2-priv
#vip
172.25.94.43   oracledev1-vip
172.25.94.44   oracledev2-vip
#nfs
172.25.94.95    win-nfs
Then we should define 3 different IPs with one name in the DNS Server in the same subnet as the public IP SCAN (Single Client Access Name) to round-robin for the SCAN listener:
172.25.94.45   oracledev-scan
172.25.94.46   oracledev-scan
172.25.94.47   oracledev-scan
Since in the example I am not using a DNS Server, I will add the first of the 3 SCAN IPs and this one to /etc/hosts:
After we have created the NFS Shares on the NFS Server to mount them, we go to each Oracle Linux server and do the following actions.
We create the folders with the oracle user as owner and the following permissions:
su root
mkdir -p /oracle/nfs
mkdir -p /oracle/oradata
mkdir -p /oracle/fra
chown -R oracle:oinstall /oracle/nfs
chown -R oracle:oinstall /oracle/oradata
chown -R oracle:oinstall /oracle/fra
chmod -R 775 /oracle/nfs
chmod -R 775 /oracle/oradata
chmod -R 775 /oracle/fra
To be sure that the rights to the NFS Server will not be cut, we go to the exports file and add a record for each NFS Share as below:
vi /etc/exports
/oracle/nfs         *(rw,sync,no_wdelay,insecure_locks,no_root_squash)
/oracle/oradata         *(rw,sync,no_wdelay,insecure_locks,no_root_squash)
/oracle/fra         *(rw,sync,no_wdelay,insecure_locks,no_root_squash)
Then we restart the NFS service:
chkconfig nfs on
service nfs restart
We add to the archive /etc/fstab one entry for each NFS Share so that they mount themselves when each machine starts:
vi /etc/fstab
win-nfs:/nfs /oracle/nfs  nfs rw,bg,hard,nointr,tcp,vers=3,timeo=600,rsize=32768,wsize=32768,actimeo=0  0 0
win-nfs:/oradata /oracle/oradata  nfs rw,bg,hard,nointr,tcp,vers=3,timeo=600,rsize=32768,wsize=32768,actimeo=0  0 0
win-nfs:/fra /oracle/fra  nfs rw,bg,hard,nointr,tcp,vers=3,timeo=600,rsize=32768,wsize=32768,actimeo=0  0 0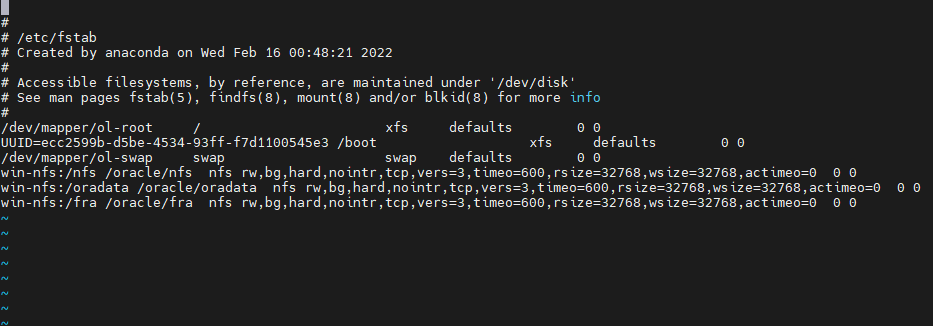
Now we are ready to mount them:
mount /oracle/nfs
mount /oracle/oradata
mount /oracle/fra

df
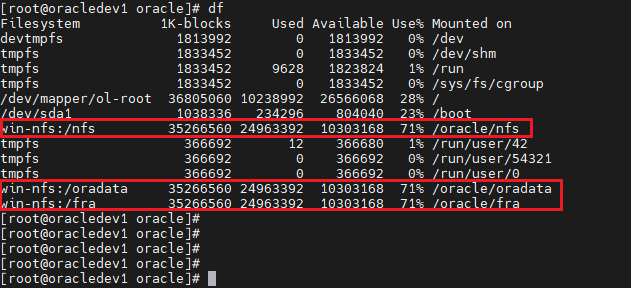
After the NFS Shares are mounted, create the following folder locally on all servers:
mkdir -p /oracle/oraInventory
chown -R oracle:oinstall /oracle/oraInventory
chmod -R 775 /oracle/oraInventory
And the following once from one of the two servers, as they are shared:
mkdir -p /oracle/nfs/app/grid
mkdir -p /oracle/nfs/app/oracle/product/12.1.0.2/dbhome_1
mkdir -p /oracle/nfs/crs_config

chown -R oracle:oinstall /oracle/nfs
chmod -R 775 /oracle/nfs
At this point we should fix it bash_profile with the parameters for each user's environment.
To oracledev1 we change it bash_profile to the oracle user:
su oracle
cd $HOME
vi .bash_profile
export ORACLE_BASE=/oracle/nfs/app/oracle
export DB_HOME=/oracle/nfs/app/oracle/product/12.1.0.2/dbhome_1
export GRID_HOME=/oracle/nfs/app/12.1.0/grid
export ORACLE_HOME=$DB_HOME
export ORACLE_SID=racdb1
export ORACLE_UNQNAME=racdevdb
export NLS_LANG=AMERICAN_AMERICA.AL32UTF8
export TNS_ADMIN=$ORACLE_HOME/network/admin
export BASE_PATH=/usr/sbin:$PATH
export PATH=$ORACLE_HOME/bin:$BASE_PATH,
export LD_LIBRARY_PATH=$ORACLE_HOME/lib:/lib:/usr/lib
export CLASSPATH=$ORACLE_HOME/jlib:$ORACLE_HOME/rdbms/jlib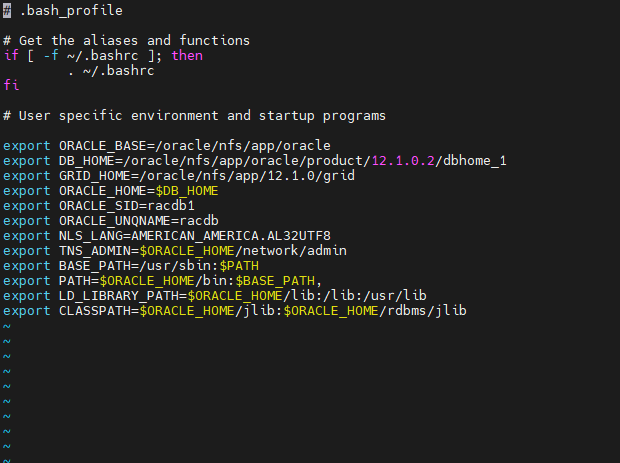
To oracledev1 we change it bash_profile to the root user:
su root
cd $HOME
vi .bash_profile
export ORACLE_BASE=/oracle/nfs/app/oracle
export DB_HOME=/oracle/nfs/app/oracle/product/12.1.0.2/dbhome_1
export GRID_HOME=/oracle/nfs/app/12.1.0/grid
export ORACLE_HOME=$GRID_HOME
export ORACLE_SID=racdb1
export ORACLE_UNQNAME=racdevdb
export NLS_LANG=AMERICAN_AMERICA.AL32UTF8
export TNS_ADMIN=$ORACLE_HOME/network/admin
export BASE_PATH=/usr/sbin:$PATH
export PATH=$ORACLE_HOME/bin:$BASE_PATH,
export LD_LIBRARY_PATH=$ORACLE_HOME/lib:/lib:/usr/lib
export CLASSPATH=$ORACLE_HOME/jlib:$ORACLE_HOME/rdbms/jlib
We repeat the same process for oracledev2 in both root user and oracle only changing the value to ORACLE_SID in racdb2:
export ORACLE_SID=racdb2In order to load the changes, we either have to login / logout, or we run the following command with the corresponding user we are each time:
source ~/.bash_profileThe installation
For Oracle Grid Infrastructure
To install Oracle Grid Infrastructure, connect to the oracle user (unless we want to create a user with the name grid and define it as an administrator) and go to the folder where we downloaded it and unzip the software:
su oracle
source ~/.bash_profile
cd /home/oracle/Downloads/grid

chmod -R 775 /home/oracle/Downloads/grid
Before running the setup we define as ORACLE_HOME the GRID_HOME which is the path we want the installation to be:
export ORACLE_HOME=$GRID_HOME
Then we run the setup:
./runInstaller
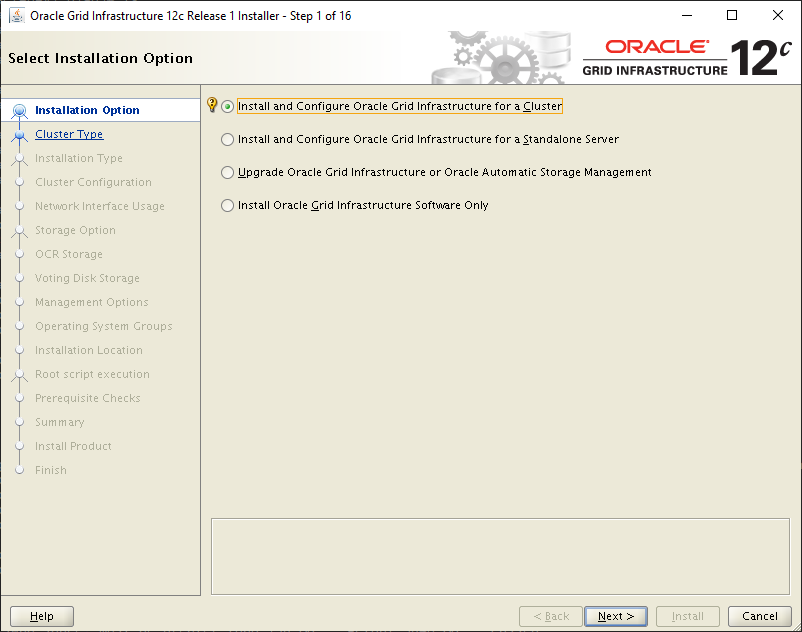
On the first screen we choose Install and Configure Oracle Grid Infrastructure for a Cluster:
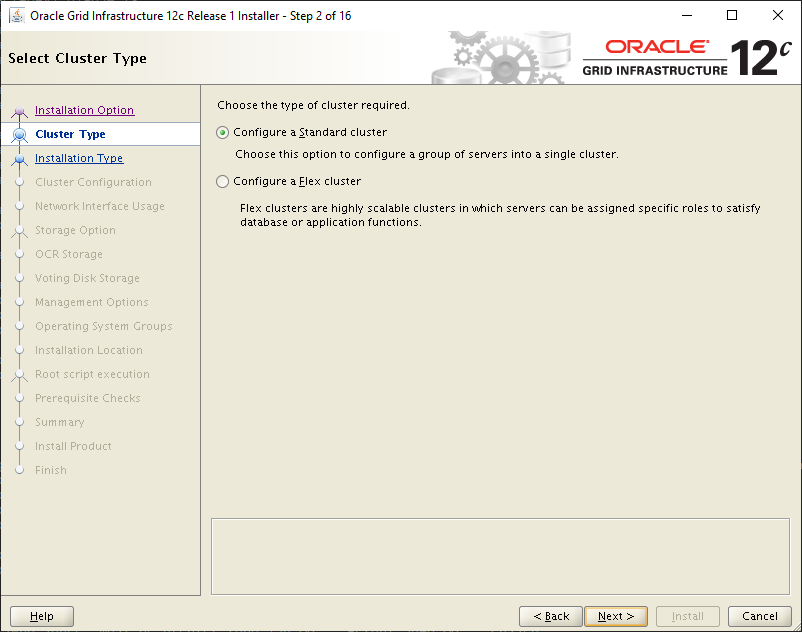
Then as cluster type, Configure a Standard clusters:
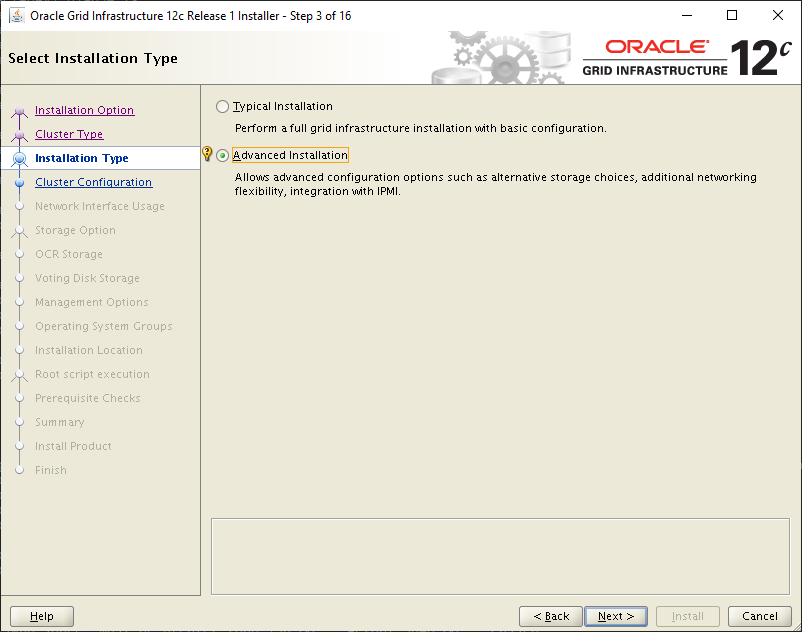
In the next tab we select Advanced Installation:
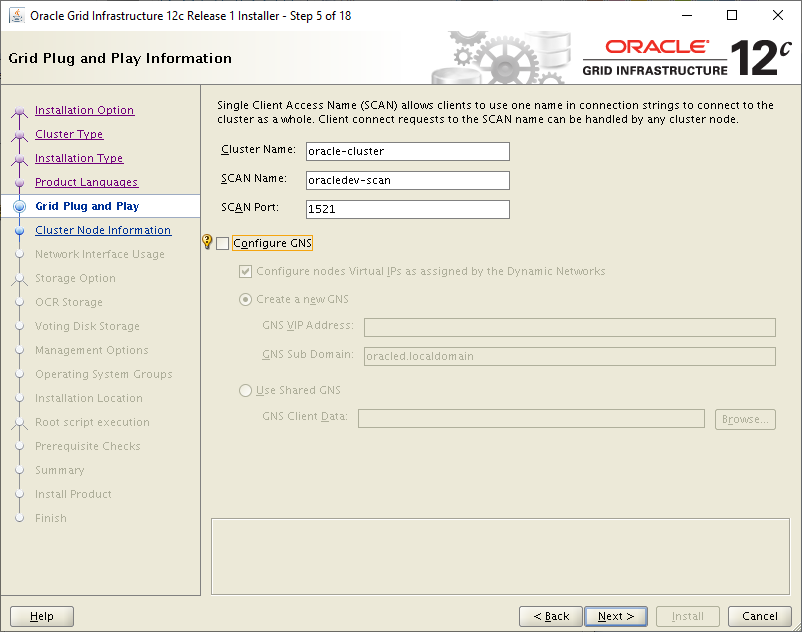
Next we define a name for the cluster, as SCAN Name the name we had defined at the beginning as SCAN and the door the listener will use. Finally we make the choice Configure GNS:
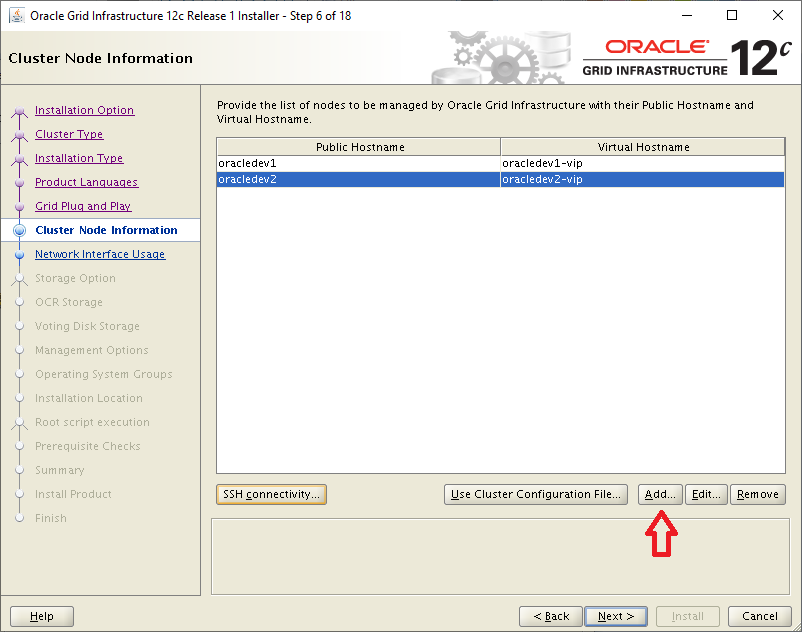
On the next screen we choose Add… and we add the servers with the public name and the VIP name we defined in /etc/hosts:
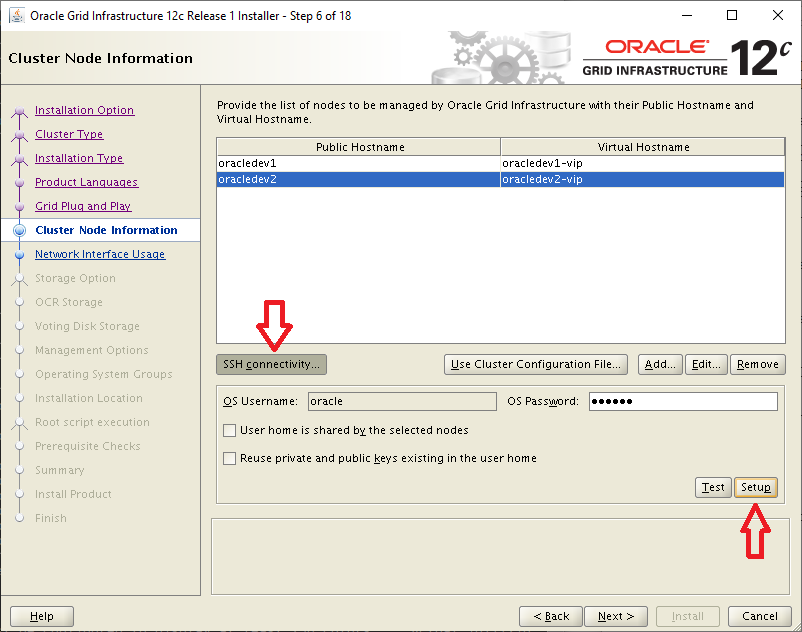
On the same screen we choose SSH connectivity, put the oracle user code and select Setup:
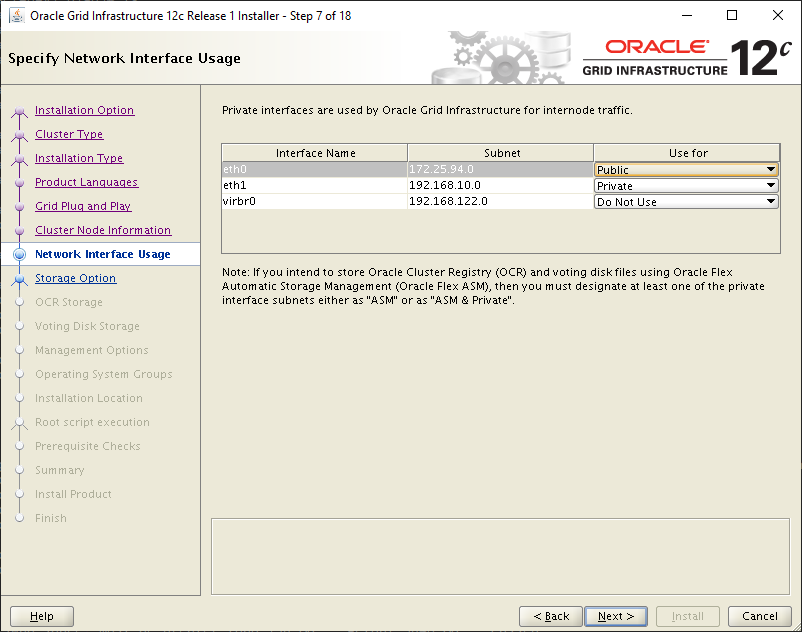
In the next tab we define which subnet will be public and which will be private as we defined it in /etc/hosts:
In the tab Storage Option, we choose Use Share File System as we don't want to use ASM:
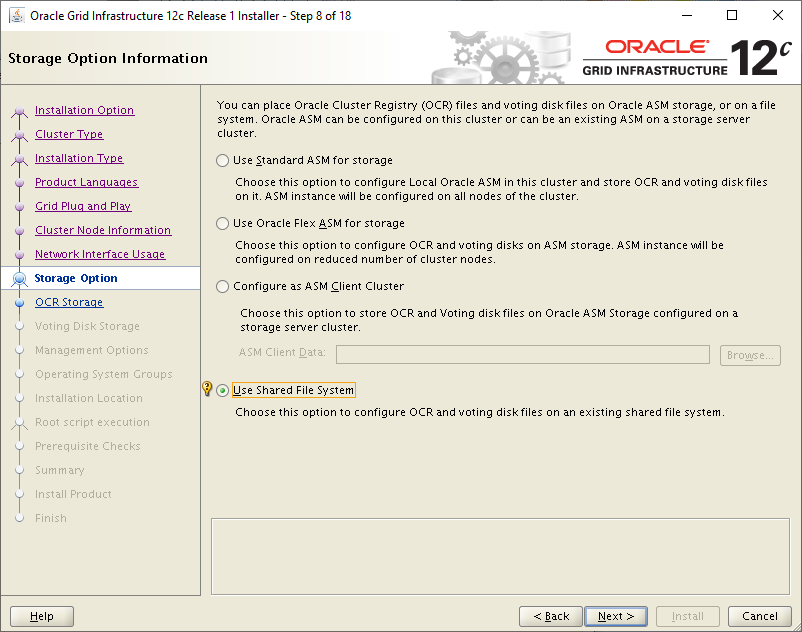
On the next screen for the OCR Storage we choose External Redundancy and set the NFS Share path for the file:
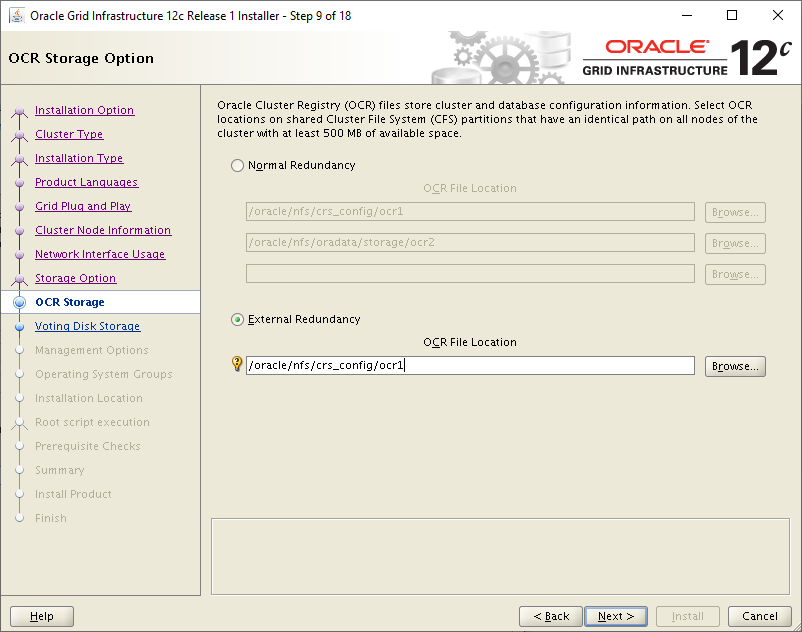
On the next screen we do the same again, we choose External Redundancy and set the NFS Share path for the file:
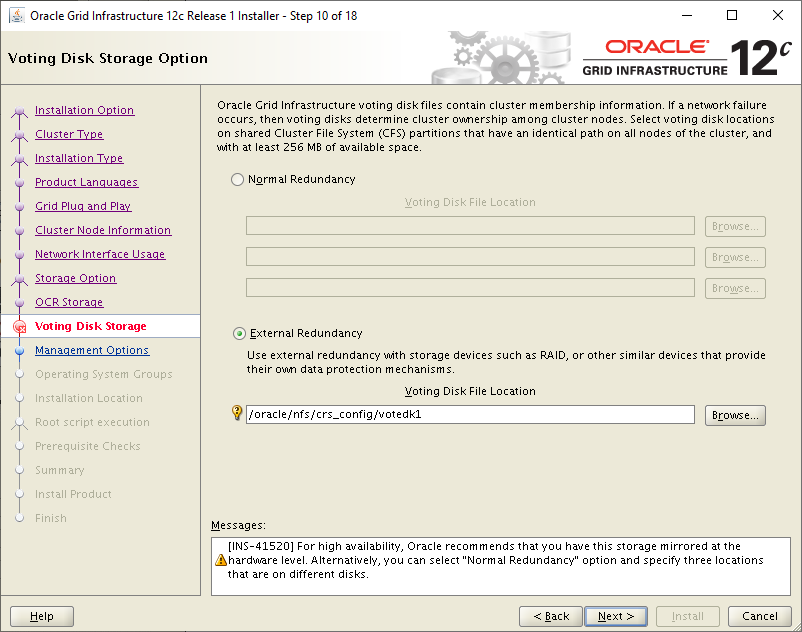
Then we define the ORACLE_BASE and GRID_HOME as we added them to bash_profile, in this case we chose to be Shared NFS for both servers:
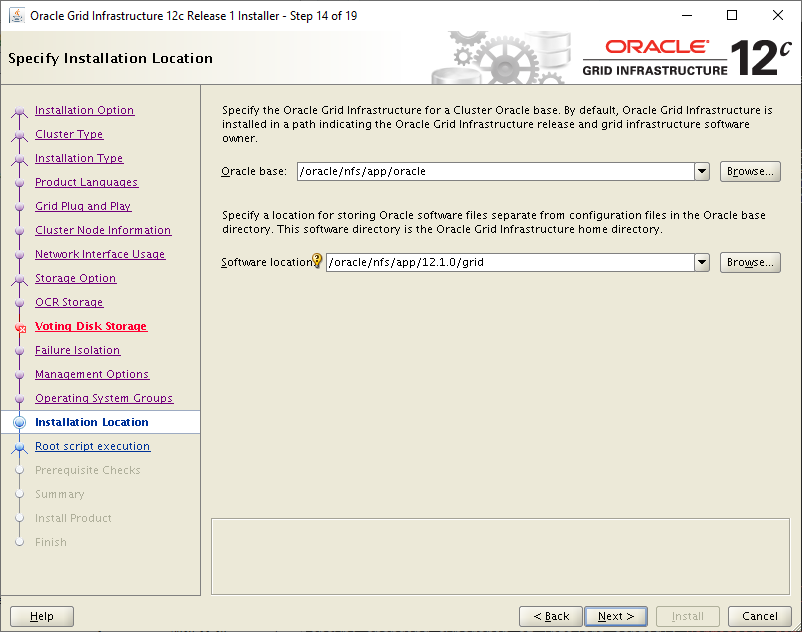
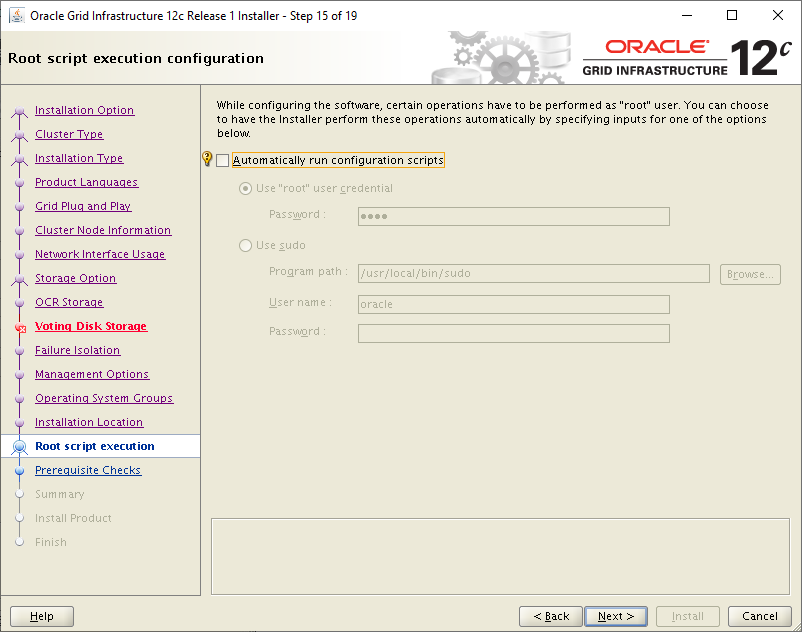
We don't choose to run the root script automatically:
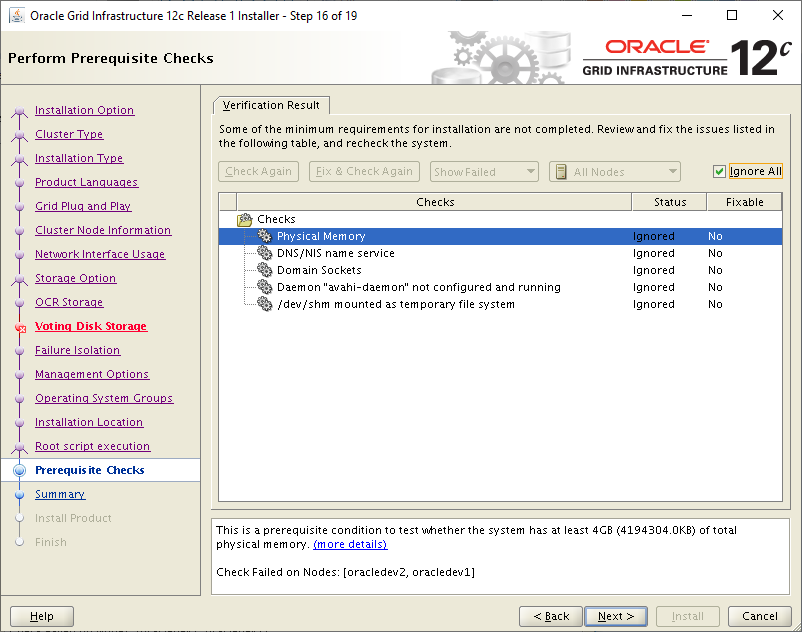
Before the installation starts it will check what needs fixing by selecting Fix & Check Again Will try to fix some if possible. In our case it didn't show anything serious other than Warnings so we choose Ignore All and Next:
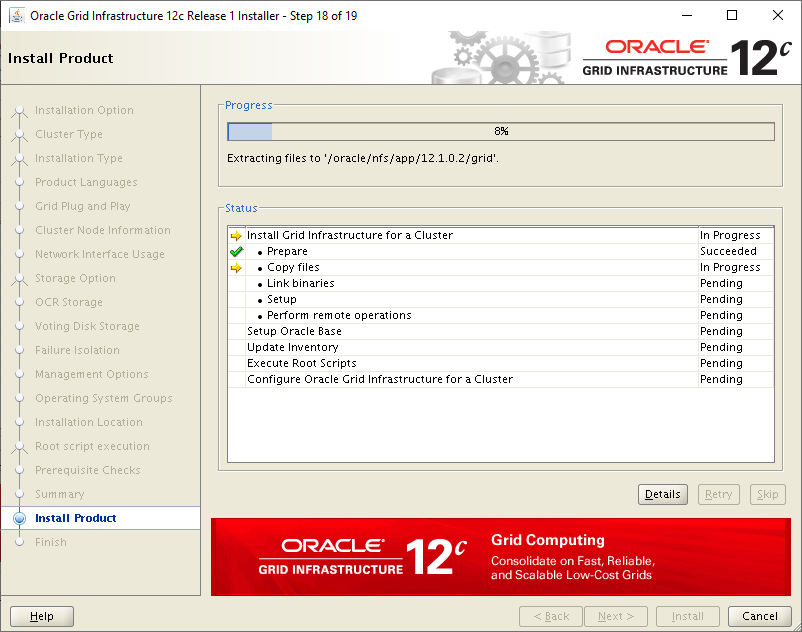
Then the installation starts:
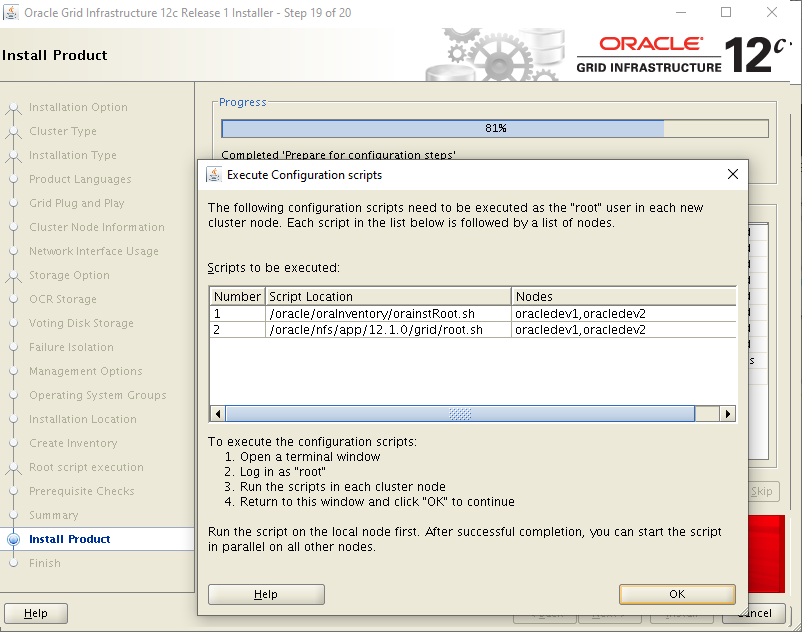
Just before the installation is complete, it asks us to connect as root to each server and run the following scripts, starting first from the server where we started the installation:
Running the root.sh script on oracledev1, if everything goes well we will see the following messages:
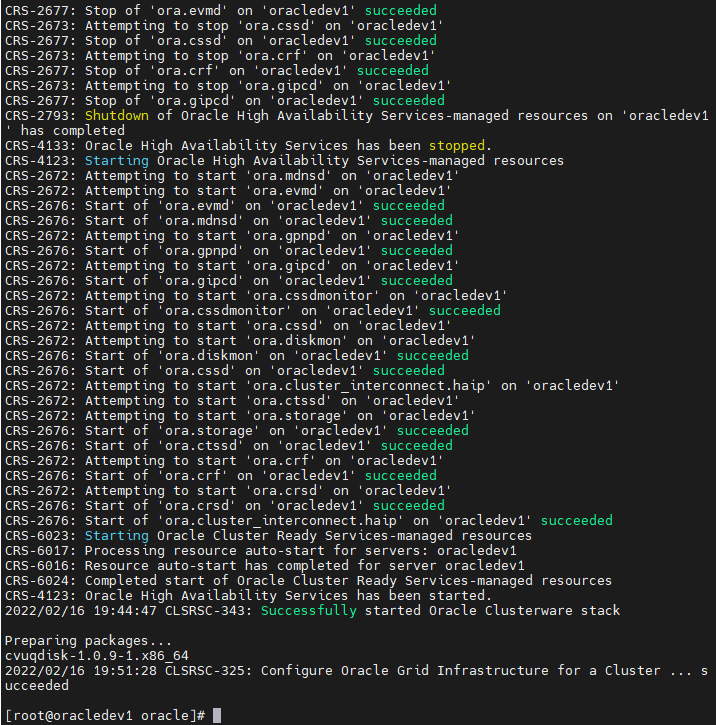
Oracle Grid installation is finally complete:
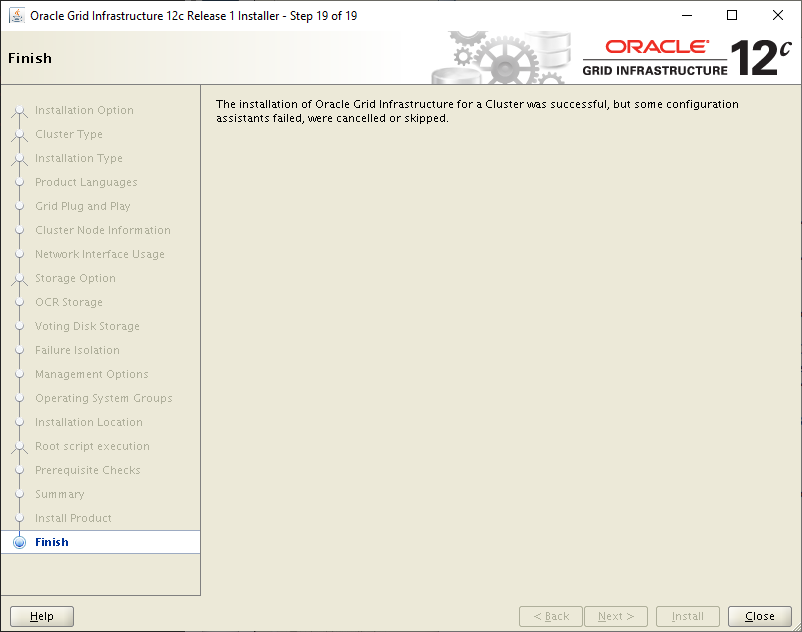
For Oracle Database software
After the installation of the Grid is completed, we are going to proceed with the installation of the Oracle Database Software. Go to the folder where we downloaded it and unzip the software:
cd /home/oracle/Downloads/database

chmod -R 775 /home/oracle/Downloads/database
And we run the setup:
./runInstaller
As soon as the setup opens on the first tab, select the option for security updates:
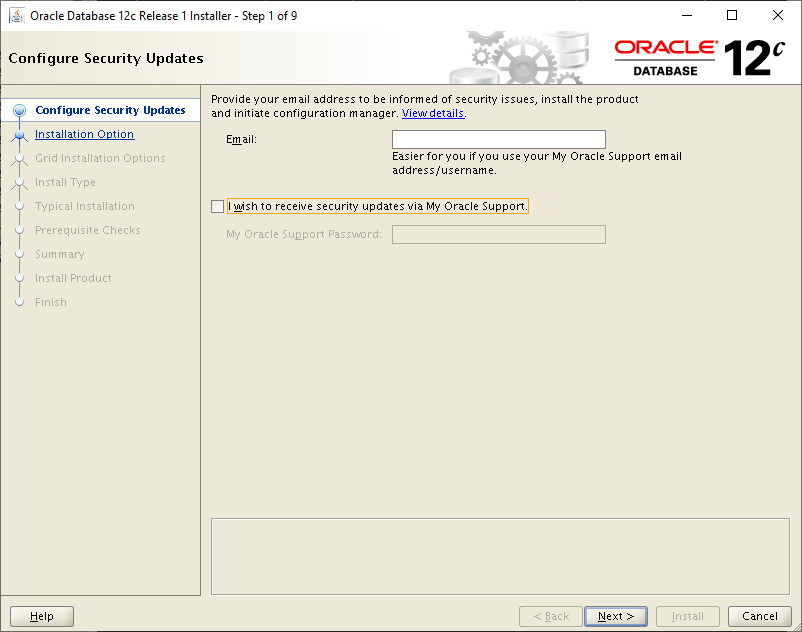
We choose to only install the software (we will create the database later):
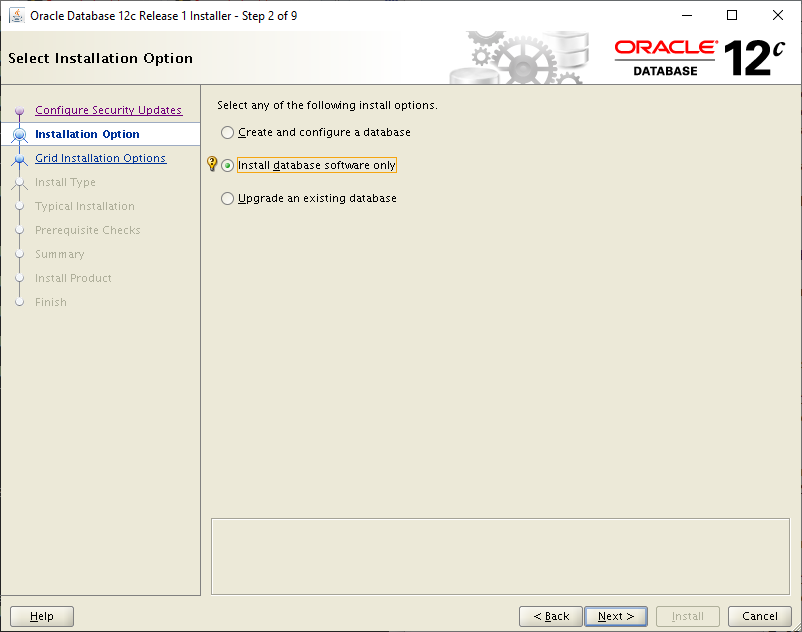
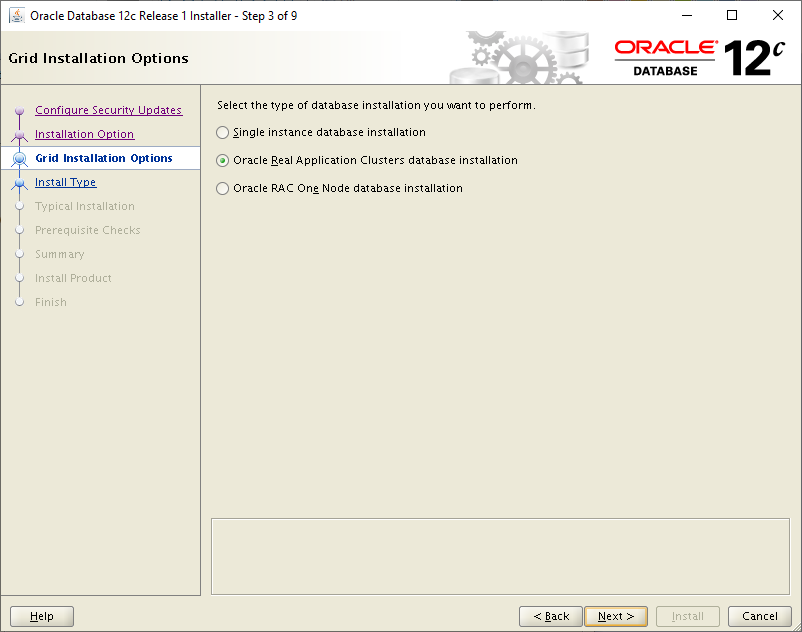
On the next screen we choose Oracle Real Application Clusters database installation:
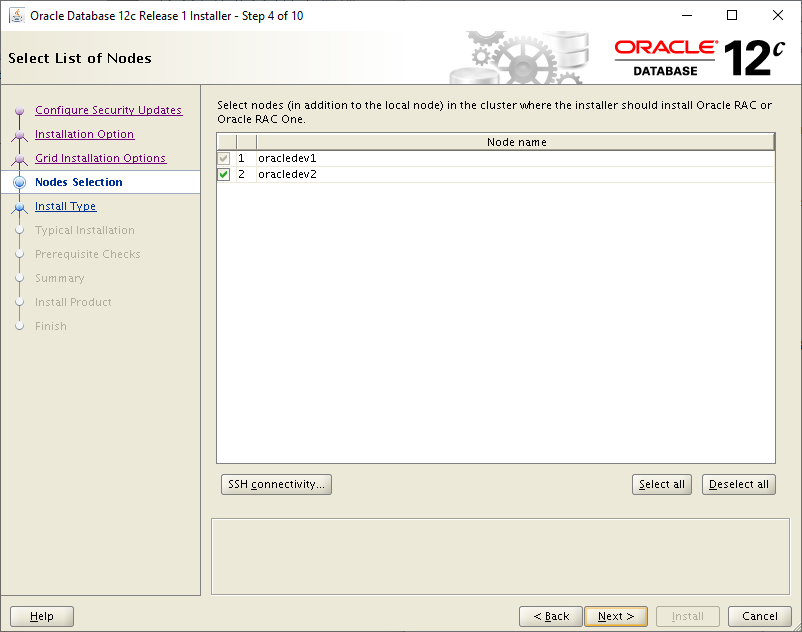
We select all the servers we want to participate in the cluster:
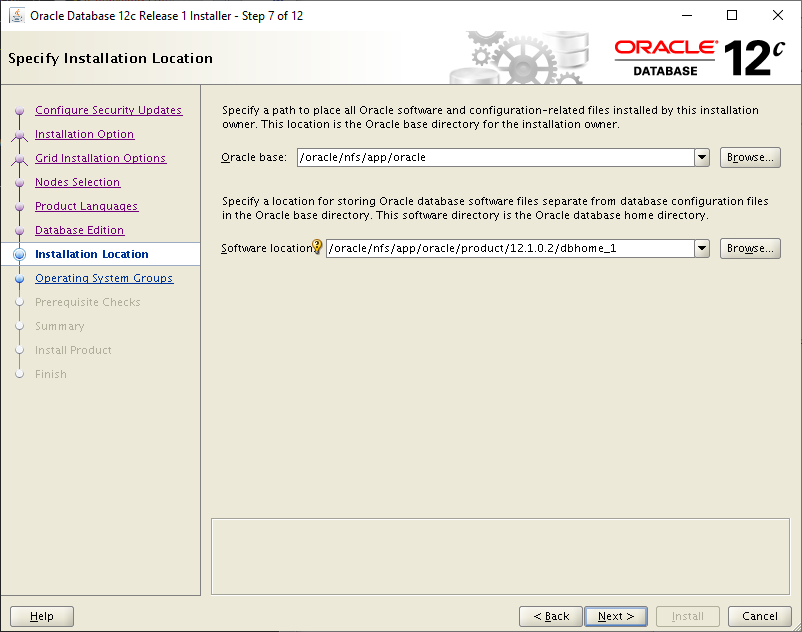
Then we define the ORACLE_BASE and DB_HOME as we added them to .bash_profile, in this case we chose to be Shared NFS for both servers:
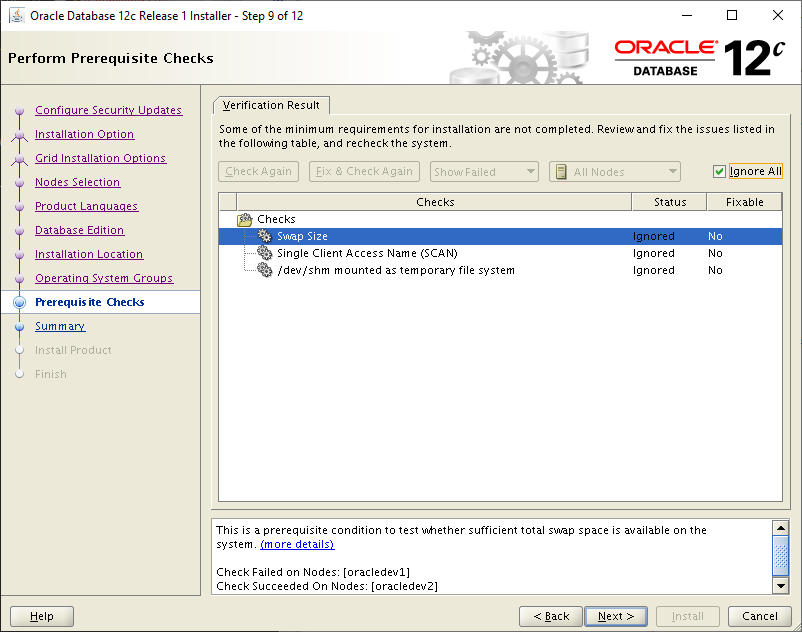
Before the installation starts it will check what needs fixing by selecting Fix & Check Again Will try to fix some if possible. The SCAN message it shows is normal as we didn't use DNS Server with 3 IP round-robin but put only one in /etc/hosts so we choose Ignore All and Next:
Then the installation starts:
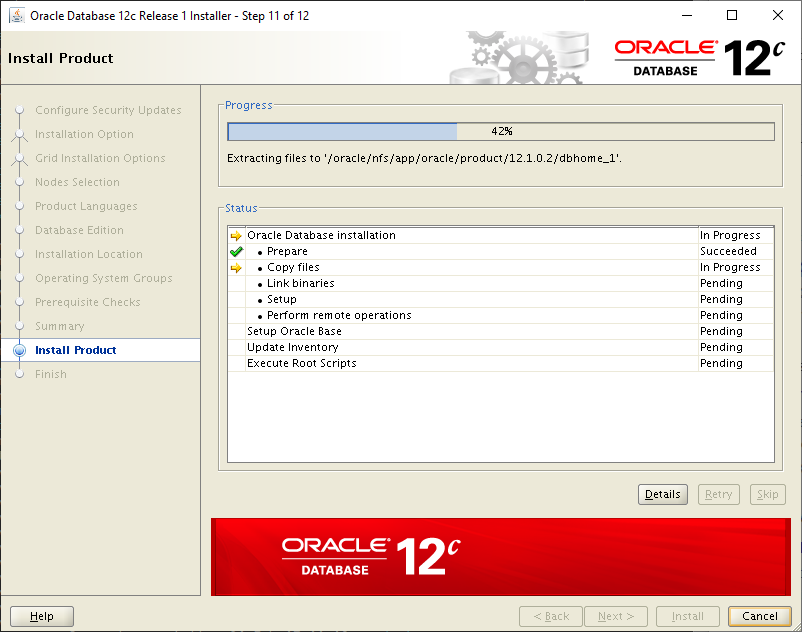
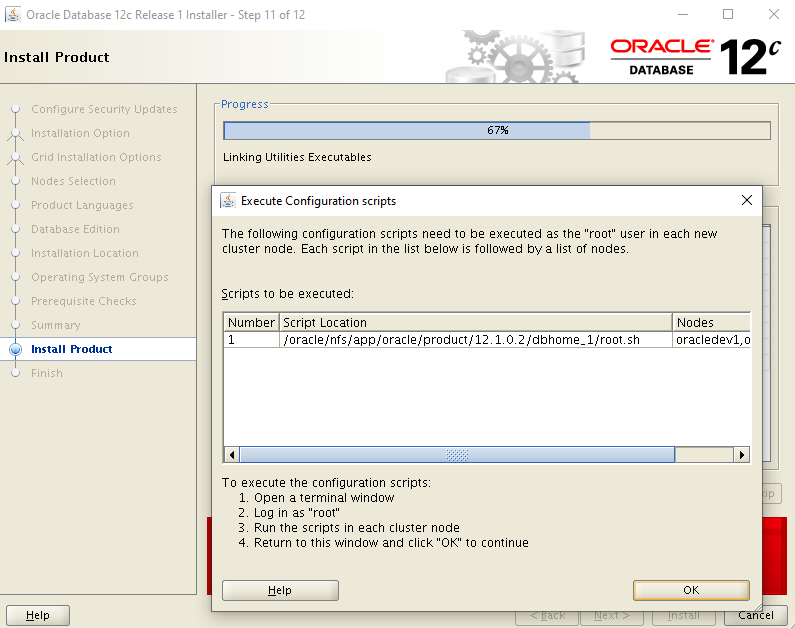
Just before the installation is complete, it asks us to connect as root to each server and run the following scripts, starting first from the server where we started the installation:
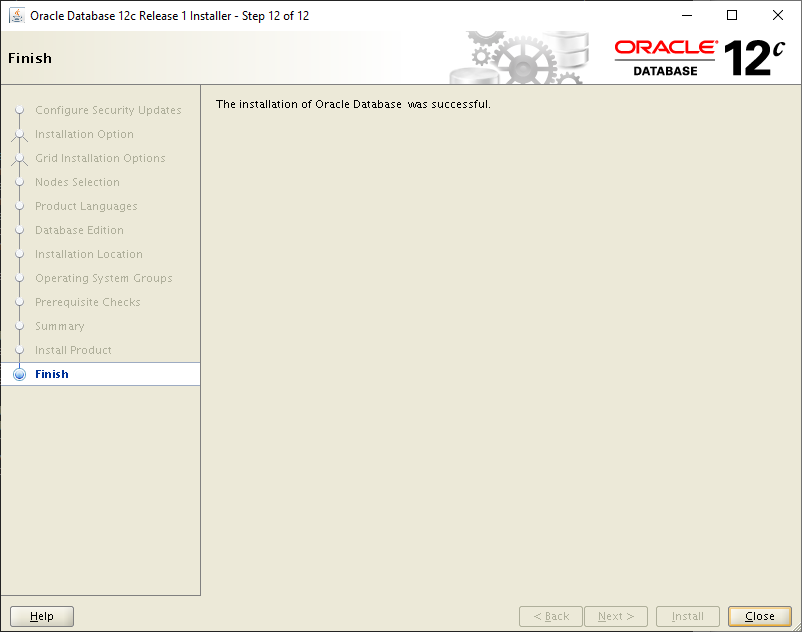
The installation of the Oracle Database software is finally complete:
To install Direct NFS
From Oracle Database version 12c onwards Direct NFS is enabled by default by itself! It gets the information about NFS Shares from /etc/fstab (mtab).
To see that it has been activated when we create the database we run the following select, to see if it will bring records:
select * from v$dnfs_servers;
Another way to see if it has been activated is to look at it alert log of Oracle Database when it starts if it displays this message:
tail -1000 $ORACLE_BASE/diag/rdbms/racdb/racdb1/trace/alert*
Oracle instance running with ODM: Oracle Direct NFS ODM Library Version 3.0More about Direct NFS is in the article here.
Create the database
To build the database, we start the setup with the following:
su oracle
cd $HOME
source ~/.bash_profile

dbca
We choose Create Database:
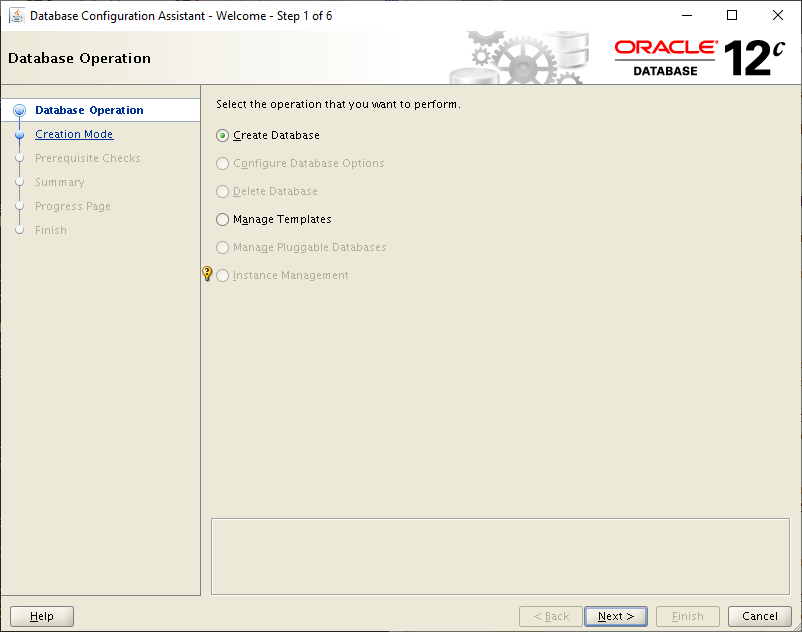
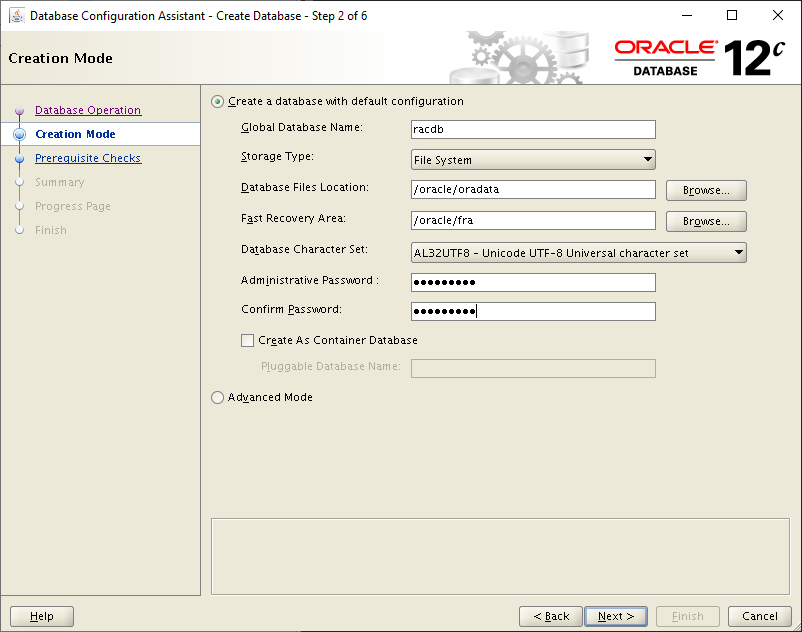
For example we do not go to Advanced Mode but set the name of the database as Storage Type: File System, the NFS Shares oradata / fra, encoding the database to AL32UTF8 (for example), the code and remove the option Create As Container Database:
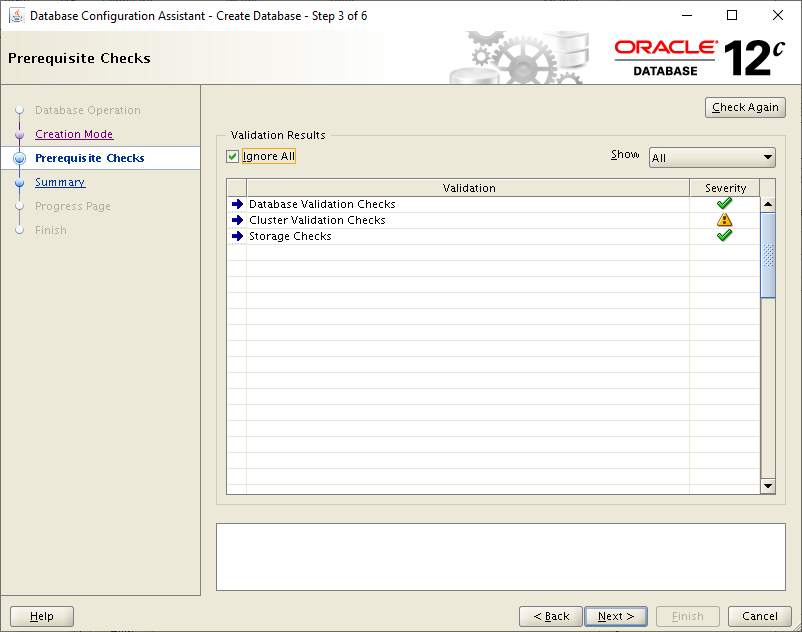
Then it will show us what problems the installer has found, the problems in Cluster Validation concern the SCAN name that we have not passed to DNS Server with 3 IP round-robin. So we touch it by choosing Ignore All and Next:
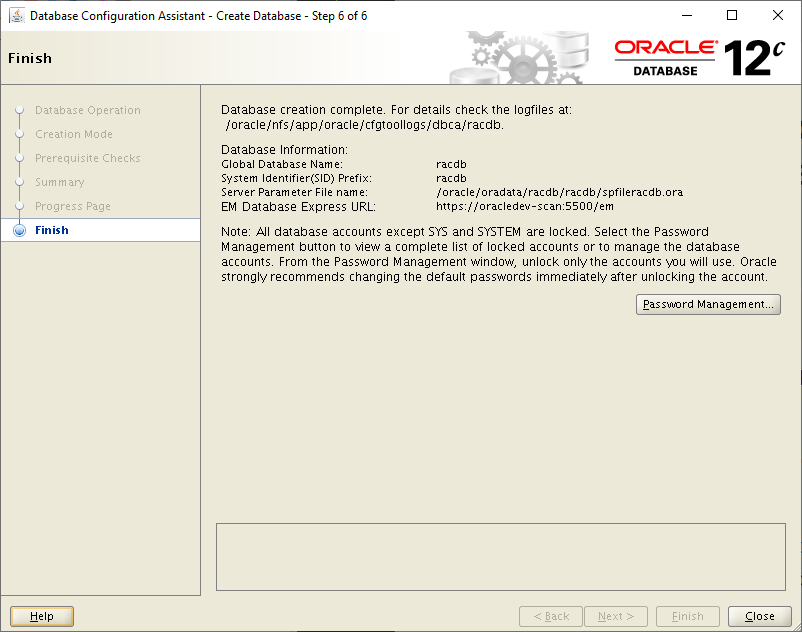
After some time, if everything goes well, the creation of the Oracle Database will be completed:
Useful Commands
For Clusterware (crsctl)
To see the status of the Cluster with all Resources, run the following command with the root user:
su root
cd $HOME
source ~/.bash_profile

crsctl status resource -t
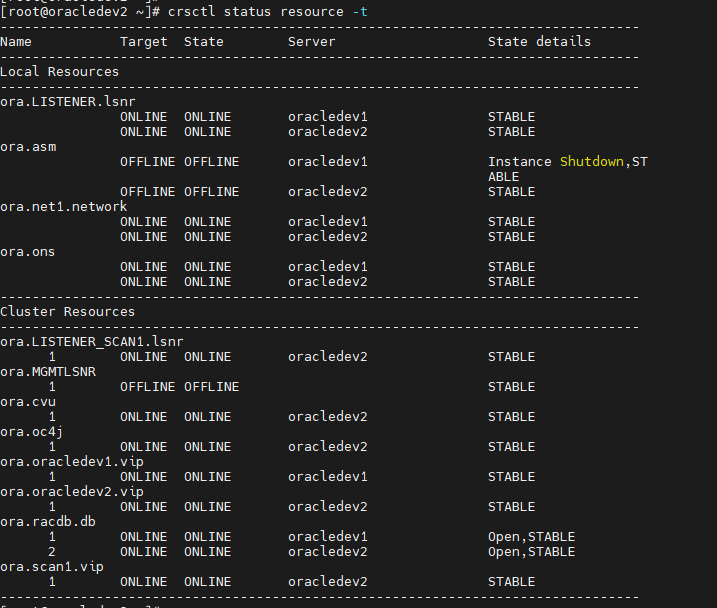
We see that the database status is Open in both instances.
To stop the cluster resources we run on each server with the root user:
crsctl stop crs
Accordingly, to start them:
crsctl start crs
For Oracle Database (srvctl)
To see the database configuration, run the following with the oracle user:
su oracle
cd $HOME
source ~/.bash_profile

srvctl config database -d racdb
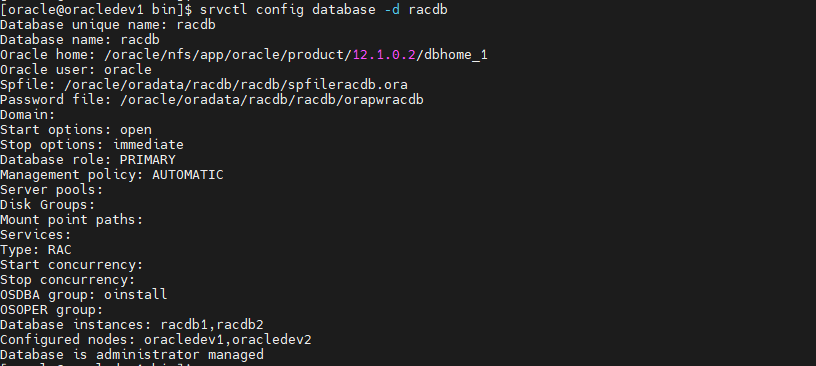
If we want to stop the database and from the 2 instances we run with the oracle user:
srvctl stop database -d racdb
While to start it:
srvctl start database -d racdb
To connect to Oracle Database
To connect to the database, go to the client's tnsnames.ora and simply add the SCAN name:
RACDB =
  (DESCRIPTION =
  (LOAD_BALANCE = ON)
    (CONNECT_TIMEOUT=5) (TRANSPORT_CONNECT_TIMEOUT=3) (RETRY_COUNT=3)
    (ADDRESS_LIST =
      (ADDRESS = (PROTOCOL = TCP)(HOST = oracledev-scan)(PORT = 1521))
    )
    (CONNECT_DATA =
      (SERVICE_NAME = racdb)
    )
  )
After doing this we can connect to sqlplus with tnsname:
sqlplus "sys/Password@racdb as sysdba"
or without using tnsname, with EZconnect:
sqlplus "sys/Password@oracledev-scan:1521/racdb as sysdba"
To see the status of the instances with SQL
With the following query we can see the status of the instances:
 select host_name,instance_name,status,sys_context('USERENV', 'CURRENT_USER') "User",sys_context('USERENV', 'INSTANCE_NAME') "Connected to",startup_time,version,sysdate
 from gv$instance;

For Direct NFS
To see if NFS Shares are being used with the increased performance of Direct NFS, the following query must return results:
select * from v$dnfs_servers;

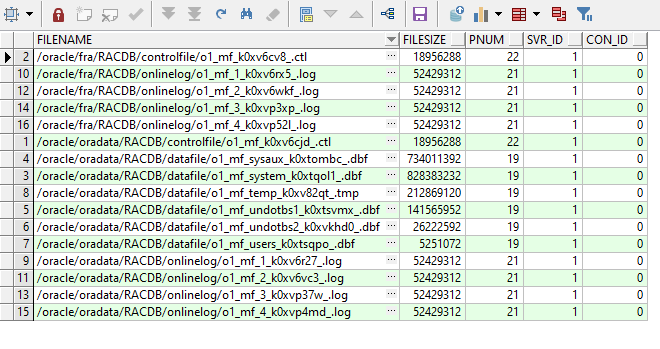
We can also see the files that use Direct NFS with the following query:
select * from v$dnfs_files;
