

How to install SQL Server on Linux
Certifications:
In this article we will see how easy it is to install SQL Server 2019 on a machine with a Linux operating system and more specifically on a Red Hat distribution. We will also see how we connect and how we can pass settings to the instance.
Prerequisites
For Red Hat based systems we want above version 7.3 with at least 2GB of RAM. The system must have access to the Internet.
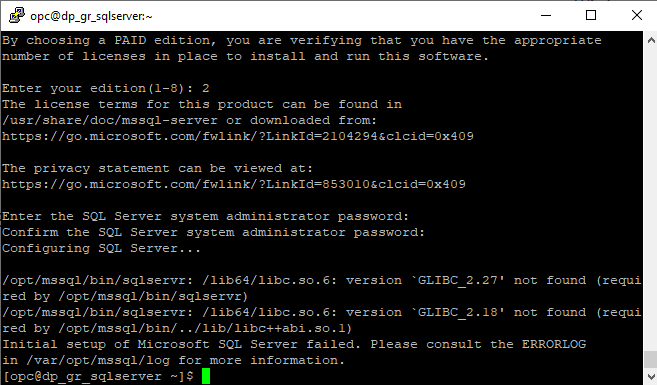
In case we do not have enough memory during the installation we will see this message:
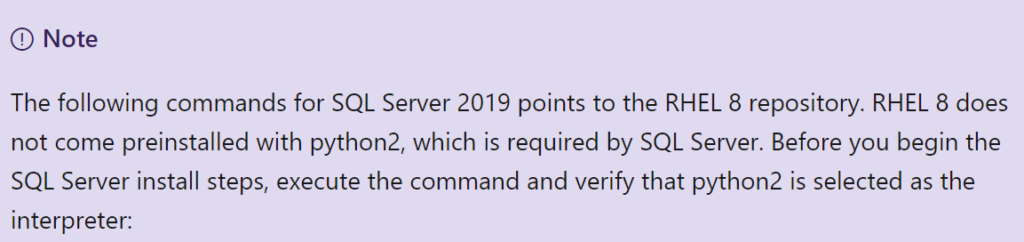
"sqlservr: This program requires a machine with at least 2000 megabytes of memory."Also in case we are using the RHEL 8 version we should install Python2 and OpenSSL as they are required for the installation and this version does not have them pre-installed.
In case this is to blame we will see this message during the installation.
To install Python2 and OpenSSL
sudo yum install python2
sudo yum install compat-openssl10

# Configure python2 as the default interpreter using this command:
sudo alternatives --config python.
The installation
First we need to download it repository which contains him SQL Server 2019.
sudo curl -o /etc/yum.repos.d/mssql-server.repo https://packages.microsoft.com/config/rhel/8/mssql-server-2019.repo
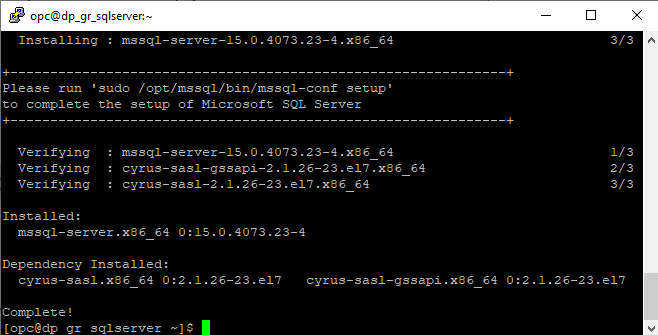
With an update and install, installation of the binaries will begin.
sudo yum update

sudo yum install -y mssql-server
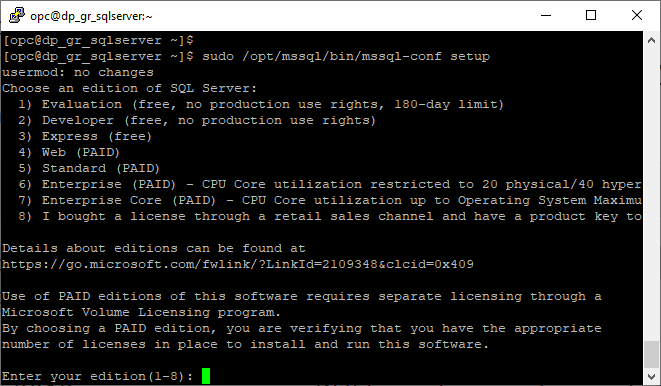
When the installation is complete with the tool mssql-conf setup we will define the version and the code that the instance will have.
sudo /opt/mssql/bin/mssql-conf setup
To see that the instance service is running:
systemctl status mssql-server
We don't forget to open the SQL Server door to firewall so we can connect from another machine.
sudo firewall-cmd --zone=public --add-port=1433/tcp --permanent
sudo firewall-cmd --reload
Installing the SQL Server command-line tools
After completing the installation, we may want to connect to the instance from the same machine, so it would be good to install the tools that allow us to connect and do some other tasks.
Again we follow the same process of downloading the repository and installing it.
sudo curl -o /etc/yum.repos.d/msprod.repo https://packages.microsoft.com/config/rhel/8/prod.repo

sudo yum install -y mssql-tools unixODBC-devel
How we connect
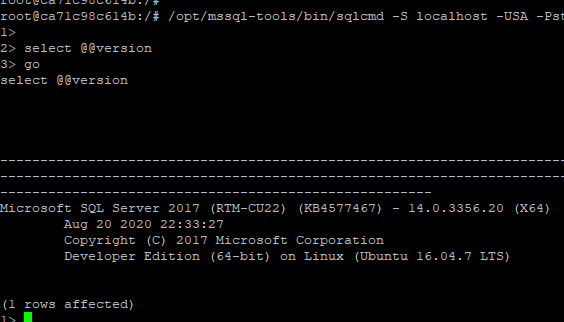
To connect locally with the well-known sqlcmd tool, with the -S parameter we define the server and with -U -P the username and password respectively.
/opt/mssql-tools/bin/sqlcmd -S localhost -USA -Pkwdikos -e
After connecting, write the query we want and then write GO so that its execution can proceed.
How we configure SQL Server on Linux
But we also need to know some daily changes that are made respectively in this operating system.
To start / stop the instance
With the following commands we stop and start the service of the instance
sudo systemctl stop mssql-server
sudo systemctl start mssql-server
To start the base with a different option
Sometimes, usually due to a fault, it will be necessary to start the instance with some parameter, e.g. to be in single-user mode. We do this with the command:
sudo /opt/mssql/bin/sqlservr -m
To activate one traceflags
sudo /opt/mssql/bin/mssql-conf traceflag 7412 on
To enable SQL Server Agent
The SQL Server Agent is disabled by default, so to activate it we run the command:
sudo /opt/mssql/bin/mssql-conf set sqlagent.ena bled on
To change it collation
To change the collation on the instance to another of the compatible we run the command.
*Caution the collation change in the instance is performed with a specific process to be successful.
sudo /opt/mssql/bin/mssql-conf set-collation